Creating Records
In TIGA, users can create records based on their role-specific permission.
Important
Fill in the fields using accurate information to avoid workflow issues in TIGA, as other tables may be affected by the automatic processes triggered by data in table records.
To create a record:
Open the desired table in TIGA.
In the main table, do one of the following options:
Fill in all required fields—and any other applicable optional fields— in the Create window.
Click Create in the lower-right corner of the window.
Post Condition:
TIGA will validate the entry and create a new record. After a record is created, you can add any related data to its Related Tables as needed.
Cloning Records
You can duplicate records using the cloning function: right-click on the record and select Clone. You can only clone one record at a time. Follow the same workflow as in Create Record. A cloned record contains all the same data as the original.
For the most part, cloning is a shallow clone. None of the related data will be populated unless for some specific cases, such as in Quotes where all the related data is copied over for a complete clone of the quote.
Adding New Data on the Fly
When creating a new record in TIGA, you are often required to link related records in order to complete your record creation. In certain tables, you can now easily create the necessary related data without canceling the creation of the initial record.
Some fields in the new record window might include a blue ellipsis that enables you to select a related record when you click on it. If that data does not yet exist, you can create it from that window and automatically link it to the other record you’re creating.
In the tutorial below, we use the Accounts table as our example. In general, the tutorial below also applies to other tables in TIGA.
To add new data on the fly:
Open the Accounts table in TIGA.
In the main table, click the plus button to create a new record.
Fill in all of the required fields in the corresponding window. In this example, we’re adding new data to the Institute field.
Click the blue ellipsis button next to the Institute field.

The Blue Ellipsis Button
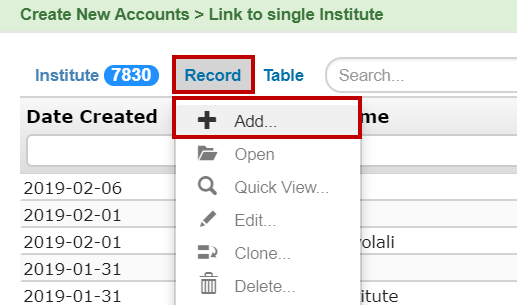
Go to the Record menu, and then click Add.

The Add Button
Type the institute name in the corresponding field.
Click Create in the lower-right corner of the window. Congratulations! You’ve successfully added the new data in the Institute table.
Click OK in the lower-right corner of the window and the new institute will be linked to the account you’re working on. Now you can finish creating your new account in TIGA.
Post Condition:
TIGA will add the newly created data to its corresponding table.
