Layers Overview
In ROCK MAKER, a layer defines the conditions of an experiment’s wells or drops. Creating layers involves the Add Layer button to select the type of layer and the Layers Design panel to define your layer conditions.
Add Layer Button
The Add Layer button is accessible from the top bar within the Design view of any opened experiments. Clicking the Add Layer button allows you to select a layer type from a dropdown menu:
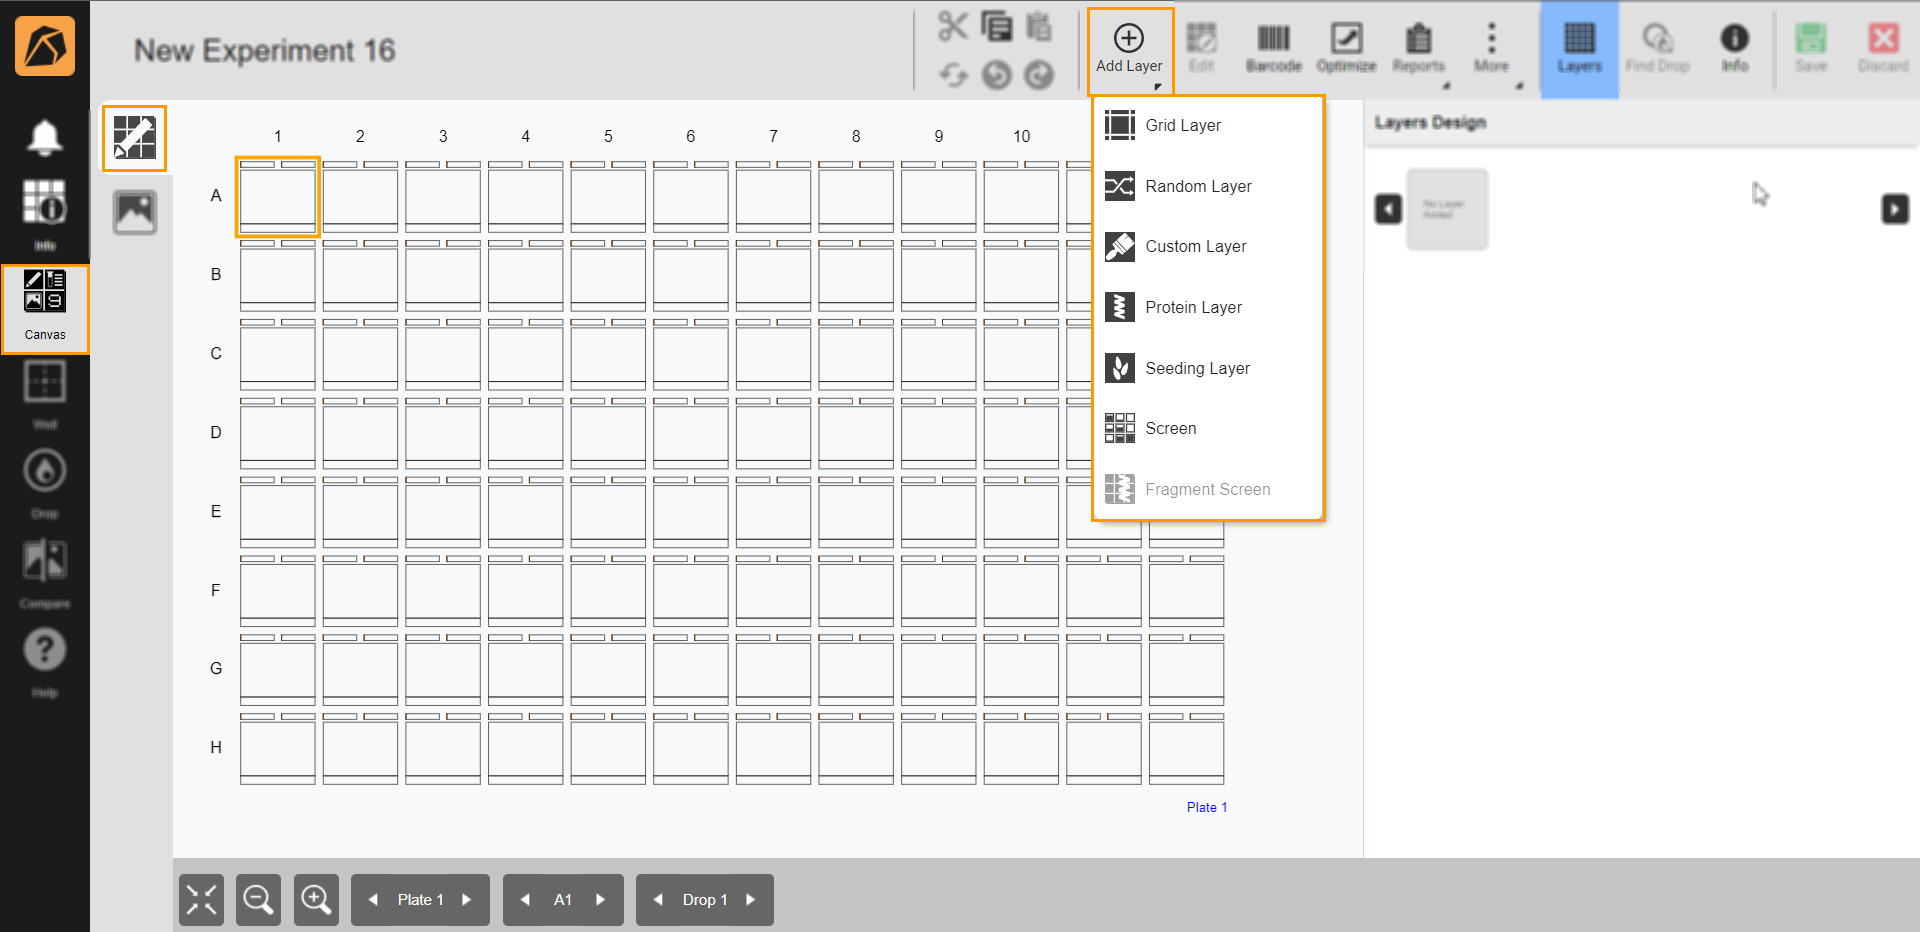
Add Layer Button
You can have different layers covering different plate areas. For example, you can have half of a plate containing a set of ingredients and another half containing different ingredient(s). To choose an area on a plate, right-click your mouse while dragging it over any selected wells.
The Layers Design Panel
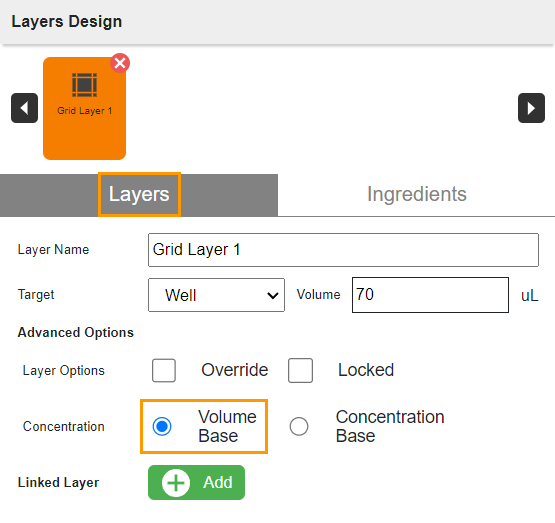
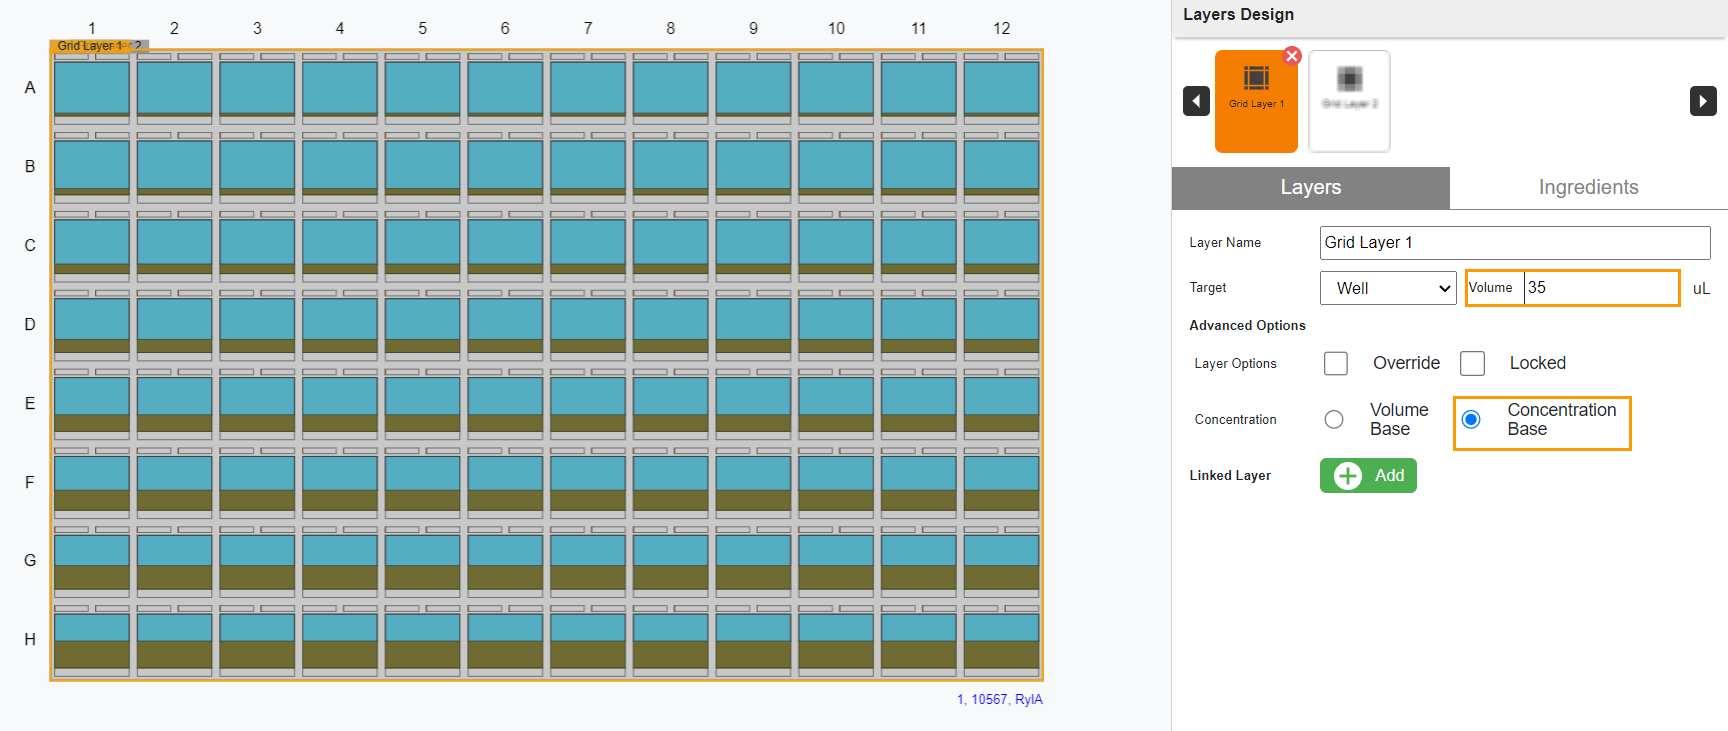
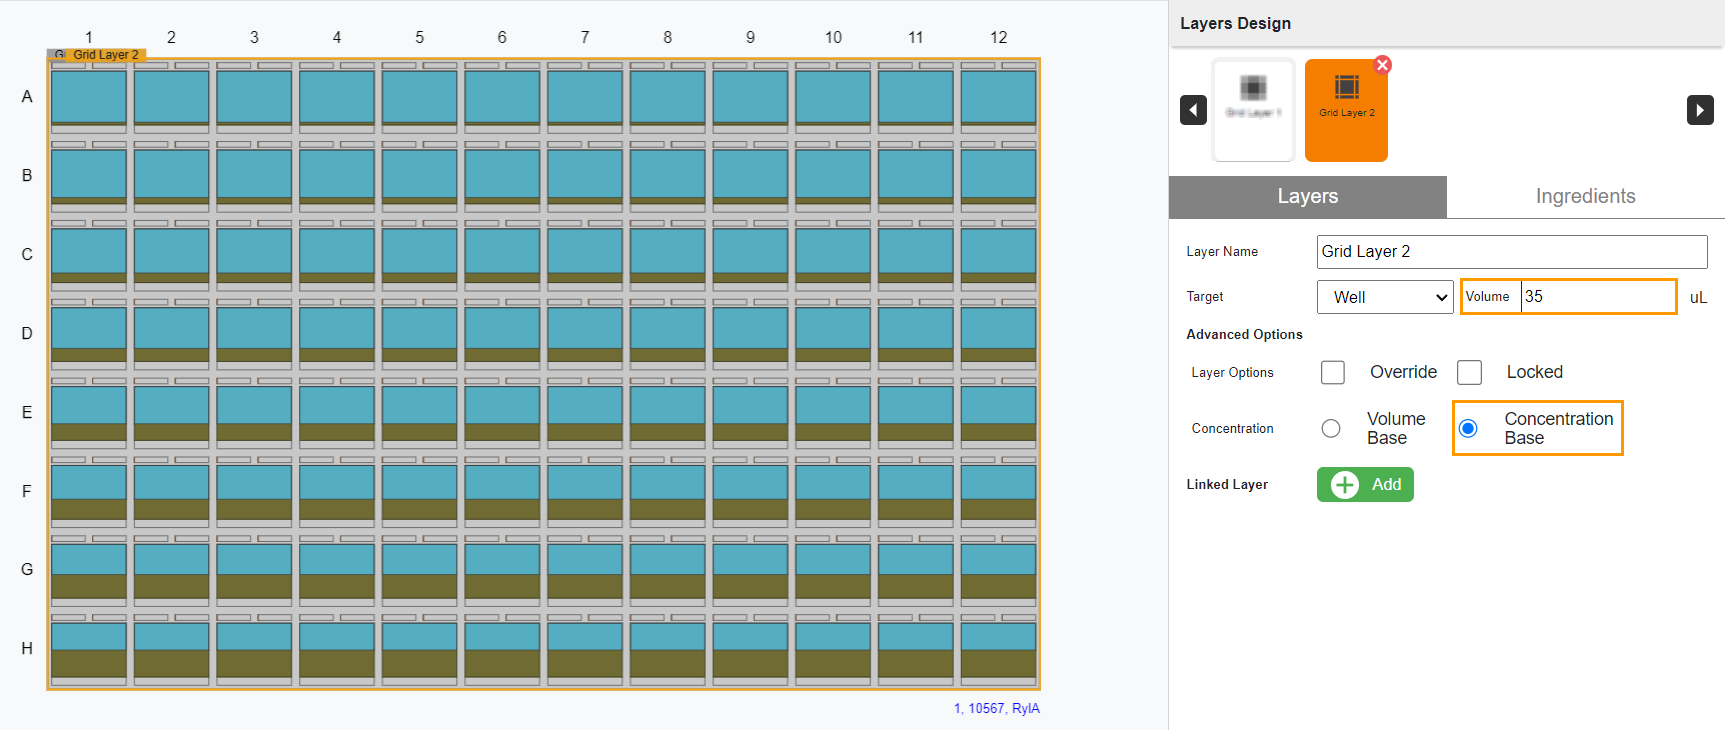
Layers Design panel defines the conditions of an added layer. Each layer targets either drops or wells. Protein layers apply only to drops, while other layers can target both wells and drops.
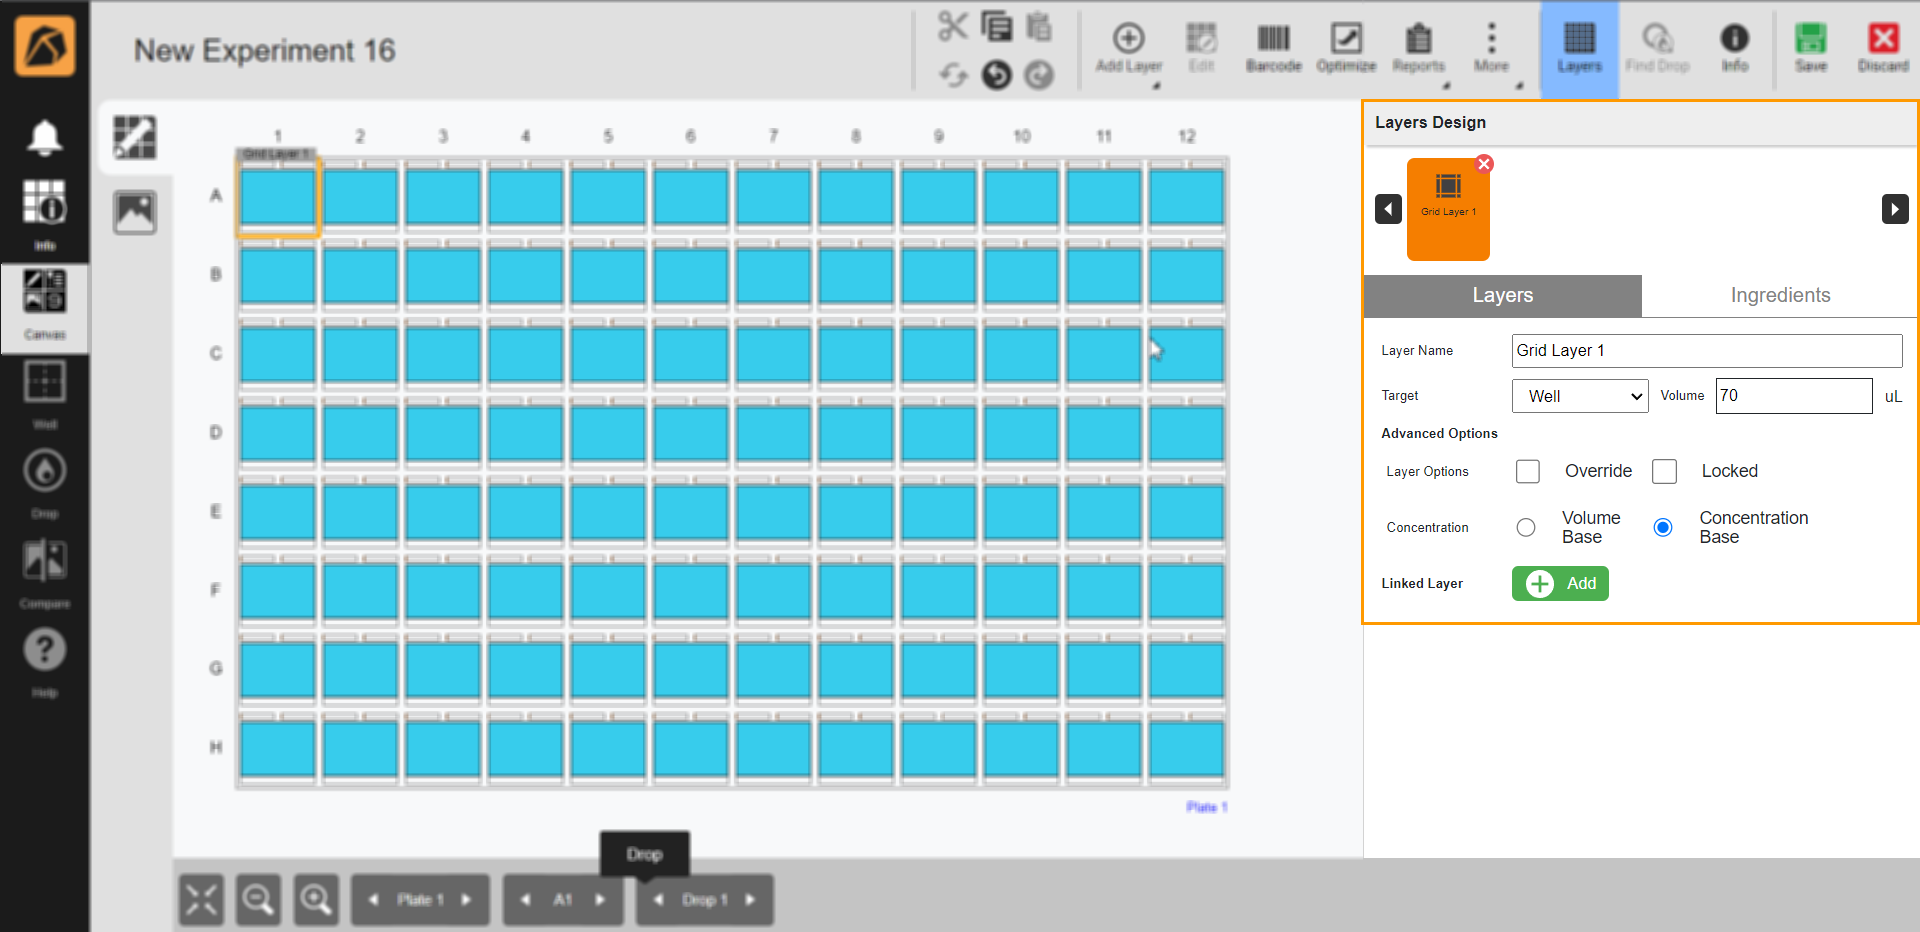
Layers Design Panel Example
Note
The fields in the Layer Options tab of the Layers Design panel are different from one layer to another. The example above is the Layer Options tab for a grid layer.
Item |
Description |
|---|---|
Layer Selection. |
Displays all created layers. Use the right and left arrows to navigate. |
Layers Tab |
Displays information about a layer in the list of layers you click. |
Ingredients Tab |
Displays Add Ingredient button and detailed information on added ingredients. |

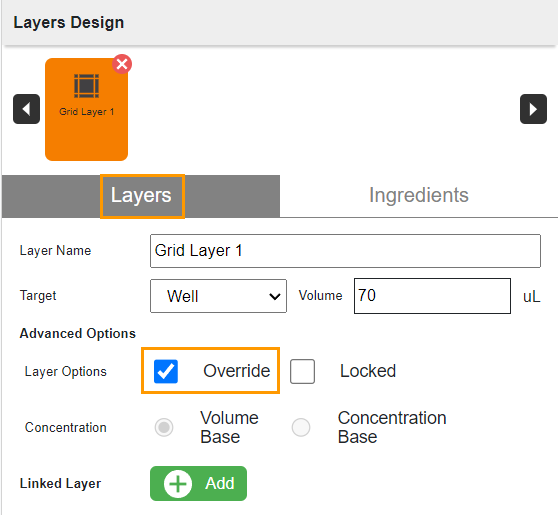
Layer Override
Layer override feature allows you to overwrite a layer by placing a new layer on top of it. Only concentration-based layers can override layers.
Override Check Box
Note
The Override option is only available for Grid, Random, and Custom layers.
Locking and Unlocking Layers
Advanced Options field enables you to lock any layer by clicking the Locked checkbox in the Advanced Options field of the Layer Options tab. To unlock a layer, uncheck the Locked checkbox.
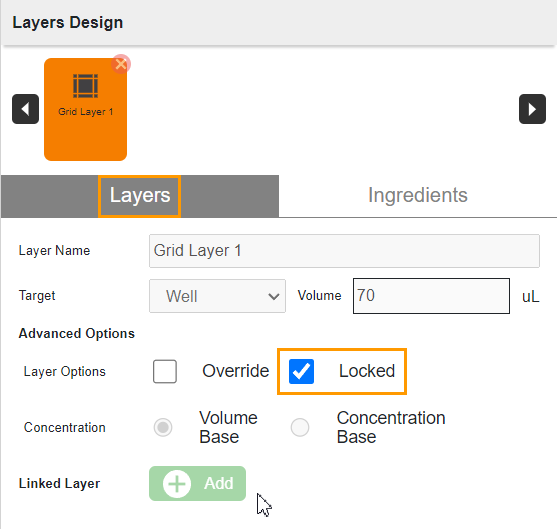
Locked Checkbox
Locked layers will not allow:
area adjustment
ingredients modification
adjustment to the well volume of an unlocked layer if there is a locked concentration-based layer in a canvas
layer deletion
copy and paste
However, locked layers can be:
moved
cut and pasted
A locked layer does not change when cut/copied and pasted even though it is a random layer.
Note
A random layer will retain its ingredients even if it is cut/copied and pasted or converted to a screen or screen experiment. Overriding is not allowed on a locked random layer. If a random layer in an experiment is converted to a screen or screen experiment, the converted random layer will retain its original ingredients and concentrations. The converted layer will be locked even if the random layer in the original experiment is not locked.
Volume-Based and Concentration-Based
You can specify a layer’s ingredient conditions for each well-targeted layer you create by clicking the Volume Based or Concentration Based box under Advanced Options in the Layer Options tab.
Note
The Volume Based and Concentration Based options are only available for Grid, Random, and Custom Layers. Other types of layers are always volume-based.

Advanced Options
Note
A combination of concentration and volume-based layers creates volume-based ingredients.
Volume-Based
The volume-based option retains a layer’s well volume but changes its ingredient if combined with other layers.
Volume-based Layer Selection
For example, two layers are combined using the volume-based option. The well volume is set to 70 μL. Thus, the total well volume from the two layers should not exceed 70 μL as shown by the example below:
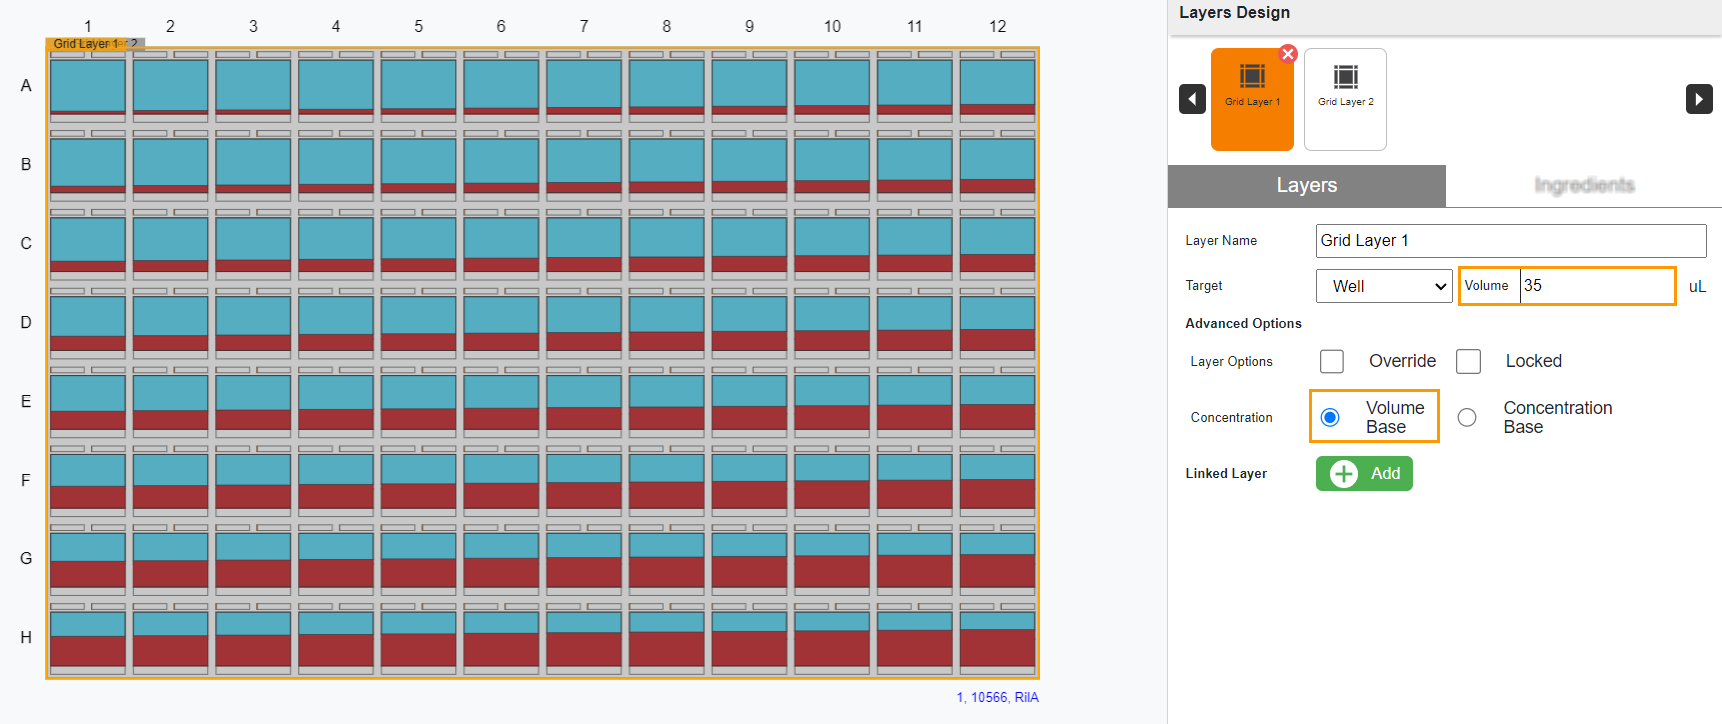
Defined Volume and Selected Layer’s Ingredient Condition in the First Layer Example
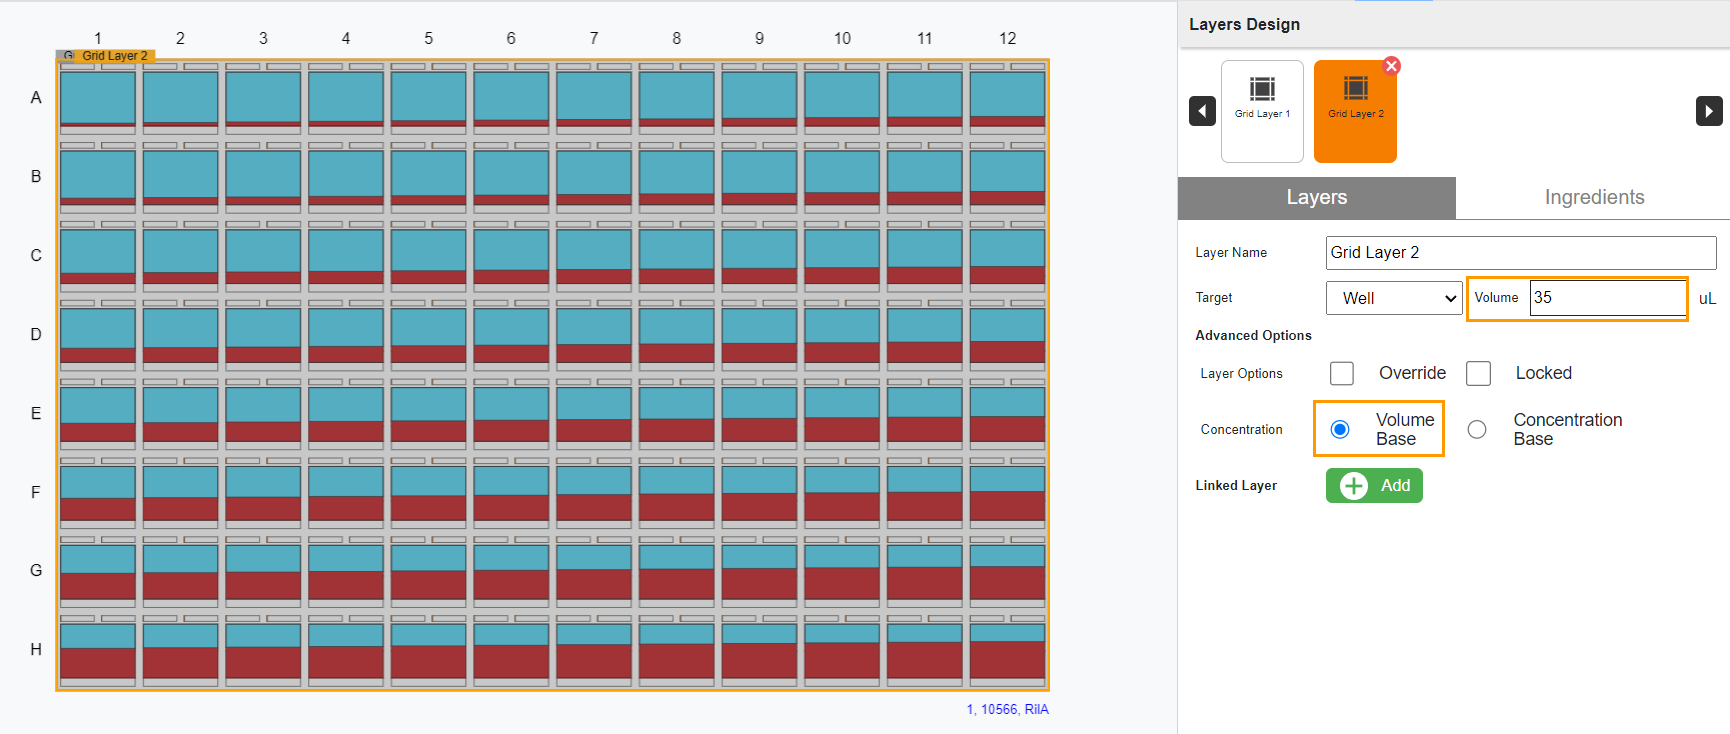
Defined Volume and Selected Layer’s Ingredient Condition in the Second Layer Example
Concentration-Based
The concentration-based option retains layers’ ingredient concentration. It will not change the total well’s volume if combined with other layers. By default, the ingredient combination selected will be Concentration Based.
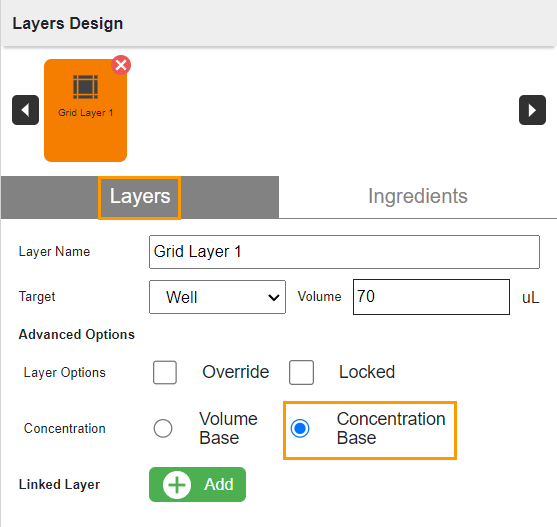
Concentration Based Option
Note
The well volumes for all concentration-based layers on a plate remain equal. If you change the well volume of one concentration-based layer, the well volumes of other layers will be automatically adjusted.
If the same layers used in the volume-based layer example are combined using the Concentration Based option, the well volume of each layer will be adjusted to retain the ingredient concentration.
Defined Volume and Selected Layer’s Ingredient Condition in the First Layer Example
Defined Volume and Selected Layer’s Ingredient Condition in the Second Layer Example
Tip
You can use mouse and keyboard shortcuts to choose an area to create a layer:
Click a well to select a single well.
Hold down the Ctrl key while clicking the wells one by one.
Drag the + sign diagonally over wells to select some or all wells.