Info Menu
The Info menu is where you define your experiment from selecting the plate type to defining the dispensing properties. The Info menu consists of the Experiment Info, Imaging Schedule, and Dispensing sections.
Info Menu
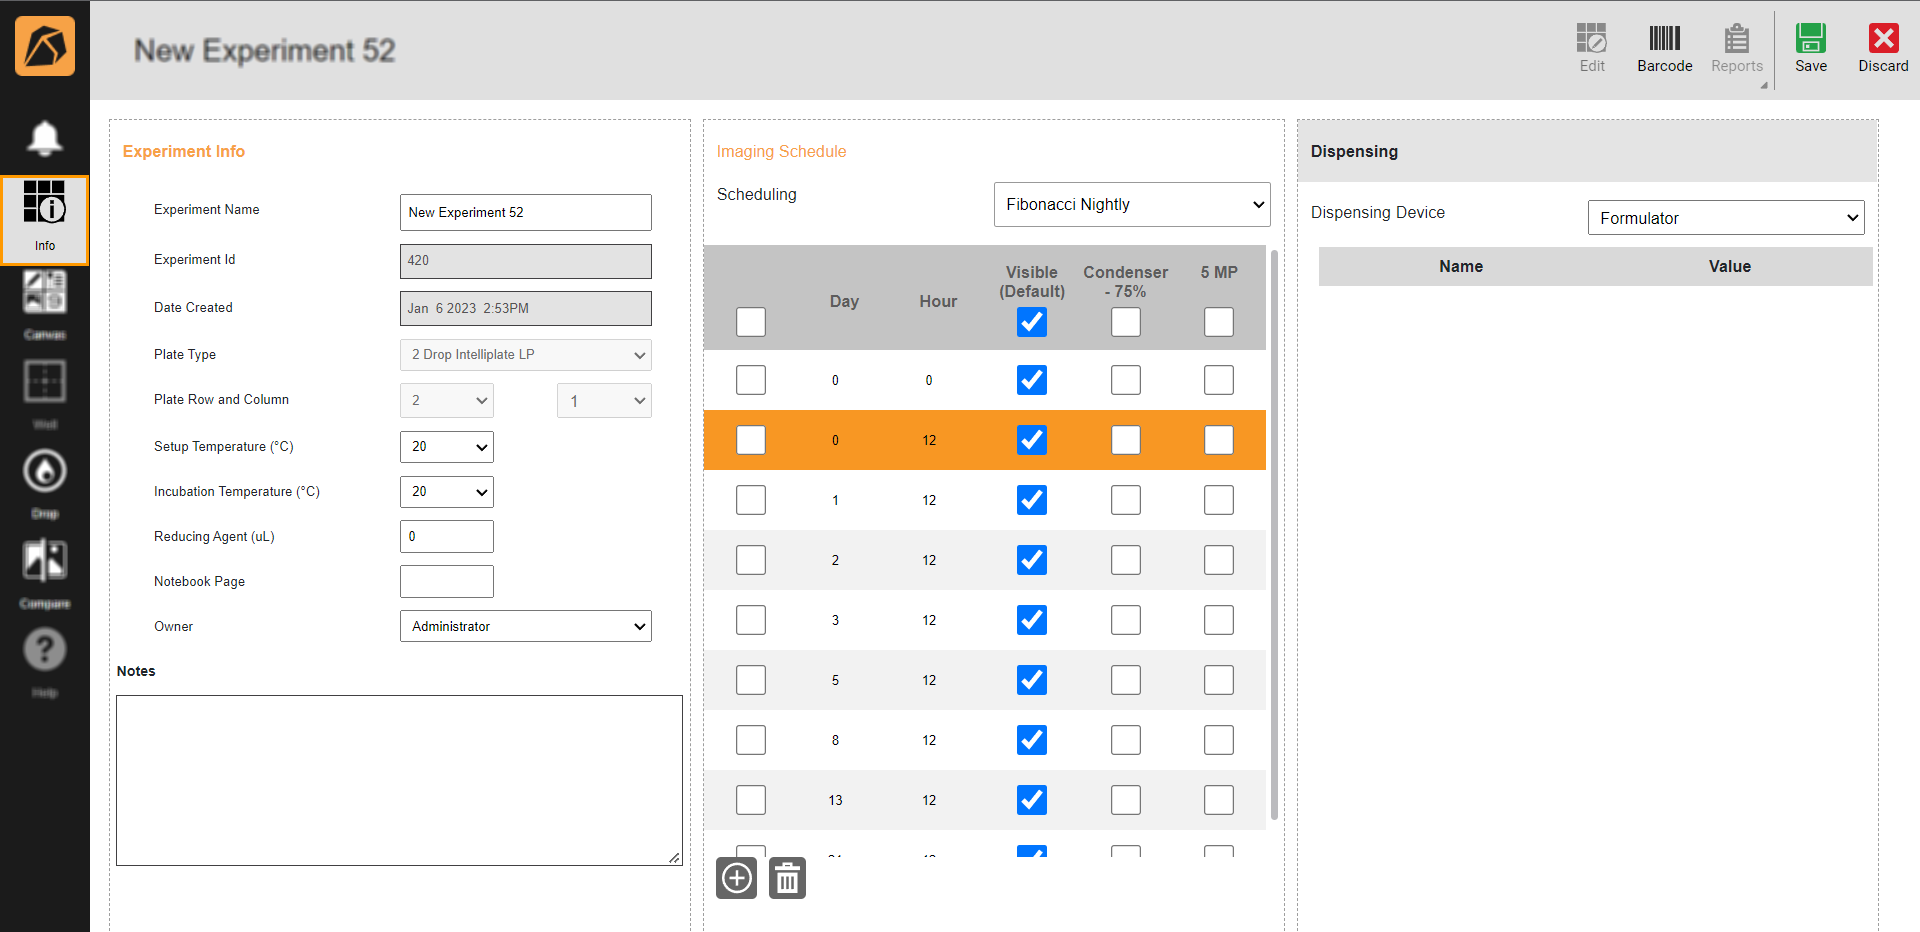
Top Bar Buttons
Top Command Bar
Feature |
Icon |
Description |
|---|---|---|
Edit |
|
Allows you to edit the design of a dispensed experiment. |
Barcode |
|
Allows you to print your experiment barcode. |
Reports |
|
Allows you to generate a report from the available options. This button will be active once you finish designing your experiment. |
Save |
|
Allows you to save your experiment. |
Discard |
|
Allows you to cancel a new experiment and discard experiment changes. |


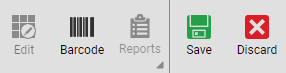
Experiment Info Section
Experiment Info Section
The experiment info section allows you to define the fields given in the table below.
Field |
Description |
|---|---|
Experiment Name |
Allows you to type an experiment name or use the default name. |
Experiment ID |
Automatically generates an experiment ID. |
Date Created |
Automatically generates the creation date and time of an experiment. |
Plate Type |
Allows you to select a plate.
|
Plate Row and Column |
Allows you to define the row and column of your plate.
|
Setup Temperature (°C) |
Allows you to select the temperature at which your plate is set up. |
Incubation Temperature (°C) |
Allows you to select the temperature at which your plate is stored to grow crystals. |
Reducing Agent (μl) |
Allows you to type a value of the reducing agent to add to an experiment (if necessary). |
Notebook Page |
Allows you to type the page in your notebook referring to the same experiment (if necessary). |
Owner |
Allows you to select an owner of the experiment. |
Notes |
Allows you to type a note. |
Imaging Schedule Section
In this section, you can define the imaging schedule for your plate. For convenience, you can select a scheduling type, such as Daily/Weekly, Daily/Weekly Nightly, Fibonacci, and Fibonacci Nightly. However, you can only create a new scheduling type from the ROCK MAKER desktop.
The schedule listed below the Scheduling field corresponds to the selected scheduling type and is customizable.
You can add a schedule list by clicking the Add  button and remove a list(s) by clicking the Delete
  button after clicking the row(s) or the checkbox next to the list you want to remove.
Imaging Schedule Section
To customize the schedule, click any checkbox in the schedule list. The Custom scheduling type will appear in the Scheduling field.
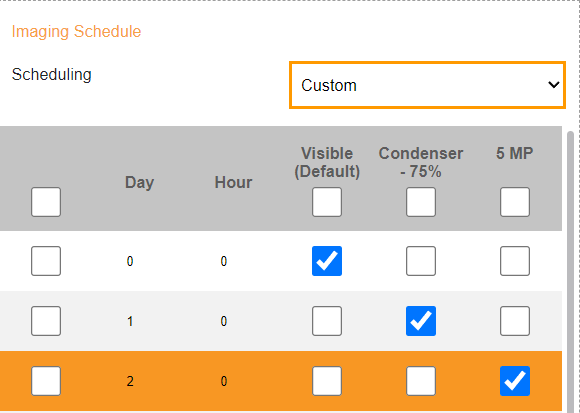
Custom Scheduling Type
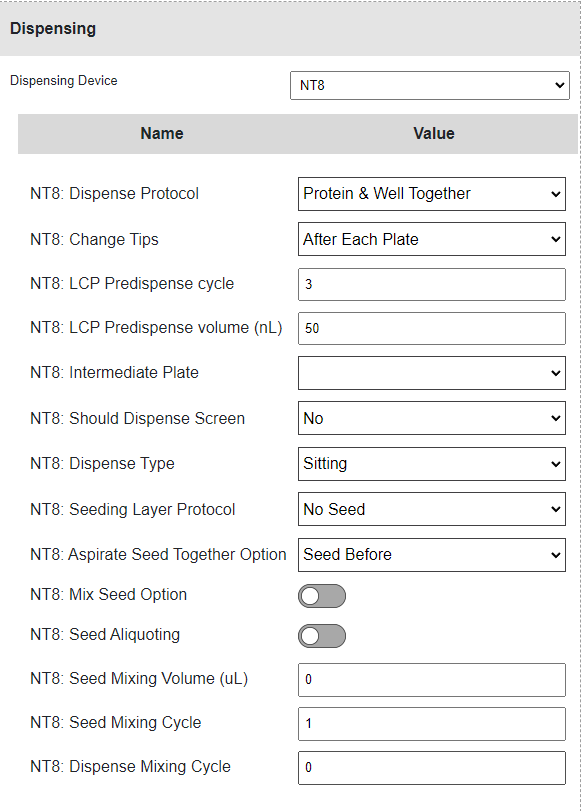
Dispensing Section
Allows you to select a dispensing device from the Dispensing Device dropdown and modify its settings.
Note
The information below the Dispensing Device field corresponds to the dispensing device you select.
Dispensing Section
Related Topics