Creating a Custom Layer
When you design a custom layer, you are defining the ingredients by well — known as a condition — and the condition consists of one or more ingredients.
To create a custom layer:
Open an experiment OR create a new one.
On the experiment page, go to the Canvas menu. Then, click Add Layer on the top bar and select Custom Layer.
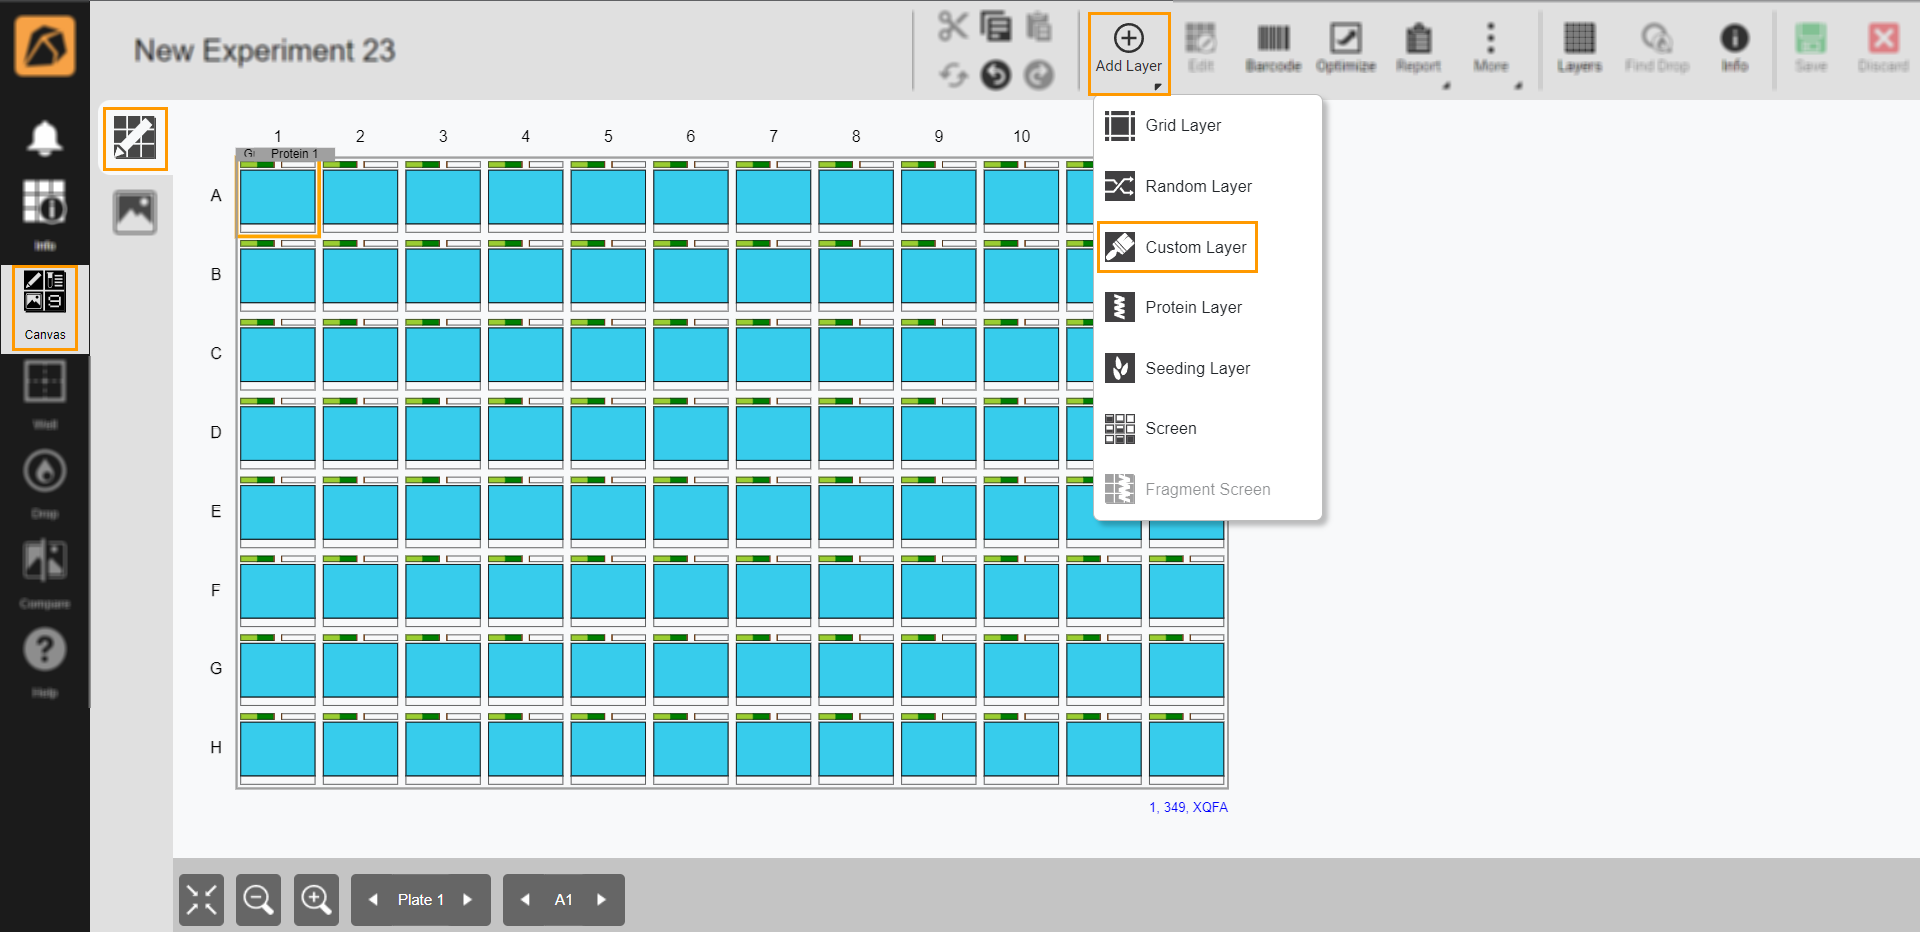
Selecting Custom Layer
Select a custom layer area accordingly:
To select all wells, click any well on the canvas.
To select some wells, click and hold the left button of your mouse while dragging it over the desired wells.
The Layers Design panel on the right side of your ROCK MAKER window will direct you to the Conditions tab.
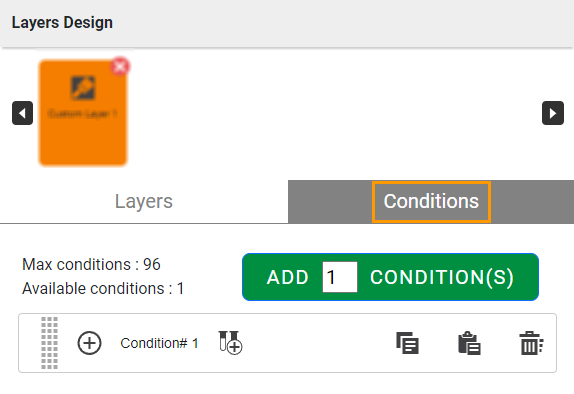
Conditions Tab
By default, a condition will be added to a well. You can add more conditions by typing a number in the box within the ADD CONDITION(S) button and clicking it. To add a single condition at a time, click
 on the left side of each condition’s field.
The Box to Add the Condition(s)
Note
The number of conditions cannot exceed the total number of wells in the layer. If you do not select a well for a new condition, ROCK MAKER will automatically select a well after the last well to which the last condition is added.
Go to a Condition# field and click the Add Ingredient button
 . You will be directed to the Select Ingredients panel.
Select an ingredient.

Selecting an Ingredient
For the ingredient selection, click:
All tab if you want to select from existing ingredients.
Note
You can use the Search Ingredient field in the All tab for a quick search. The dropdown menu next to the Search Ingredient field allows you to choose a filter setting: All, Buffer, Non-Buffer, and Prepared.
OR
Favorites tab if you want to select from your favorite ingredients.
Once you select an ingredient, a panel to select a stock will appear. Select the desired stock.
Note
You can use the Search Stocks field for a quick search. The dropdown menu next to the Search Stocks field allows you to choose a filter setting: All, Buffer, Non-Buffer, and Prepared.

Selecting a Stock
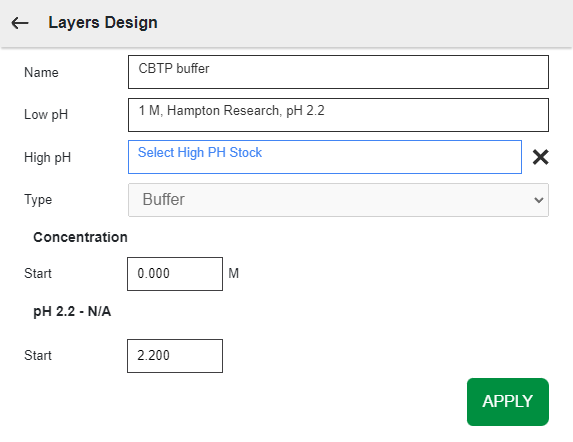
A panel to edit the ingredient will appear. If your ingredient is a buffer, you can vary both concentration and pH.
Panel for Buffer Filter

Panel for Other Filters
The Name, Stock, and Type fields can be edited by clicking on the respective fields.
Note
The Type field will be unselectable if the selected ingredient consists of only one type.
In case of buffers, click the Low and High pH fields, and select the desired stocks.
Note
The Low pH field is optional, and it depends on the selected low pH. false at the end of the pH section’s name indicates that no high pH is selected. Thus, the Stop field value will be set to the same value as the Start field.

pH Field
Then, click APPLY.
In the available panel, go to all Condition# box(es) and add ingredients.
To modify a condition(s), you can:
Add more ingredients to the same well by clicking the Add Ingredient button
next to the condition number.Change the condition position by dragging the Condition# box.

Changing Condition Position
Apply the same ingredient to other conditions by copying
 and pasting
  the condition. Clicking the Copy button twice will cancel copying.
Copying and Pasting a Condition
When all conditions are set, go to the Layers tab and complete the information.
Type a name in the Layer Name field or use the default name.
Select a target from the Target dropdown menu.
Type a volume in the Volume field.
In the Advanced Options field, select a layer setting(s) (Override, Locked, or both) from the Layer Options field.
Note
By default, the Concentration field is set to Concentration Base. Selecting Override in the Layer Options field will automatically set the Concentration to Volume Base.

Completing Layers Tab
Click the Save button on the top right toolbar.

Save Button
Tip
You can create an ISO experiment from a custom layer.
Related Topics: