General Submenu
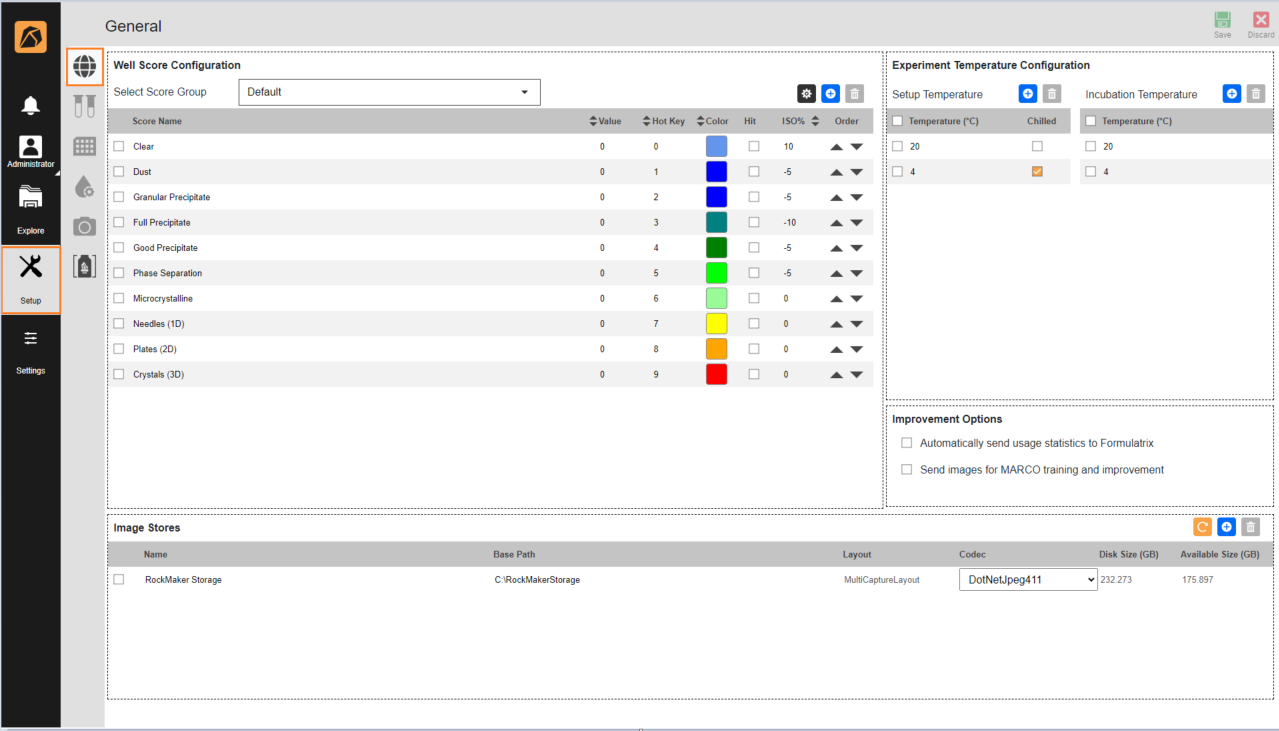
General submenu helps you set up scoring, temperature, improvement feedback, and image storage. It comprises Well Score Configuration, Experiment Temperature Configuration, Improvement Options, and Image Stores sections.
General Submenu
To access the General submenu, go to the Setup menu. The General submenu  will open by default.
Well Score Configuration Section
In this section, you can configure the score name, value, hot key, color, hit indication, and ISO values for an ISO experiment.
If you select a checkbox to mark a score as a hit, a small diamond indicator  will appear over the folders, projects, experiments, and plates containing a drop with the corresponding score(s).
The Value column will be available for auto score groups only as shown in the image below.
will appear over the folders, projects, experiments, and plates containing a drop with the corresponding score(s).
The Value column will be available for auto score groups only as shown in the image below.
Note
This example uses MARCO as the auto scoring model.

MARCO in Well Score Configuration
Column |
Description |
|---|---|
Score Name |
Allows you to type the score name of a selected score group. |
Value |
Defines the minimum threshold of an auto score name. For example, if the value of the C score is 0.4, any images with a value under 0.4 will not be defined as C.
|
Hot Key |
Enables you to assign a score to an image with the shortcuts you define using your keyboard. For example, if you enter ‘1’ in the Hot Key column for the Crystals (3D) score, you can assign that score to a well by pressing 1 on your number keypad. |
Color |
Allows you to select a color for a particular score to easily identify the scores of different wells in the plate viewer. To do so, click the colorful boxes in the Color column and choose one from the 31 predefined colors in the Color Picker dialog box. |
Hit |
Allows you to define scores in a selected score group as Hits by clicking the checkbox(es) corresponding with your desired scores in the Hit column. Images marked as Hits can be sorted for easy viewing and even published in a report. |
ISO% |
Enables you to define the ISO values to create an ISO experiment. |
|
Allows you to move the position of each score in the table up and down. |

You may select a score group from the Select Score Group dropdown menu.
To add or remove the list in the dropdown, click  on the top right of the Well Score Configuration section to open the Score Group Configurations dialog box.
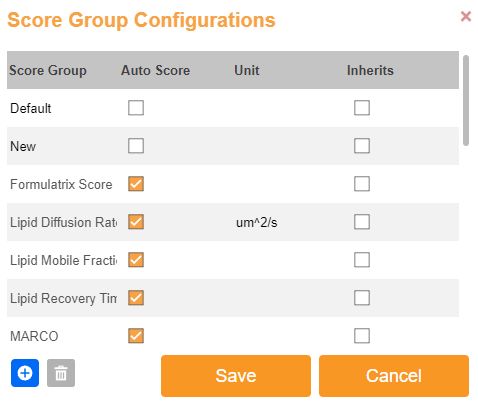
Score Group Configurations Dialog Box
In the dialog box, you can:
Select the score(s) you want to set as auto score in the Auto Score column.
For FRAP Score only:
Type the unit scores (if any) in the Unit column. These units will be displayed in the well information along with the score values accessible from the Info button.
Click the Inherits checkbox if the score is obtained from a previous imaging session.
Click
 to add a score group.
Click
 after clicking a corresponding checkbox(es) to delete the score group.
Click Save to apply changes.
Click Cancel to undo changes.
You can modify the Score Name list of a selected score group by clicking
to add a score name or after clicking the corresponding checkbox(es) to delete it.
Experiment Temperature Configuration Section
In this section, you can set the temperatures of your plate setup and incubation locations. The temperatures you set here are displayed in the Setup Temperature and Incubation Temperature dropdown menus in the Experiment Info section accessible from the Info menu on the experiment page. Read Creating an Experiment for more information.

Experiment Temperature Configuration Section
ROCK MAKER comes with default temperatures. You may edit these and add the temperatures of setup and incubation locations if necessary.
In both the Setup Temperature and Incubation Temperature fields, you can:
Click
Click
Select the setup or incubation temperature(s) by clicking an appropriate checkbox in the Temperature (*C) column. To select all temperatures at once, click the box on the top left of the setup or incubation table.
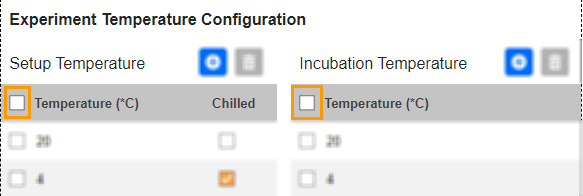
Selecting All Temperatures in Each Table
Setup Temperature only: Choose a temperature(s) you want to use as a chilled setup location(s) in the Chilled column.
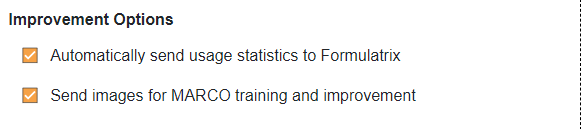
Improvement Options Section
Improvement Options Section
The Improvement Options section includes two options:
Automatically send usage statistics to Formulatrix. If you select this option, ROCK MAKER will send a weekly usage report to FORMULATRIX.
Send images for MARCO training and improvement. Selecting this option will enable the Send for Training button in the Auto Score tab of the Score panel. You can send images to FORMULATRIX to improve auto scoring performance by clicking the button.
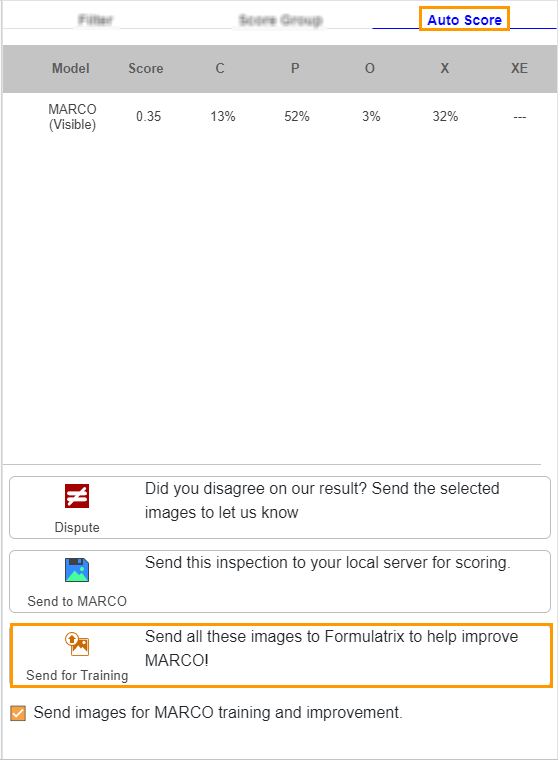
Auto Score Tab
Image Stores Section
An image store is a directory in which ROCK MAKER saves the image files created from imaging processes. Typically, you will need only two image stores: one for storing images and one for archiving old images.
Important
FORMULATRIX will set up the default Image Stores during ROCK MAKER installation. Only an administrator can modify this setting.

Image Stores Section
The Image Stores section allows you to:
Click
 to undo changes.
Click
to add an image store.Click
after clicking the corresponding checkbox(es) to delete an image store.Type a name for the image store in the Name column.
Type the path of the directory in which images are stored in the Base Path column.
Note
By default, the image files will be saved in the C directory.
Select DotNetJpeg411 or WICHDPhoto in the Codec column. By default, the system will choose DotNetJpeg411.
Note
Both DotNetJpeg411 and WICHDPhoto are image formats.
Note
The Layout, DiskSize (GB), and Available Size (GB) are automatically generated by ROCK MAKER and are uneditable.
If everything is set up, click the Save button on the top right bar of the submenu. You can also discard all changes you make by clicking the Discard button.
Related Topics: