Creating a Protein Layer
Each protein layer specifies the protein formulation to be used in one drop of each well in the layer. For example, if your plate has two drops per well, and your design uses both drops, then you will need to create two protein layers.
Prerequisite:
You already have a protein formulation. Go to Creating a Protein Formulation for more information.
To create a protein layer:
Open an experiment OR create a new one.
On the experiment page, go to the Canvas menu. Then, click Add Layer on the top bar and select Protein Layer.
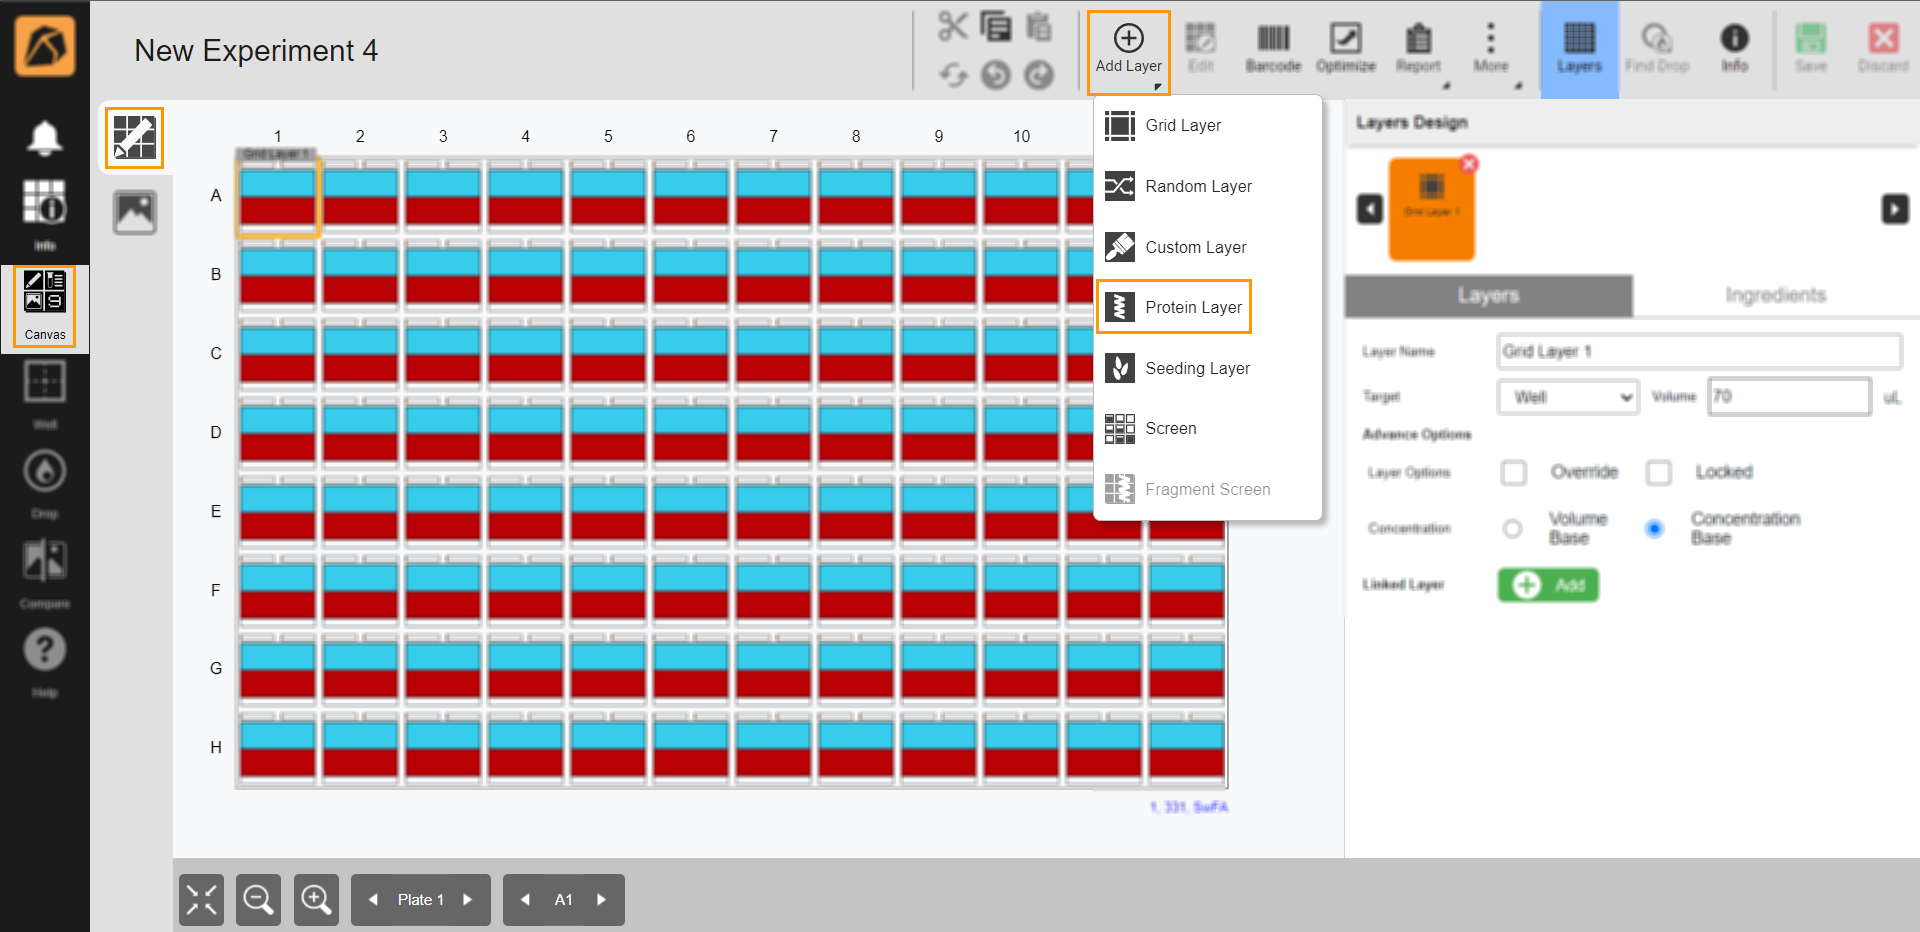
Selecting Protein Layer
Select a protein layer area accordingly.
To select all wells, click any well on the canvas.
To select some wells, click and hold the left button of your mouse while dragging it over some desired wells.
The Layers Design on the right side of your ROCK MAKER window will direct you to select a protein. By default, ROCK MAKER will show all proteins from your ROCK MAKER database.
Then, select a protein by:
Typing a protein name in the Search here field for a quick search.
OR
Clicking one of the available proteins.
OR
Clicking the Folder button
 on the top right to select a protein from a different folder.
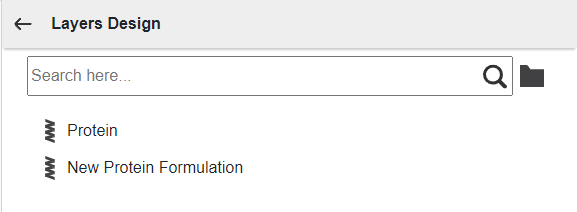
Selecting a Protein
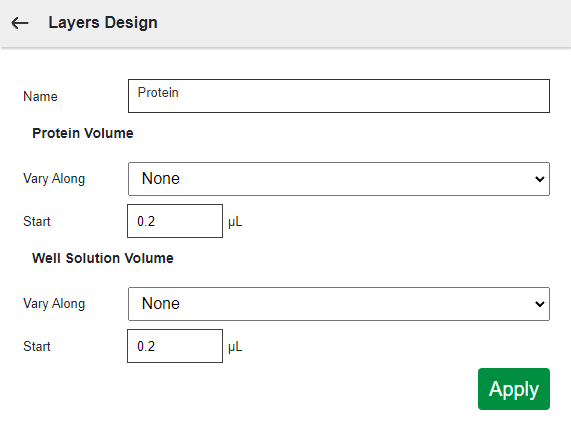
After protein selection, adjust the protein settings in the layer design panel.
Adjusting Protein Settings
Click the Name field to change the protein.
Select a protein volume variation from the Vary Along field.
Type a start protein volume in the Start field.
Select a well solution volume variation from the Vary Along field.
Type a start well solution volume in the Start field.
Then, click Apply.
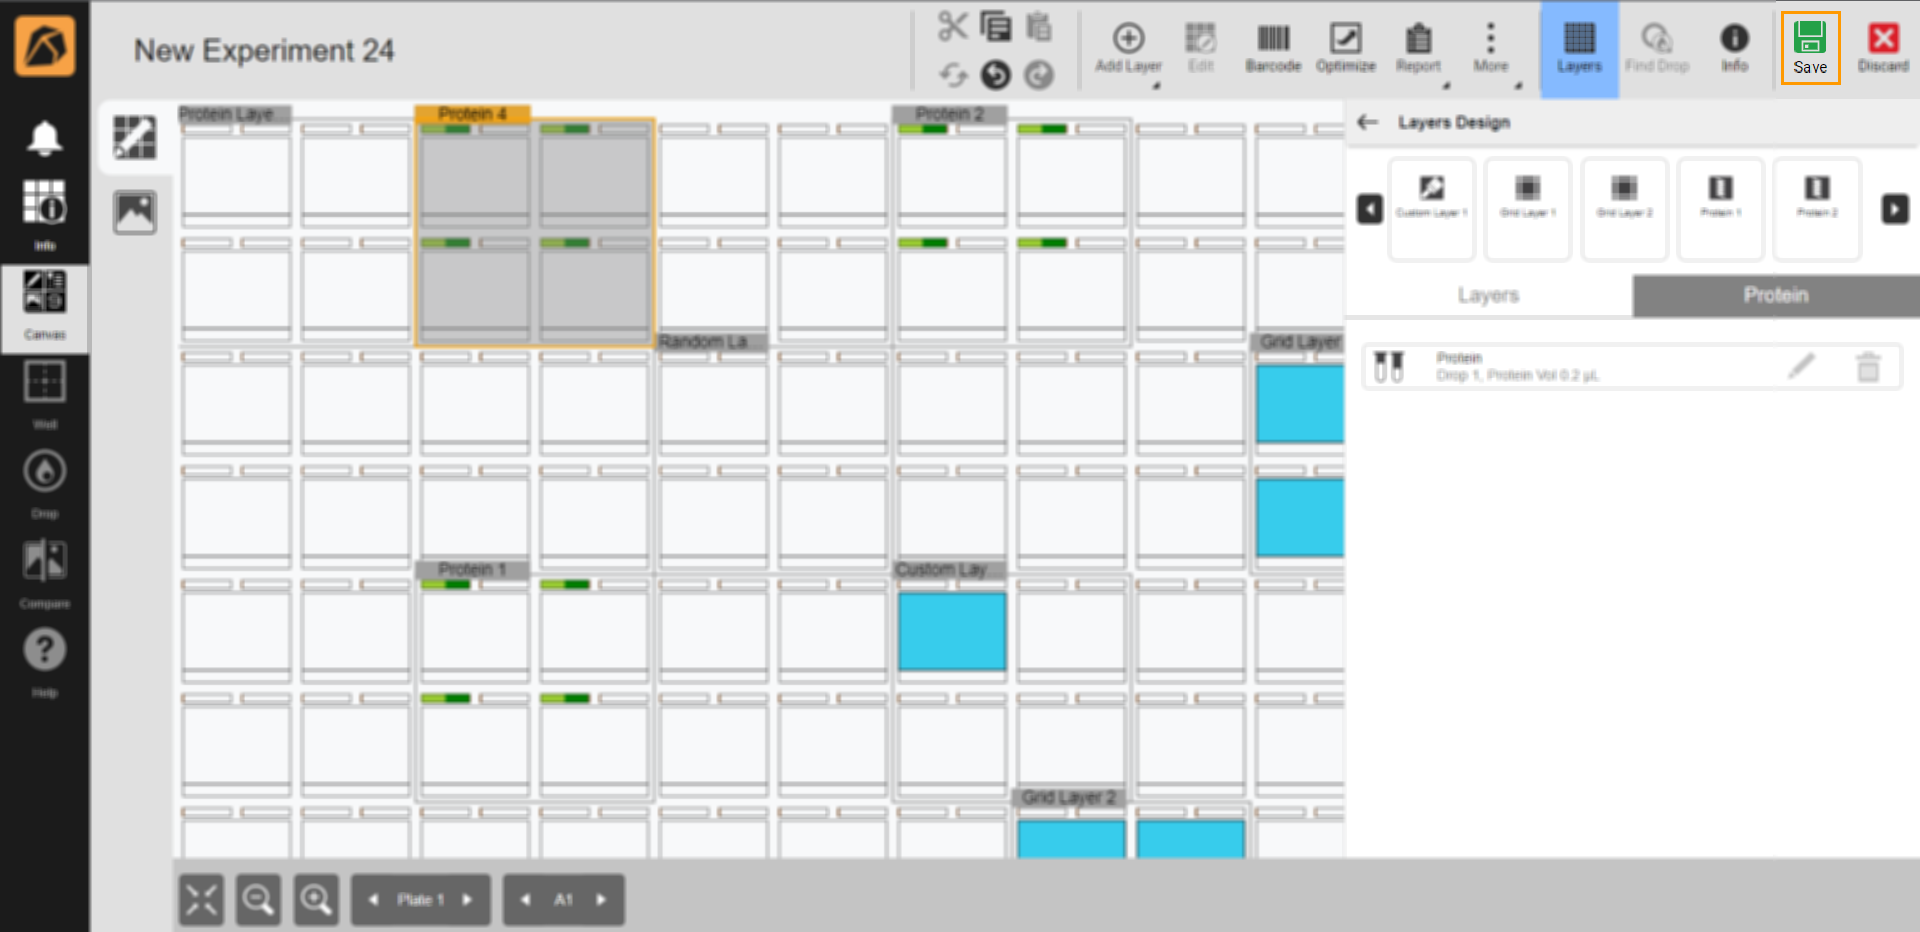
In the Protein tab, you can modify a protein setting by clicking the Edit
 and Delete
  buttons.
Protein Tab
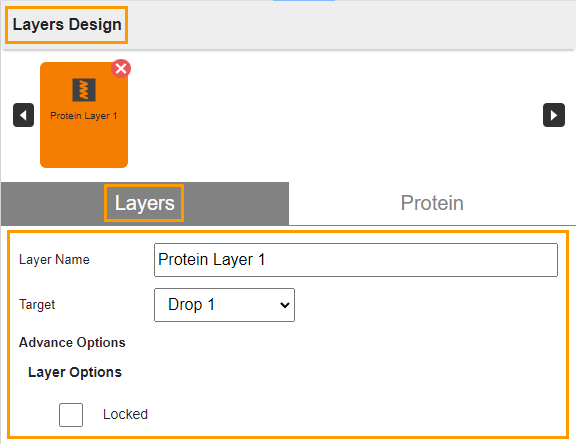
Go to the Layers tab in the Layers Design panel (next to the Protein tab) and do the following:
Type a name in the Layer Name field or use the default name.
Select a target, Drop 1 or Drop 2 from the Target dropdown menu.
If necessary, lock the layer by clicking the Locked checkbox.
Completing Layers Tab
Click Save.
Save Button