Creating a Random Layer
Random layers are useful when you have several choice ingredients that you want to experiment with, but you aren’t sure which combinations of ingredients will yield the best results.
To create a random layer:
Open an experiment OR create a new one.
On the experiment page, go to the Canvas menu. Then, click Add Layer on the top bar and select Random Layer.
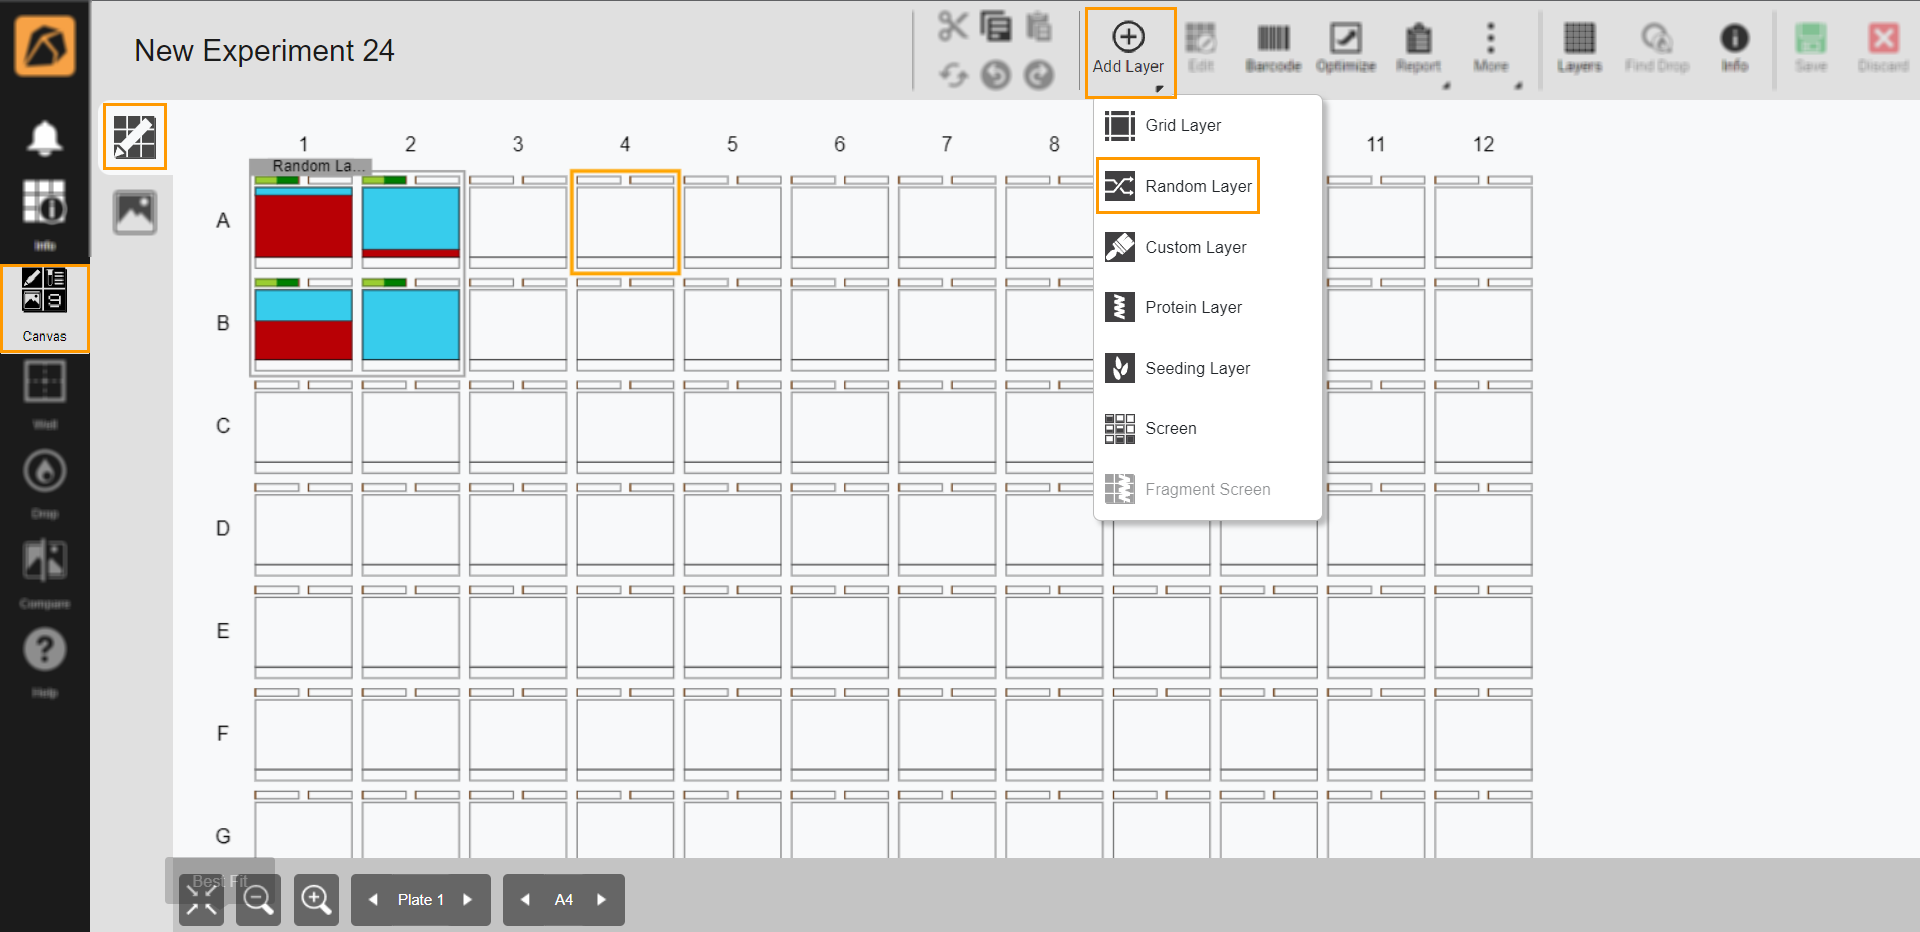
Selecting Random Layer
Select a random layer area accordingly.
To select all wells, click any well on the canvas.
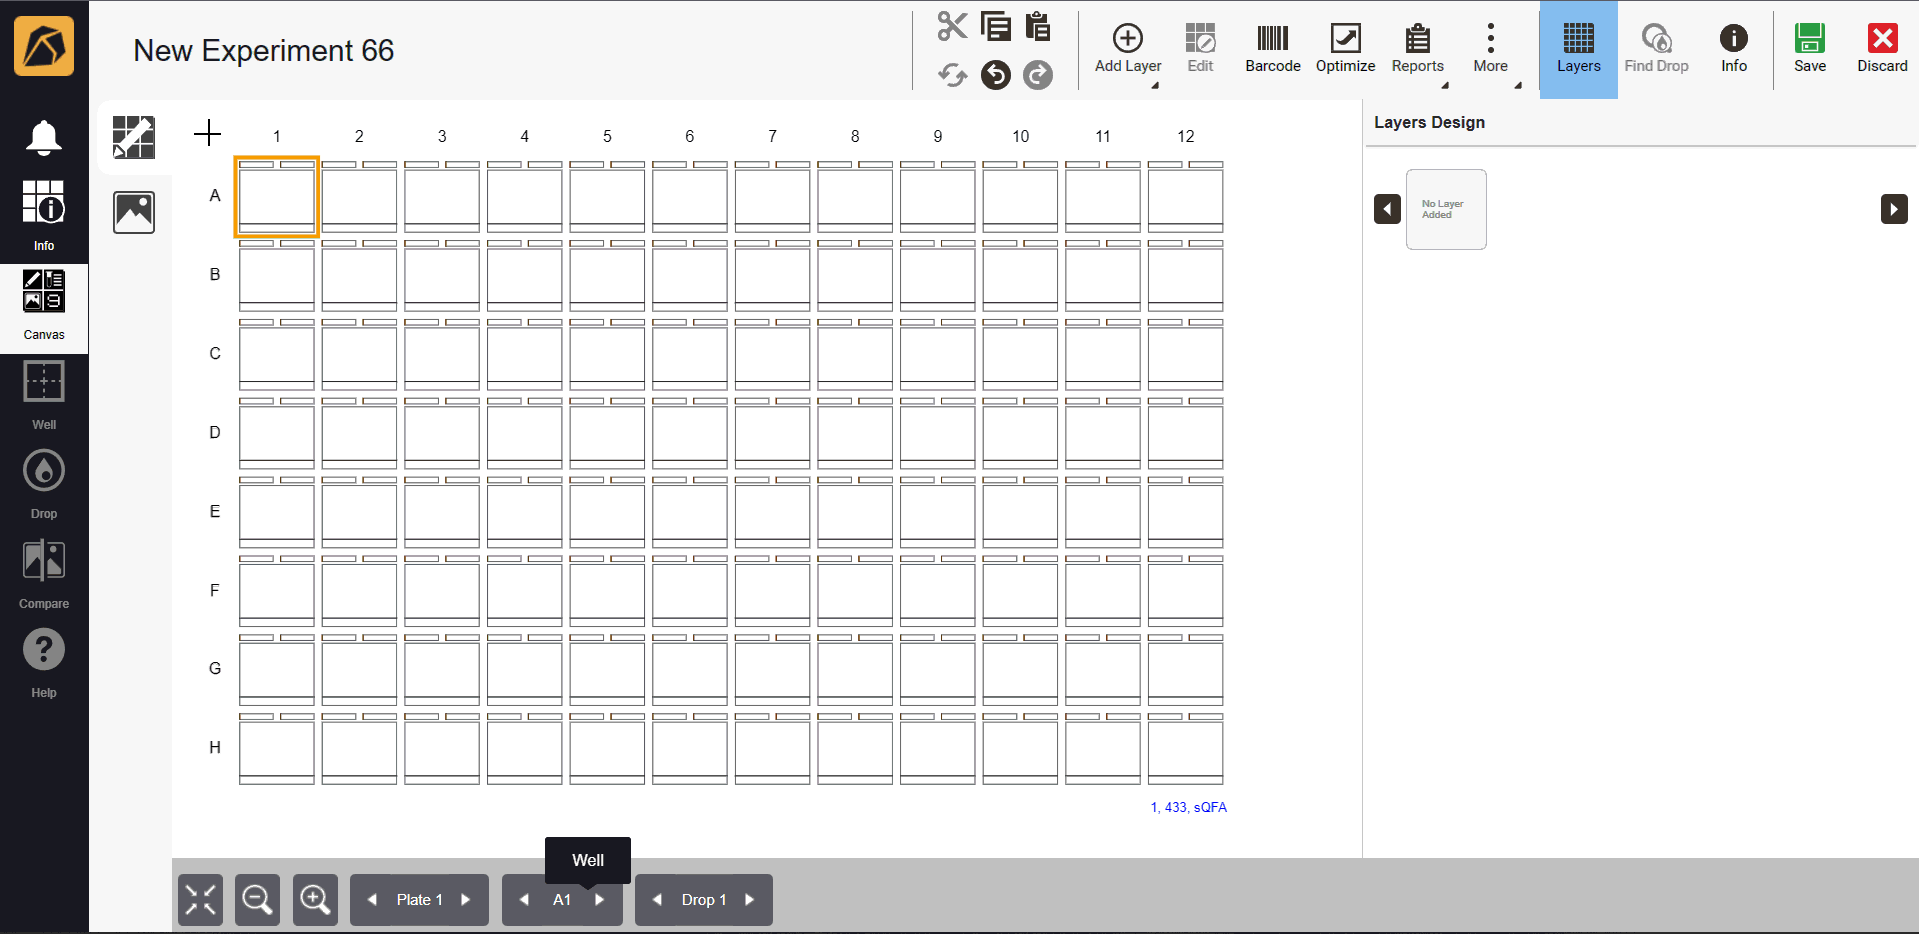
Selecting All Wells
To select some wells, click and hold the left button of your mouse while dragging it over the desired wells.
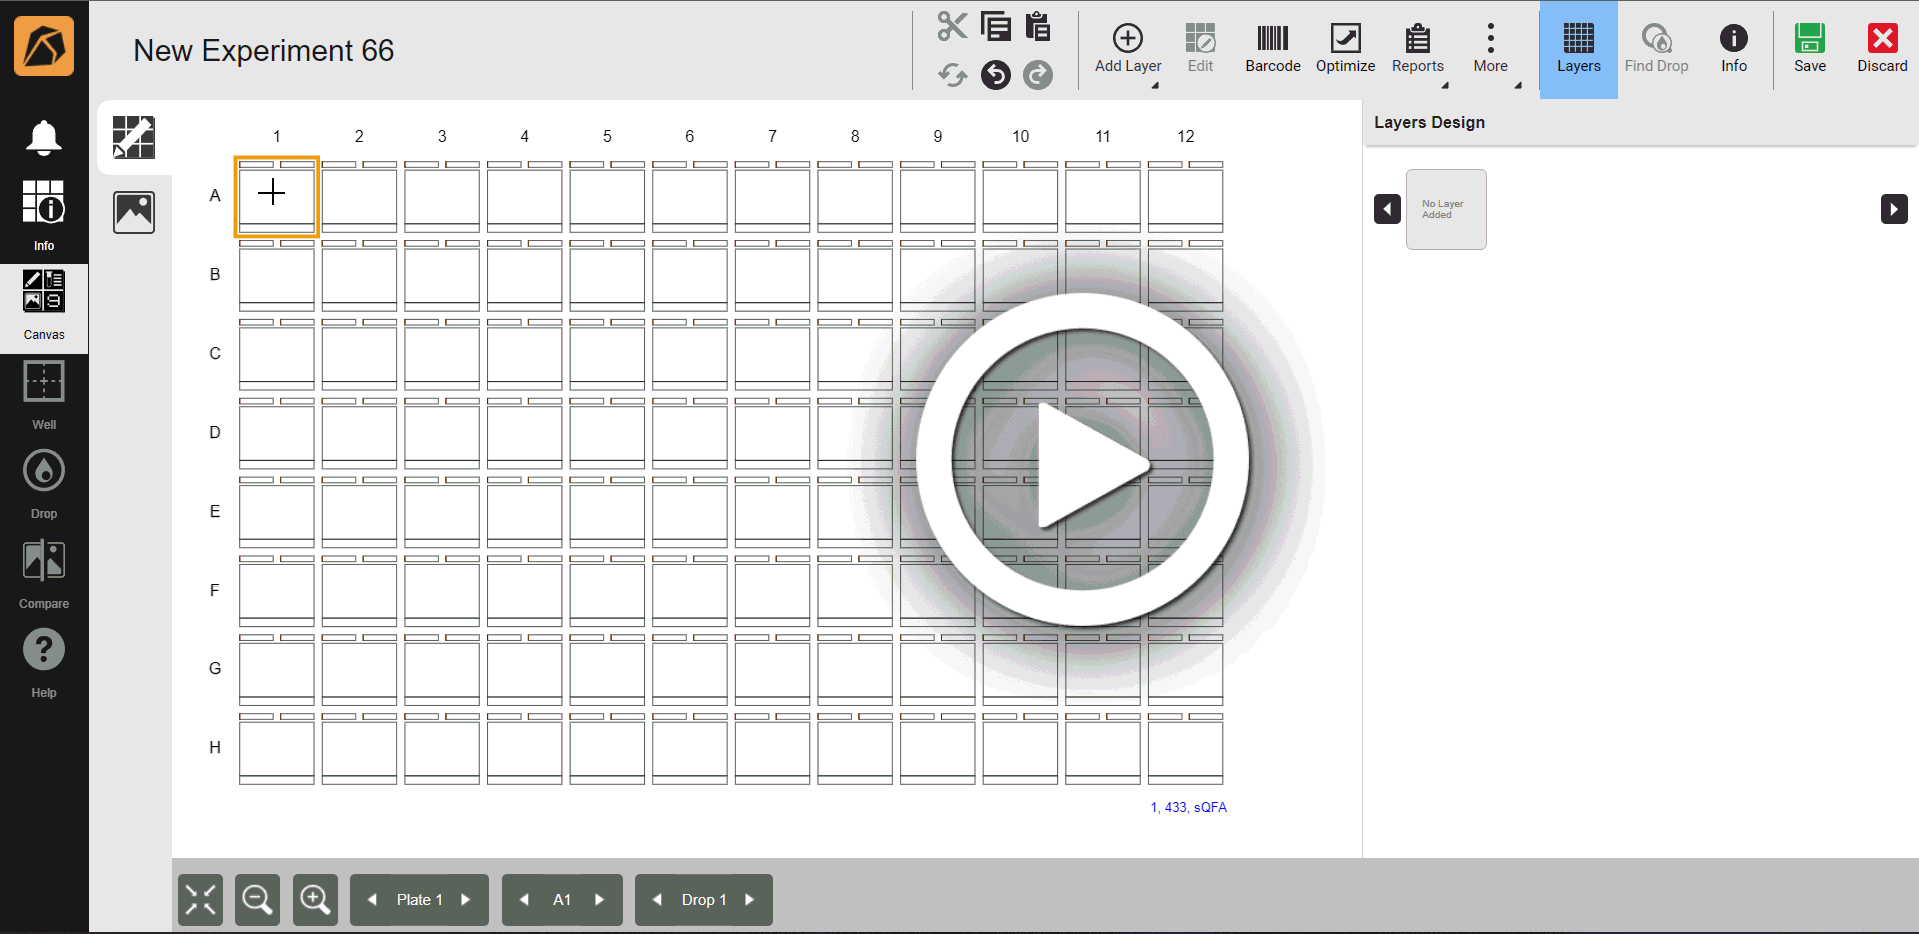
Selecting Multiple Wells
The Layers Design panel on the right side of your ROCK MAKER window will direct you to choose a group.
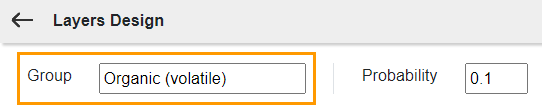
Select a group from the list, and it will appear in the Group field.
OR
If you want to add a new group, type the group’s name in the Type New Group field and click the Add button
 . To cancel adding a new group, click the Cancel button
  .
.Note
You can delete a group(s) in the list by clicking the Delete button
 .
.Type the probability in the Probability field.
Note
The probability ranges from 0 to 1. For example, if a Buffer group has a probability of 1, and the Additive group has a probability of 0.5, then an ingredient you assign to the Additive group will only appear half as many times as a buffer does in a well. When everything is set, click ADD.
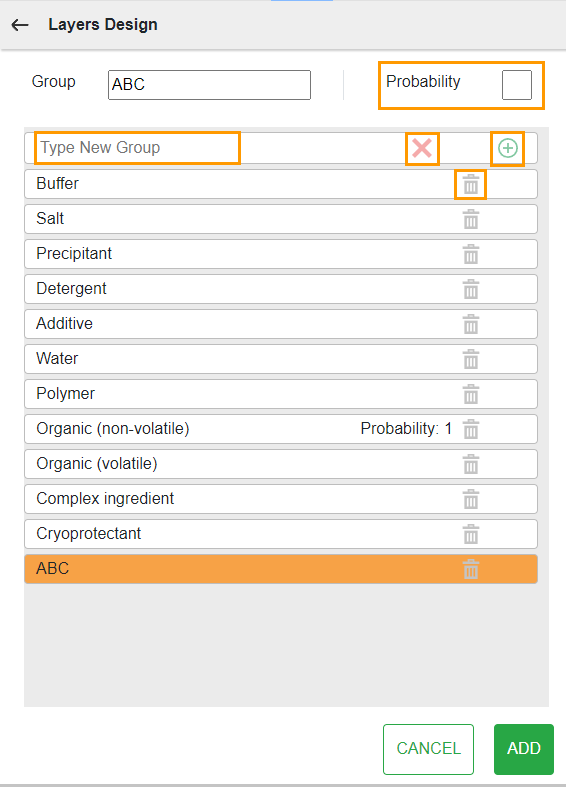
Selecting a Group
You can edit the group name in the Group field located in the top left of the panel.
Group Field
You will be directed to the ingredients tab in the Layers Design panel. In the available panel, click the Add Ingredient button
 next to the group name.
Adding an Ingredient
For the ingredient selection, click:
All tab if you want to select from existing ingredients.
Note
You can use the Search Ingredient field in the All tab for a quick search. The dropdown menu next to the Search Ingredient field allows you to choose a filter setting: All, Buffer, Non-Buffer, and Prepared.
OR
Favorites tab if you want to select from your favorite ingredients.
Selecting an Ingredient
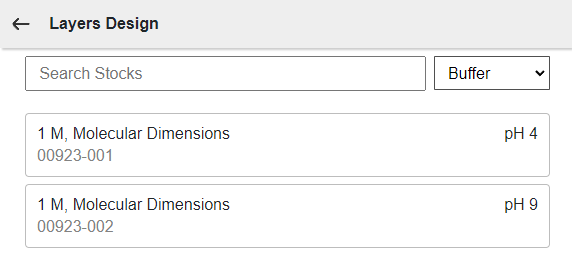
Once you select an ingredient, a panel to select a stock will appear. Select the desired stock.
Note
You can use the Search Stocks field for a quick search. The dropdown menu next to the Search Stocks field allows you to choose a filter setting: All, Buffer, Non-Buffer, and Prepared.
Selecting a Stock
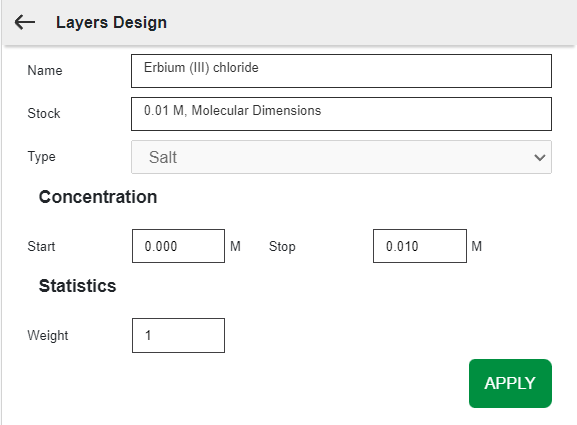
In the available panel, you can modify the ingredient. If your ingredient is a buffer, you can vary both concentration and pH.

Panel for Buffer Filter
Panel for Other Filters
The Name, Stock, and Type fields can be edited by clicking on the respective fields.
Note
The Type field will be unselectable if the selected ingredient consists of only one type.
In case of buffers, click the Low and High pH fields, and select the desired stocks.
Note
The High pH field is optional, and it depends on the selected Low pH. False at the end of the pH section’s name indicates that no high pH is selected. Thus, the Stop field value will be set to the same value as the Start field.

pH Field
In the Weight field, type the probability that this ingredient will be selected in the group (when that group is selected for the well’s ingredients).
For example: A Detergent group has two ingredients: “A” and “B”. “A” has a weight of 1 and “B” has a weight of 0.5. Thus, when the detergent group is selected for a well, the probability for “B” to get selected will be half as many times as “A”.
Then, click APPLY.
All ingredient information is in the box(es) below the group list section. You can add more groups by clicking
 .
.
Ingredient Information
Note
You can modify the group(s) and the ingredient(s) by clicking the Edit and Delete buttons.

Modifying Group(s) and Ingredient(s)
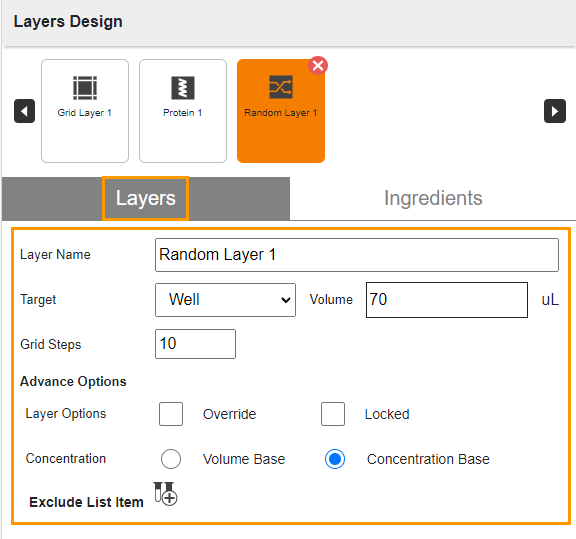
Go to the Layers tab and complete the layer information.
Type a name in the Layer Name field or use the default name.
Select a target from the Target dropdown menu.
Type a volume in the Volume field.
Type how many Grid Steps you want ROCK MAKER to create for each range of conditions and this would apply to all the ingredients in the layer.
Example: If you only vary the pH in an experiment and do not vary any other condition, and you have 5 steps, your wells would all correspond to one of these 5 steps which might consist of 0.5-2.5-1.5 steps.
Another reference: Suppose your target is well and the volume is 50 µL. If you type 5 grid steps, the step can be 10 µL, 20 µL, 30 µL, 40 µL, and 50 µL.
In the Advanced Options field, select a layer setting(s) (Override, Locked, or both) from the Layer Options field.
Note
By default, the Concentration field is set to Concentration Base. Selecting Override in the Layer Options field will automatically set the Concentration to Volume Base.
Completing Layers Tab
OPTIONAL: Click the
button next to Exclude List Item to select two ingredients not to mix in the same well.Important
You need at least two ingredients in a layer to enable Exclude List Item.
The system will direct you to choose two ingredients to exclude. Then, click APPLY.
Note
You can modify the Exclude Pair (two excluded ingredients) by clicking the Edit and Delete buttons.
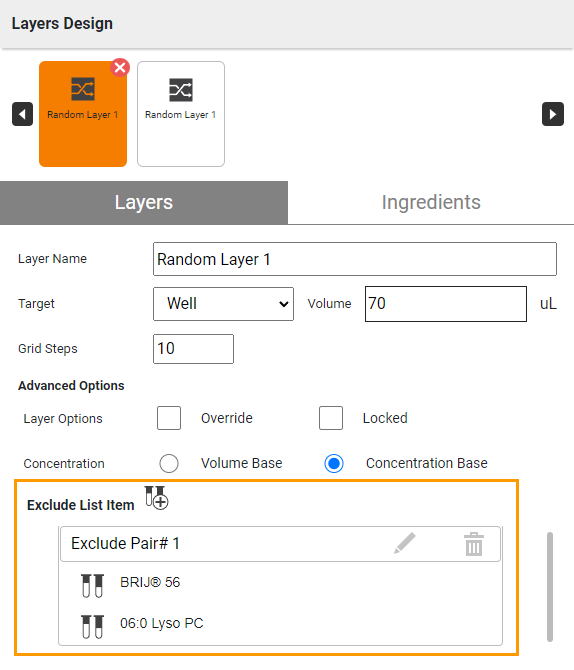
Exclude List Item
On the toolbar, click Save.
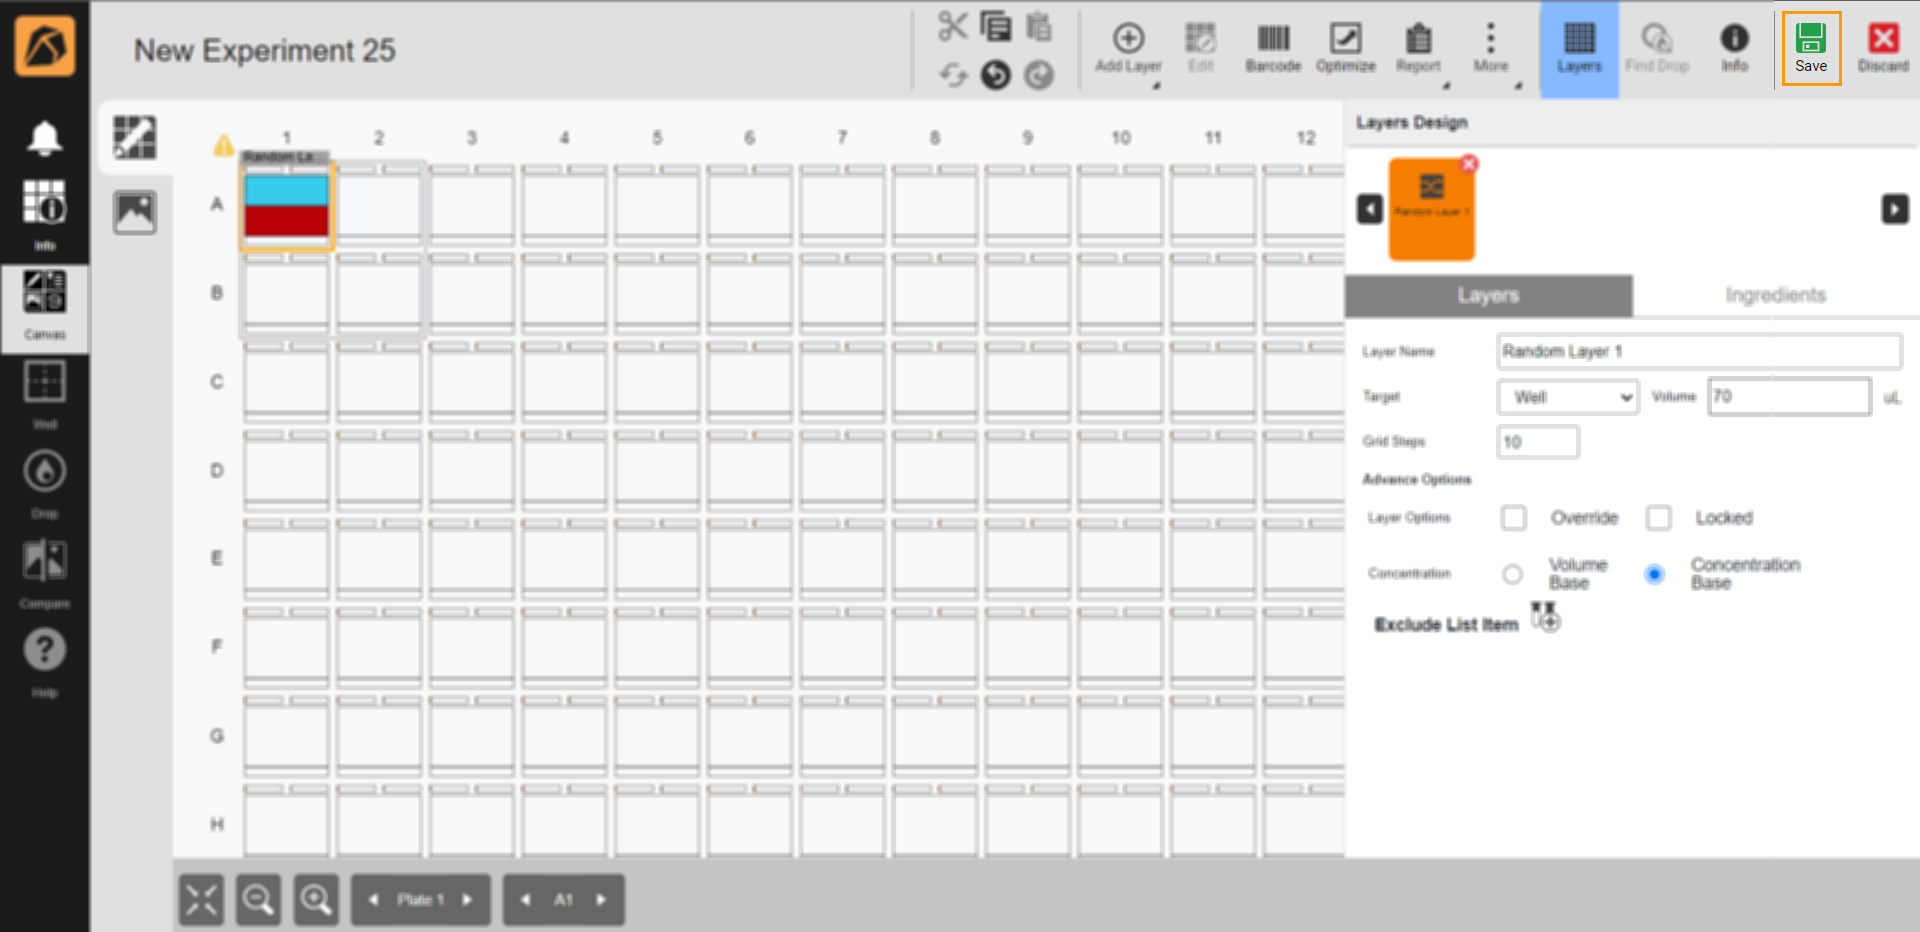
Save Button
Related Topics: