Creating Multiple Screen Experiments Using Screen Experiment Wizard
This wizard can be extremely useful if you want to use the same proteins in multiple screen experiments. You can create multiple screen experiments at once by using the Screen Experiment Wizard. You should remember that multiple screen experiments created this way will use different screens but the following parameters will stay identical on all plates:
Plate type
Protein formulation
Owner
Imaging schedule
To create multiple screen experiments at once:
Open your ROCK MAKER Software.
Go to the Explore menu.
Click the Wizard button in the Toolbar and select Screen Experiment Wizard.

Screen Experiment Wizard
In the Screen Experiment Wizard, locate Create Experiment Options field and select an option.
Note
The Create Screen Experiment Based on Saved Wizard Setup option will be active if you have a saved wizard setup.
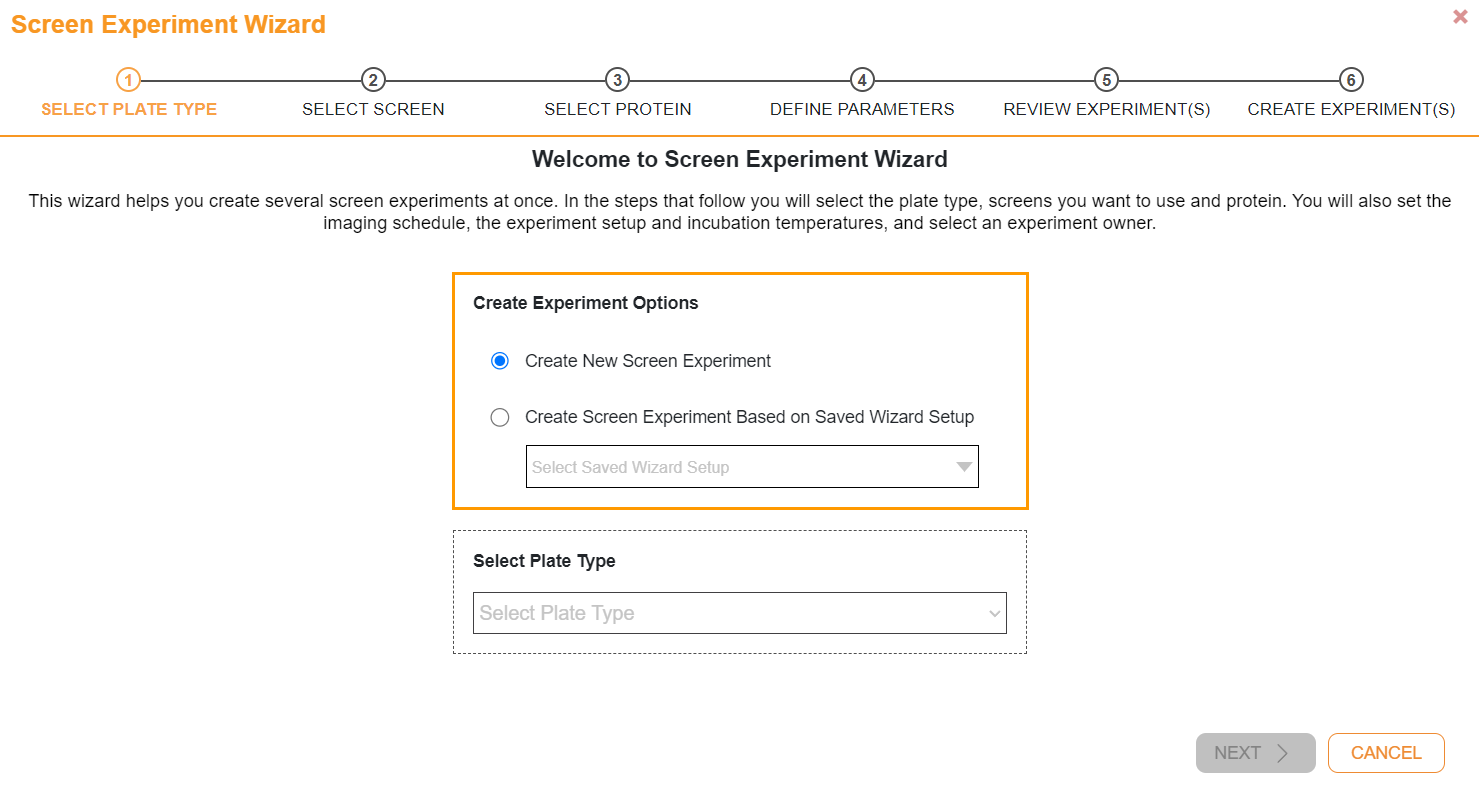
Selecting an Experiment Option
Select the plate type in the Select Plate Type field and click Next.
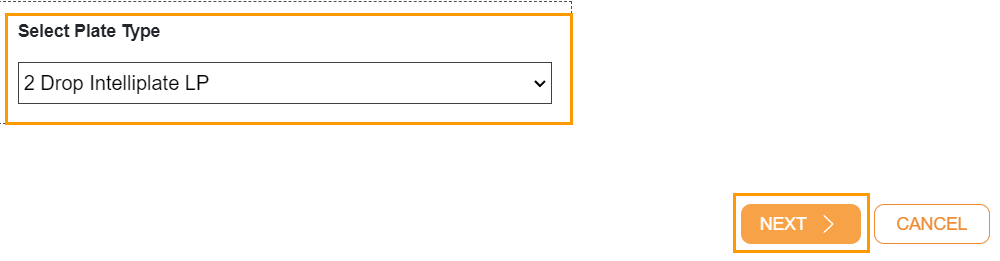
Selecting Plate Type
On the next page, click a location in the Define Screen Location section.
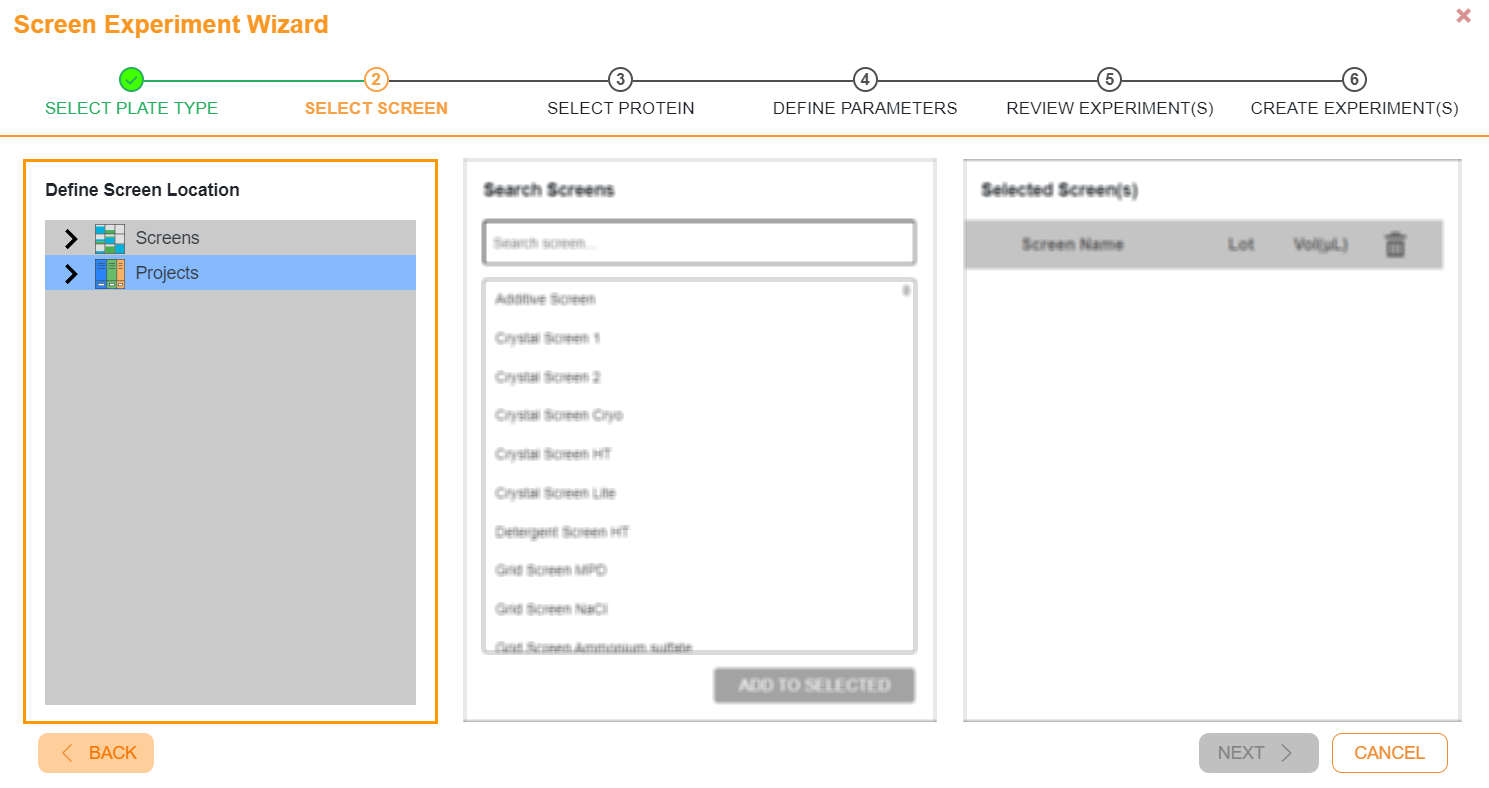
Define Screen Location Section
After defining the screen location, go to the Search Screens section. Select the screen you want to use or type a keyword in the Search screen field. Then, click ADD TO SELECTED.

Search Screens Section
To select multiple screens at once, press Ctrl on your keyboard while selecting the screens.
The screen(s) you select will be added to the Selected Screen(s) section.

Selected Screen(s) Section
Click Next.
Click a location in the Define Protein Location section.
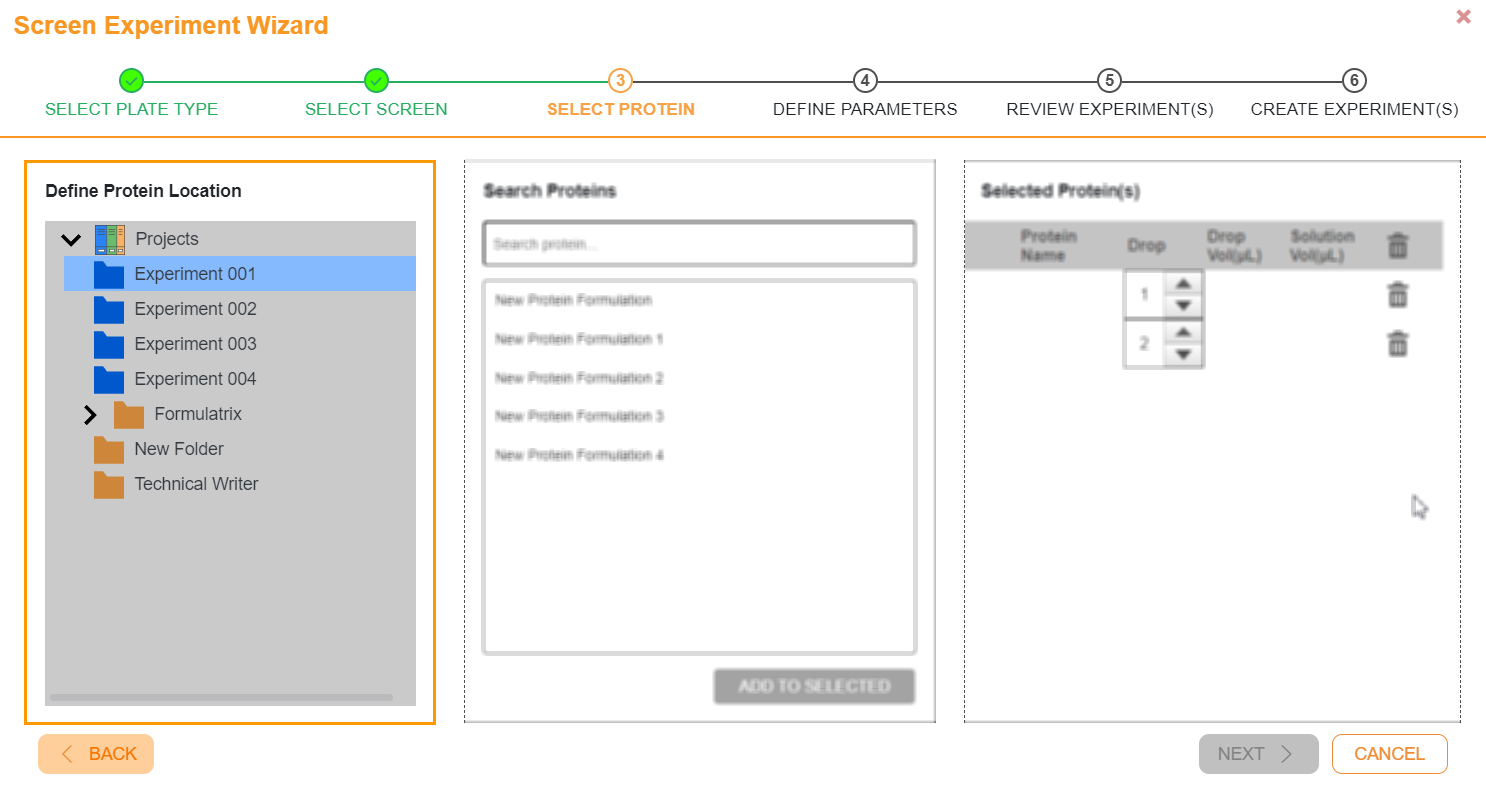
Define Protein Location Section
When you have defined the protein location, go to the Search Proteins section. Select up to two proteins you want to use or type a keyword in the Search protein field and click ADD TO SELECTED.
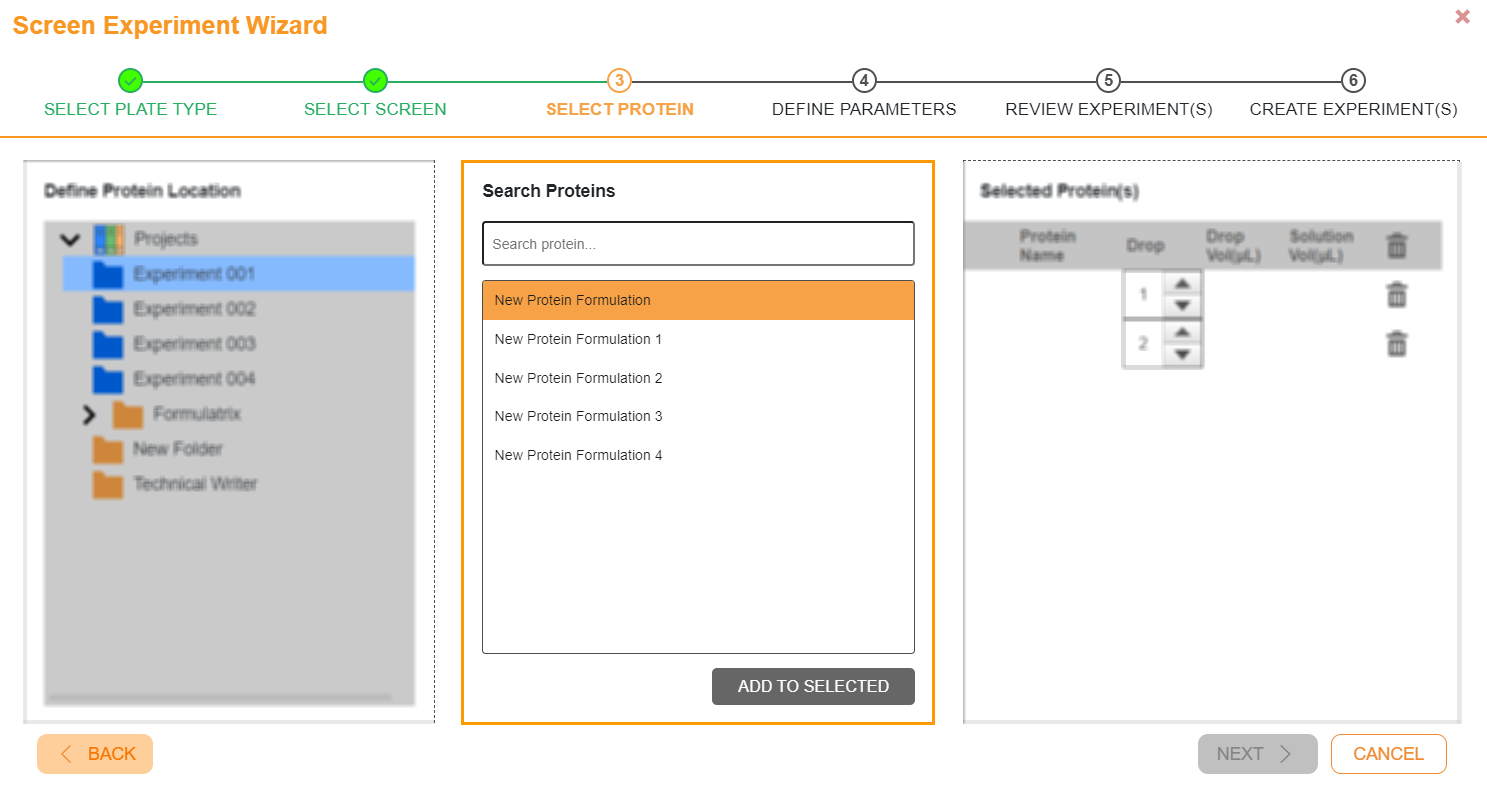
Search Proteins Section
To select two proteins at once, press Ctrl on your keyboard while selecting the proteins.
The protein(s) you select will be added to the Selected Protein(s) section.
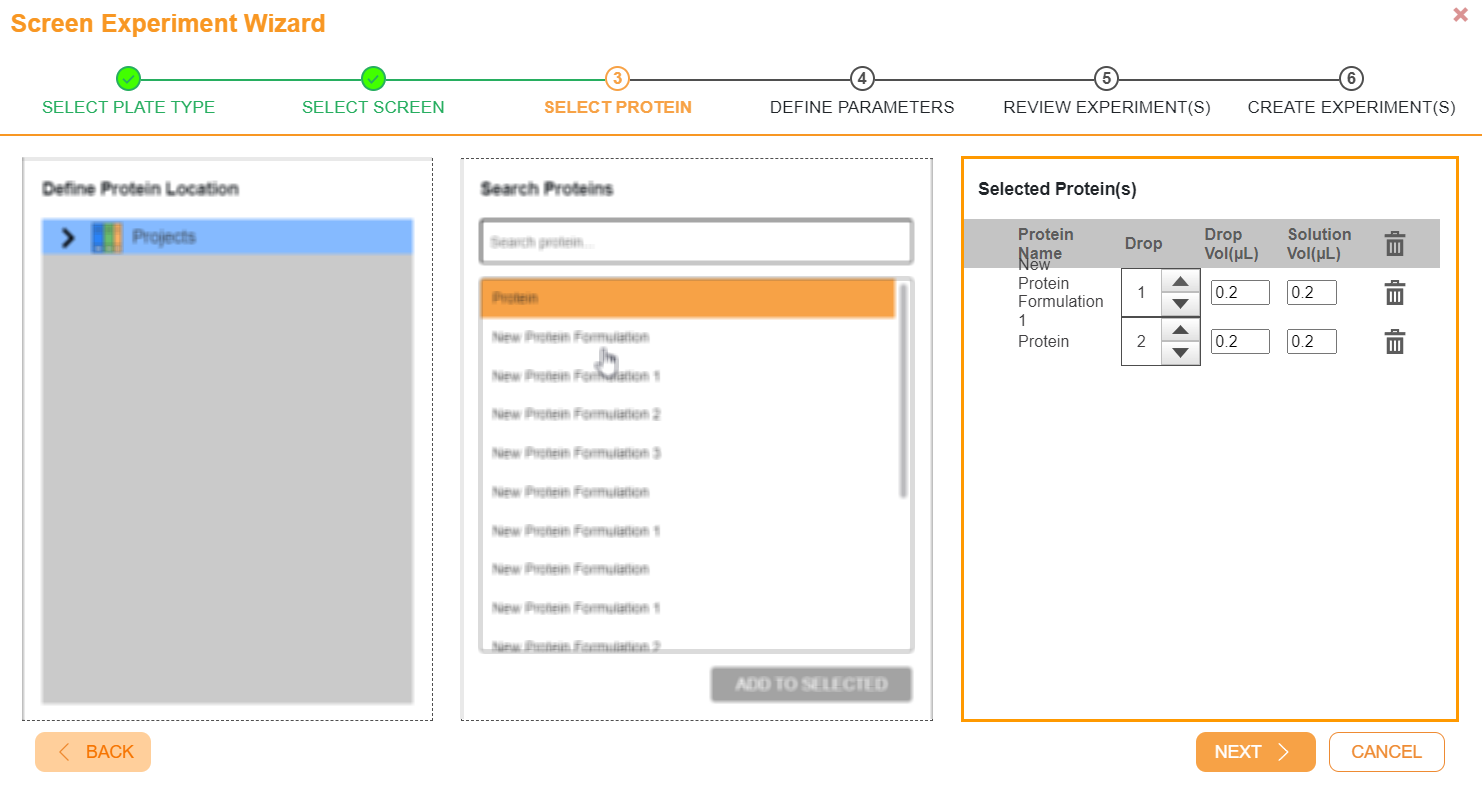
Selected Protein(s) Section
Click Next.
Select the owner of the experiment in the Select Owner field. Then, set the incubation temperature by clicking on one of the boxes in the Selected Incubation Temperature section.

Select Owner and Selected Incubation Temperature Sections
Set the imaging schedule in the Schedule section by choosing an option from the Scheduling dropdown. The scheduling table below the Scheduling dropdown displays the option you set in ROCK MAKER.
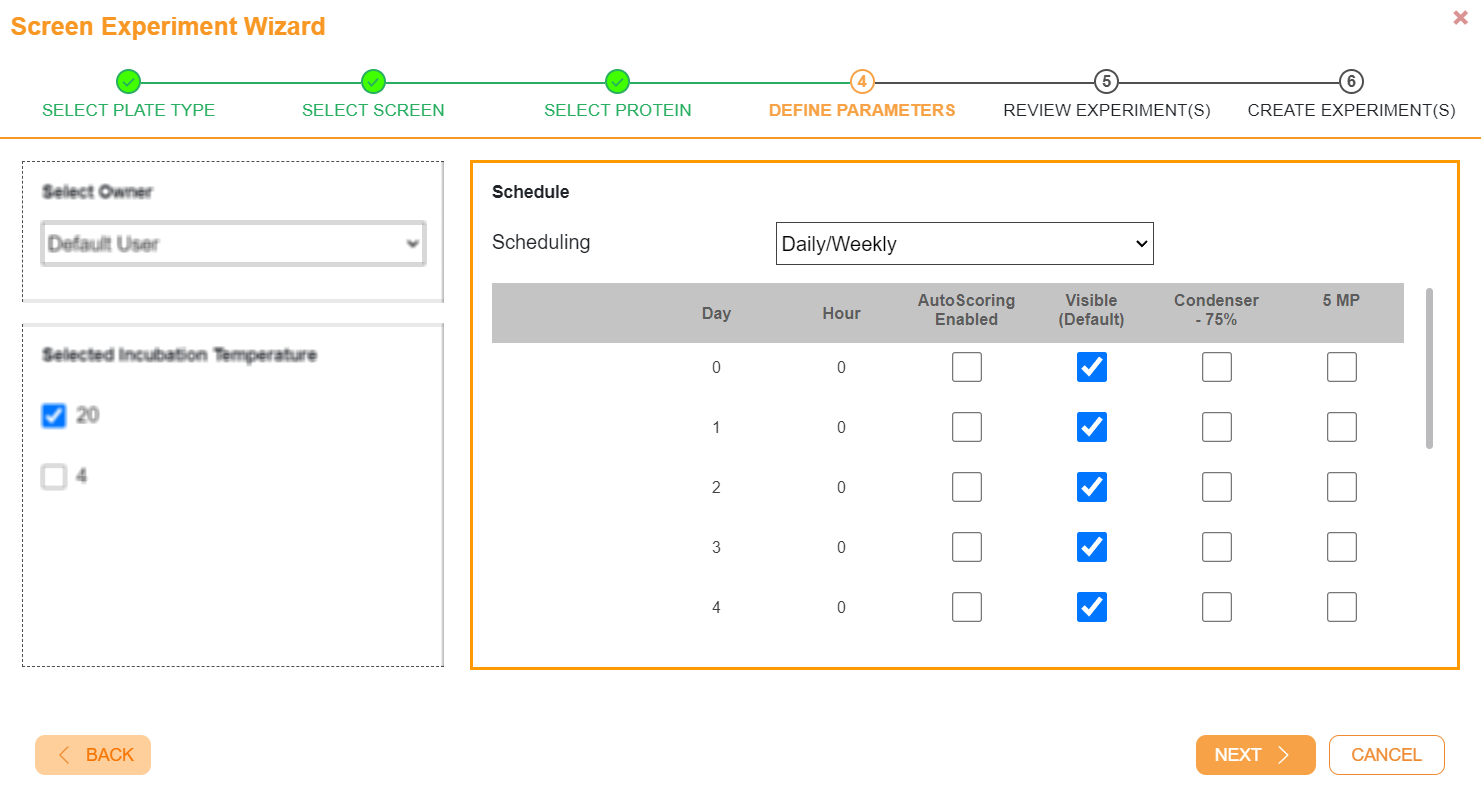
Schedule Section
Click Next.
Select a location for your experiments in the Select Location for the Experiment(s) section.
OR
Create a new location by clicking the NEW FOLDER or NEW PROJECT button.

Select Location for the Experiment(s) Section
After a location is set, your experiments will be added to the Experiment Name Review section. To modify all experiment names at once, click any checkboxes and complete the fields next to them accordingly. To modify the names one by one, edit them in the Screen Experiment Name fields.

Experiment Name Review Section
Click Next, and the software will create your experiments. If successful, a confirmation message on the Create Experiment(s) page will inform the location of the created experiment.
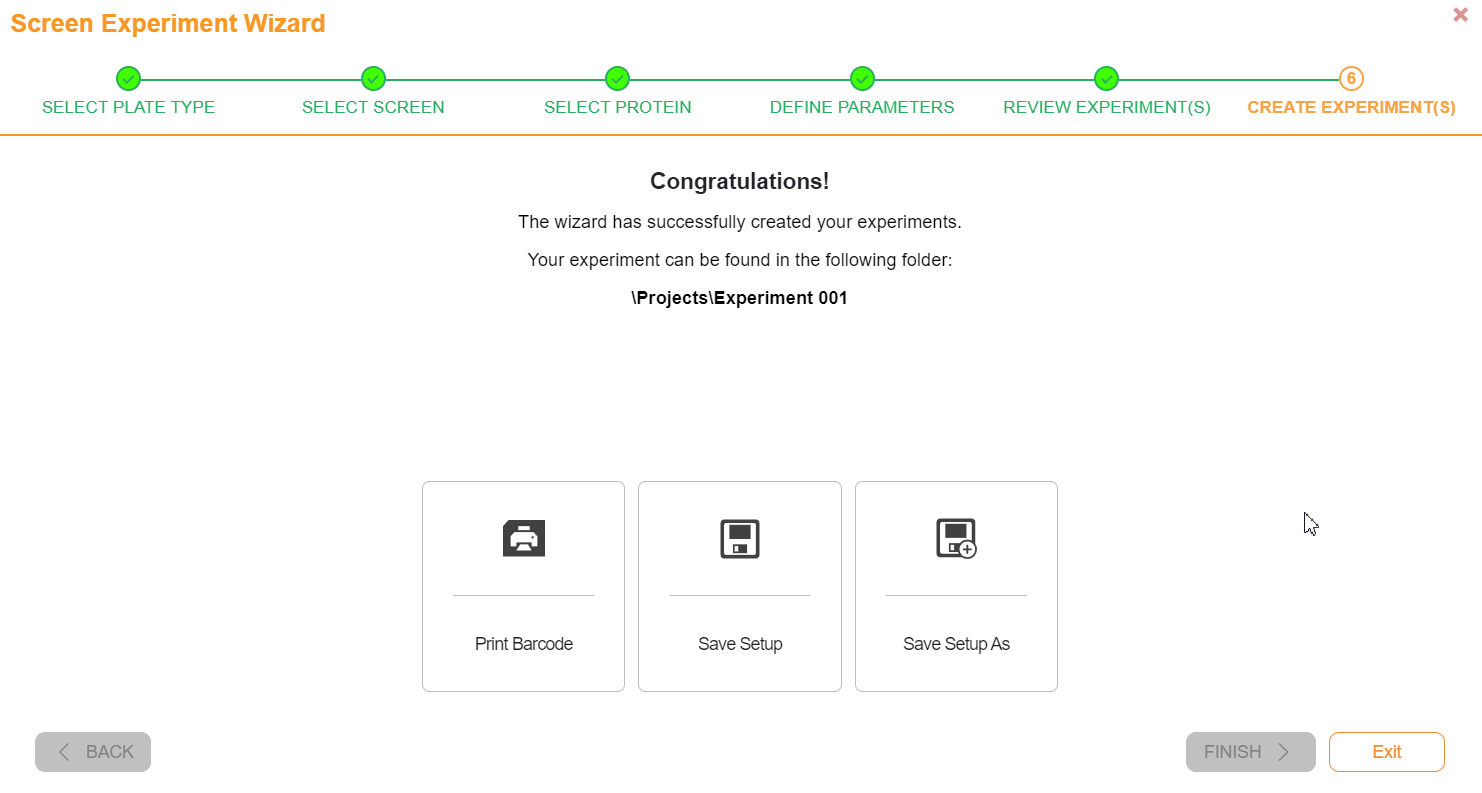
Confirmation Message
You can choose what to do with the created experiments by clicking any of the buttons below the confirmation message.
Print Barcode to print the screen barcode you have just created.
Save Setup to save the wizard setup.
Save Setup As to save the wizard setup with a different name.
Exit to close the wizard.