Creating an Experiment
Prerequisites:
You have defined at least one plate type.
You have created at least one protein formulation.
To create an experiment:
In Explorer, open a project
 . If you do not have any project, create a project first.
Note
You can only create an experiment inside a project
.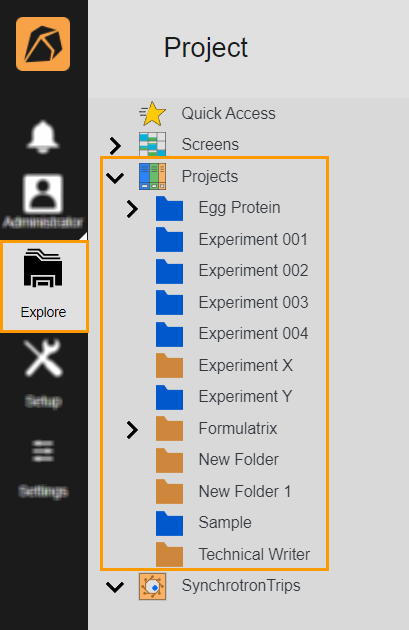
Opening a Project
Click the Add button
 and select Experiment.
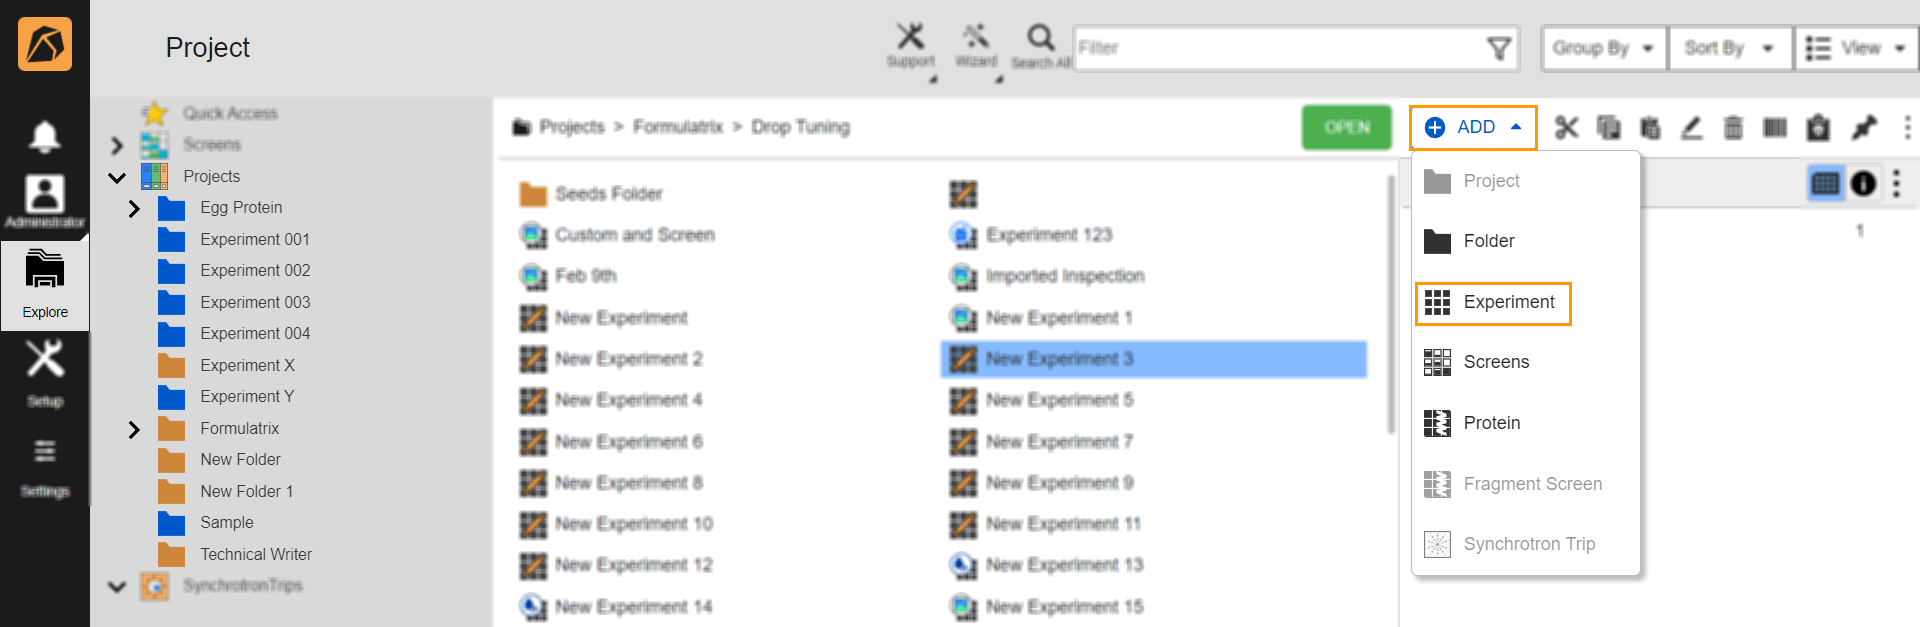
Add Button and Experiment Option
You will be directed to the experiment page, and the Info menu will open by default.

Experiment Page
Then, complete the following information.
Experiment Info Section
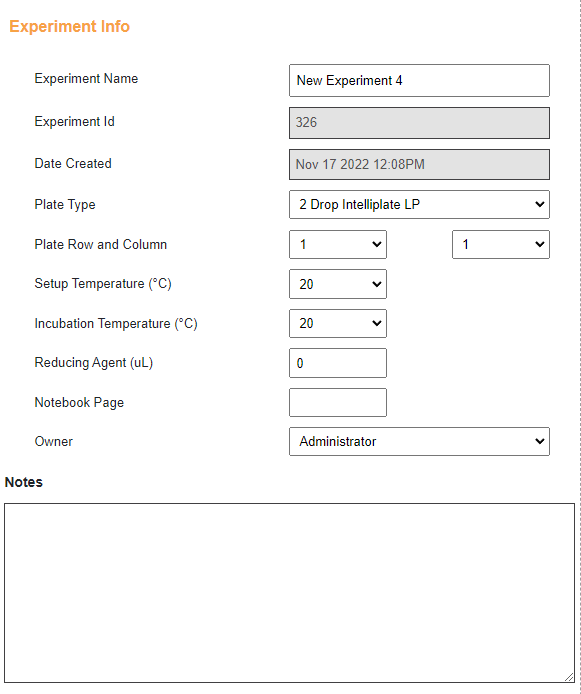
Experiment Info Section
Type an experiment name or use the default name in the Experiment Name field.
Important
You can only rename dispensed experiments.
Select a plate from the Plate Type dropdown menu.
Select the number of the row and column for your plate from the Plate Row and Column dropdown menu.
Note
This field will be unselectable if you only have one plate option.
Select the temperature at which your plate is set up in the Setup Temperature (°C) dropdown menu.
Select a plate storage temperature from the Incubation Temperature (°C) dropdown menu.
Select an owner of the experiment from the Owner dropdown menu.
OPTIONAL
You can type:
A value of the reducing agent to add to an experiment in the Reducing Agent μL field.
The page in your notebook referring to the same experiment in the Notebook Page field.
Any notes in the Notes box.
Imaging Schedule Section
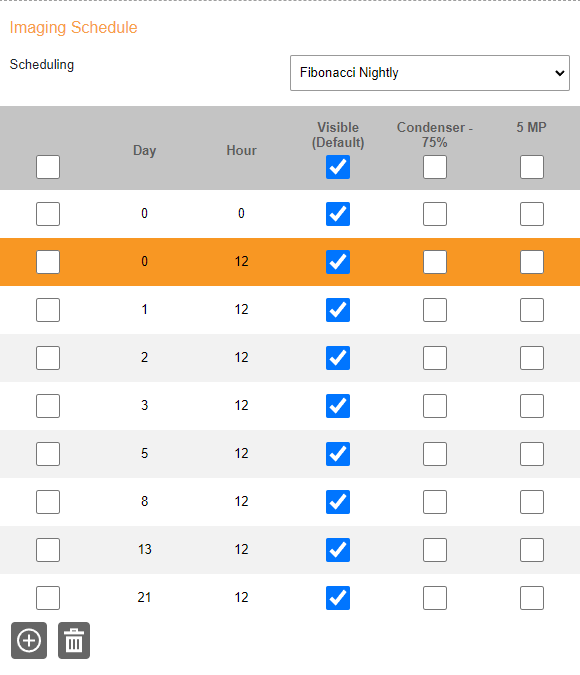
Imaging Schedule Section
To define the imaging schedule:
Select a schedule from the Scheduling dropdown menu or customize the schedule in the table below the Scheduling dropdown. Clicking a checkbox at the top of a column will automatically select all checkboxes in the column.
Note
Add a row to the list by clicking the Add button
 and delete a row(s) by selecting a row(s) and clicking the Delete button
  .
.
Dispensing Section

Dispensing Section
To select a dispensing device:
Go to the Dispensing Device dropdown menu and select a dispensing device.
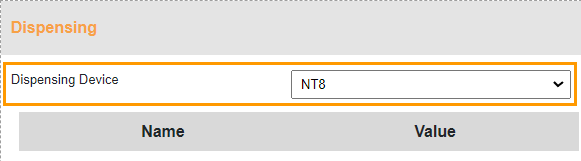
Dispensing Device Dropdown Menu
Modify the settings for the selected dispensing device by adjusting the Value column. The example below uses NT8.
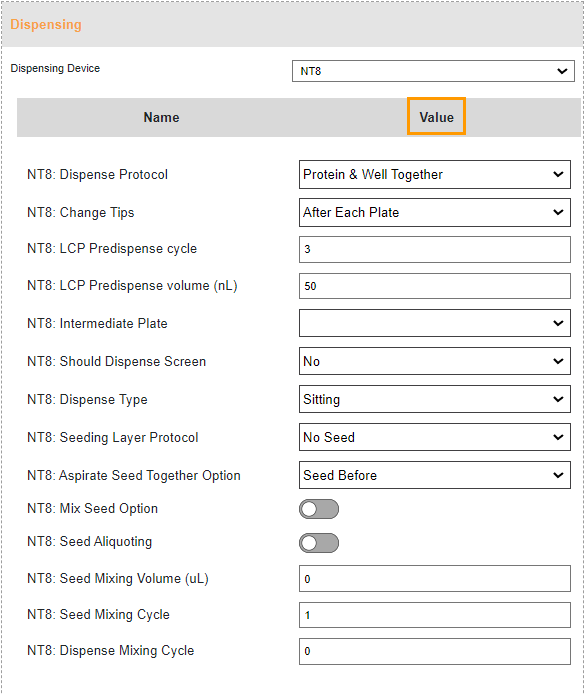
Value Column
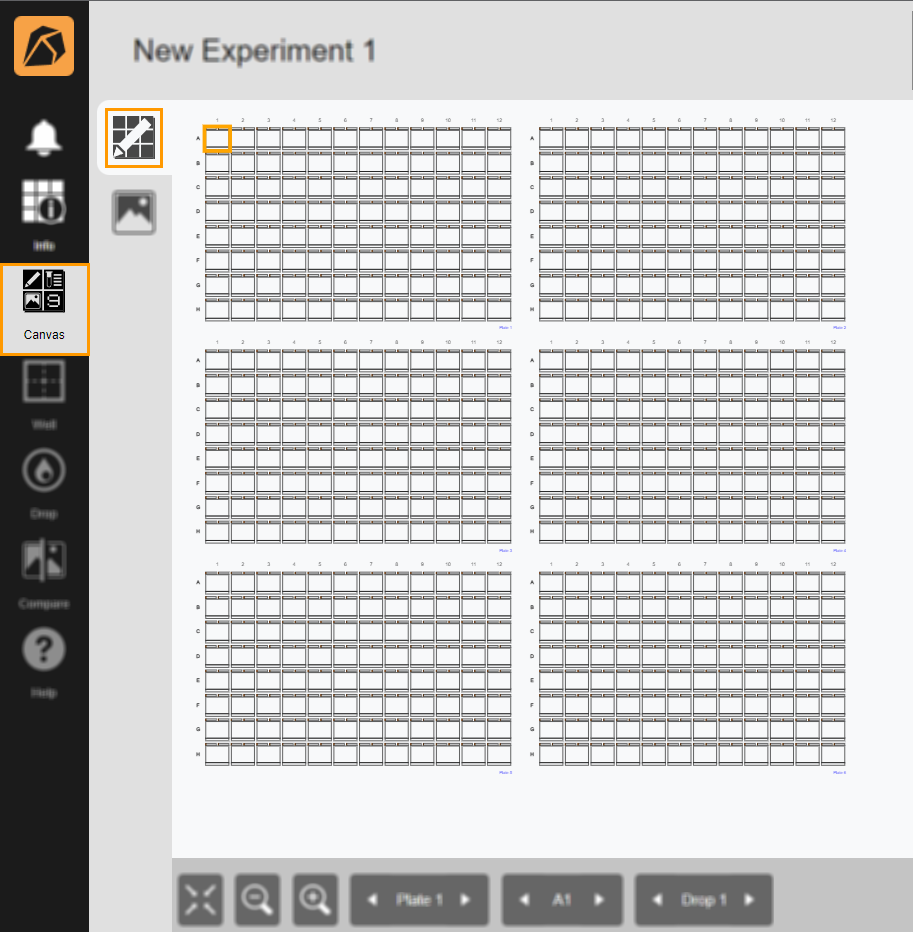
Go to the Canvas menu to proceed with your experiment design.
Creating an Experiment with Multiple Plates
You can create and arrange multiple plates in an experiment.
To create a single experiment with multiple plates:
Go to the Experiment Info section in the Info menu and define the number of plates you want to have in the Plate Row and Column fields. The first field defines the row, and the second specifies the column. If you want to have six plates arranged in three rows and two columns, like the example below, select three in the first field and two in the second field.
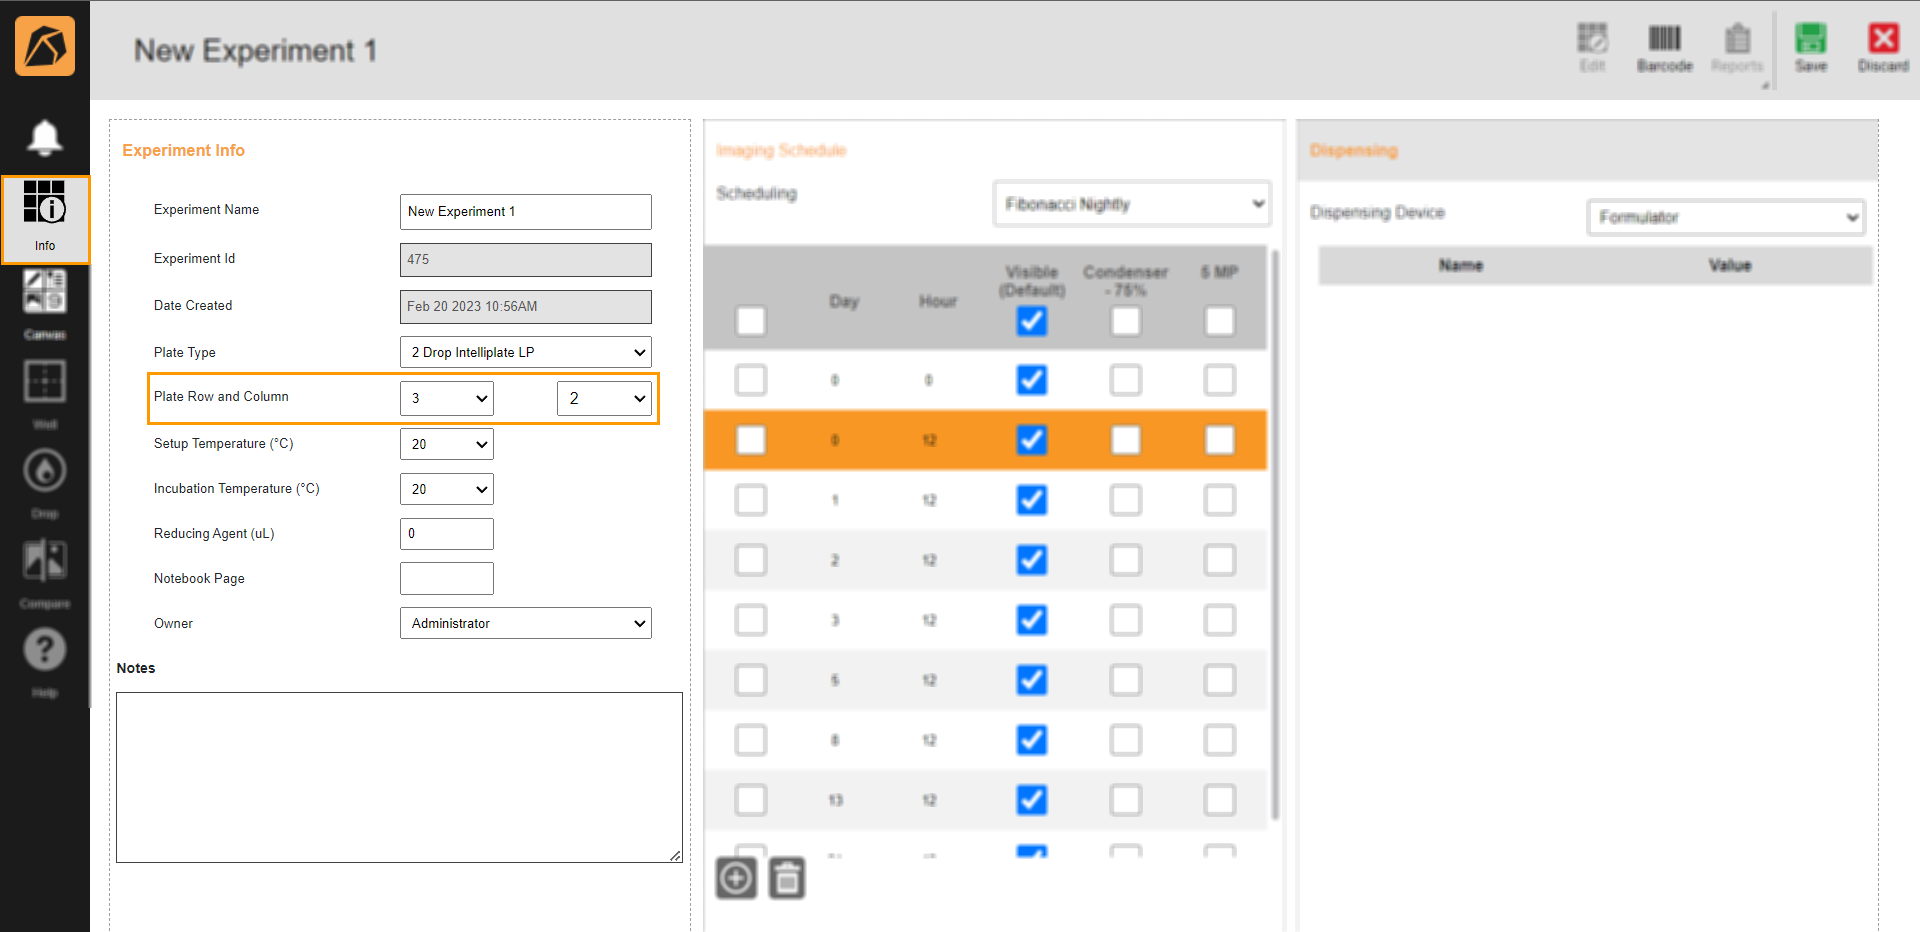
Plate Row and Column Field
You can see the plate arrangement in the Design view in the Canvas menu.
3 Rows and 2 Columns Plate View
Make sure to complete other needed information in the Info menu and save it before you work further with your experiment.
Related Topics: