Configuring Quote Line Items
After creating or cloning a Quote draft, you must immediately configure the Quote line items before submitting it for approval. This is the process where you specify the main product and its options in your Quote to boost sales. During this process, you must include accurate information since the customer will rely on it.
Configuring the Quote line items involves five key steps:
Configuring the line items
Configuring the shipping and installation costs
Editing the terms
Reviewing the Quote line items checklist
Reviewing the Quote line items summary
These steps apply to all Quote types, except for the Service Estimate Quote, in which you only need to configure the Quote line items and review their summary.
Note
The Quote wizard interface for configuring the Instrument, Consumable, and Maintenance Quotes are slightly different. Please continue reading below to learn how to configure line items for these Quotes.
Prerequisites
You have created a Quote.
You are authorized to configure Quotes. Contact the TIGA team to get access.
You have selected the desired Quote record in the Quotes main table.
Configuring Line Items for the Instrument and Consumable Quotes
Adding Products
Add the line items for the products you are quoting. Include quantities, prices, and discounts, if applicable.
Go to the Actions menu, and then click Configure Quote. The Edit Line Items section in the Quote wizard will display all the products that are being quoted.

The Line Items Section in the Quote Wizard
Click the Plus button next to the name of the product you want to add to your Quote.
Note
After adding items, TIGA may offer you their options and additional suggested products. There may be validation rules, such as minimum and maximum quantities, depending on the product.
Enter the product information as necessary. You can change some information, such as descriptions, pricing, quantity, and the discount for the selected product in each corresponding column.

The Line Items Section in the Quote Wizard
Tip: You can hide or display certain “products’ child” by clicking the green eye or red-eye icon next to the S&TC column.
In the lower-right corner of the window, click Next to proceed with the Shipping and Installation costs configuration.
Configuring Shipping and Installation Costs
In the Configure Shipping & Discount window, specify the discount, shipping, and installation cost fields for all of the items being quoted.
Note
The discount fields in this window will be disabled if you have previously specified any line items’ discounts in the Edit Line Items window.

The Shipping & Discounts Window
Configure Discount
Discount in Percent — Type the total discount applied as a percentage, if any.
Discount in Nominal — Type the total discount applied as a currency amount, if any.
Discount Type — Select the correct discount type for your quote from the Discount Type list.
Configure Shipping & Travel
Installation Type — Select one of the following options:
Install by Visit — Select this option if support must install the selected product(s) at the customer site.
Remote Install — Select this option if support must install the selected product remotely.
No Install Needed — Select this option if the customer can install the selected product themselves.
Override Price — Select this option if you want to override the current shipping or installation costs.
Shipping and Travel for Installation — Read only. The information in this field is taken from the Travel Cost column in the Quote - Shipping Zone Cost table and the Zone Price Factor Override field in the Quote window (if applied).
Shipping — Read only.
Installation Cost — Read only.
This field is only applicable to instrument quotes.
Click Next to start Editing the Quote terms and conditions.
Editing the Terms and Conditions
In the Terms section, TIGA will display a set of optional terms and conditions that it thinks applies to your products best.
Terms that have a checkbox on them are not selected by default, they are lightly recommended. You can check off the check box to include them.

The Terms Window
Some terms need a selection and show up as a drop-down. If you select the Custom Payment Term option, it is recommended that you enter a custom term as an alternative. For example, in the Payment drop-down select the desired payment option that you want to apply.
You can enter custom terms in the corresponding field. Don’t forget to click Add. You can later remove them via the X button.
You can also remove default terms via the X button and then reapply them via the curved-arrow button.
Click Next to review the Quote checklists and submit the Quote for approval.
Reviewing Checklists and Submit the Quote for Approval
Review the line items’ checklist and select or unselect items as necessary.

Checklist Window
Click Next. You must review the line items’ summary.

Review Summmary Window
When done reviewing the line items’ summary, click Submit to proceed to the next process.
OR
Click Save if you want to revisit the Quote later. When you return to your Quote, your previous selections will be available.
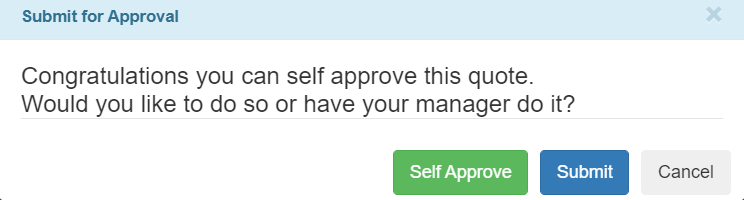
After clicking the Submit button, the Submit for Approval dialog will appear. You can then do the following steps:
If you’re already in the Quote - Self Approvals group, click Self Approve. A Quote can be self-approved if it has discounts less than the maximum discount limit.
Self Approving Quote
If you want to let your manager approve your quote or other people do so, click Submit in the Submit for Approval dialog, then choose one of the following options:
Submit to My Manager—Select this option if you want to submit your Quote to your manager.
Let other approve—This option allows you to pass the Quote approval to people other than your manager.
Sales Notes—You can add sales notes to internal Quotes before submitting them to the Quotes’ approver for review. You can write any sales information, such as discounts or other customer requests.

Submit for Approval Window
Click Submit.
Post Conditions
After following the tutorial below, TIGA will send a notification to the Quote approver. The approver must carefully review the Quote before approving or rejecting it. See also, Approving Quotes.
Configuring Line Items for the Maintenance Quote
Maintenance Quotes have a slightly different interface for selecting and configuring line items.
From the list of currently installed products at the customer, select the product(s) that you want to add maintenance for, and click the + button to add it.
Set the Start and End of the maintenance period. If the maintenance period is not known yet, you can set them as TBD. To do this, click the green eye icon next to the End Date field. Once you do that the field becomes disabled and TBD will be shown on the Quote PDF.
Change other information, such as Quantity and the Price Factor for the selected item in each corresponding column, if needed.
Click Next to go to the Terms section.
In the Terms section, you can enter custom terms in the corresponding field. Don’t forget to click Add. You can later remove them via the X button.
You can also remove default terms via the X button and then reapply them via the curved-arrow button.
Click Next until you see the Review Summary section, then you can either save the Quote line items or submit it for approval via the Save or Submit button.

Configure WIndow
Configuring Line Items for the Service Estimate Quote
Similarly, Service Estimates are a little different as shown below.
Go to the Actions menu, and then click Configure Quote. The Edit Line Items section in the Quote wizard will display all the products that are being quoted.
Click the Plus button next to the item that you want to add to your Quote.
Change some information, such as pricing, quantity, and the discount for the selected item in each corresponding column.
Optional: If you’re unable to find an item to add to your Quote, you can import additional spare parts by clicking Import Parts in the lower-left corner of the Edit Line Items window, selecting the desired spare part you want to include, and then clicking Create in the lower-right corner of the spare part window. You will have to wait for a product manager to enter the pricing for the new part you want to include.
Click Next. You can add additional cases to the Quote from the Link Additional Cases section allowing you later trace back to work on each of the cases.
In the review section you can check off the Generate SE option and click OK to submit the Quote. After you have submitted the Quote, its status will change from Draft to In Progress and you can’t revert or change it.
Select the Generate SE checkbox and click OK to save your changes. The Quote status will change to In Progress.
Note
If the Generate SE checkbox is not selected, the Quote status will stay as Draft.
Configuring the External Quote
After configuring Quote line items, you may need to configure the external Quote that will be sent to the customer.
Select the desired Quote draft, then click click the Configure External Quote command in the Actions menu.
Double-check all the information in the Configure External Quote window and make sure they’re all correct. You may want to adjust the items’ Price, Quantity, and so on.
You can quickly load the current Quote line items that have been configured before via the Import from Internal button.
Note
The External Quote line items are stored in the Quote - Custom Quote Line Items related section in the Quotes table. The Internal Quote line items are in the Quote Line Items.
When done, click Create. The Quote can be sent for approval.
Related Topics: