Deleting Images
If you have issues with disk space from keeping too many images of old or un-scored drops, you can recover that disk space by executing an image management task to delete the unneeded images. In this section, you will learn different methods to delete images using both the Basic and Advanced options in Image Management.
Note
Any parameters given in the examples — such as Score Group or Min. Age of Images — can be changed according to your needs.
Deleting Images without Scores
In this section, you will learn how to delete images without scores.
To delete images without scores:
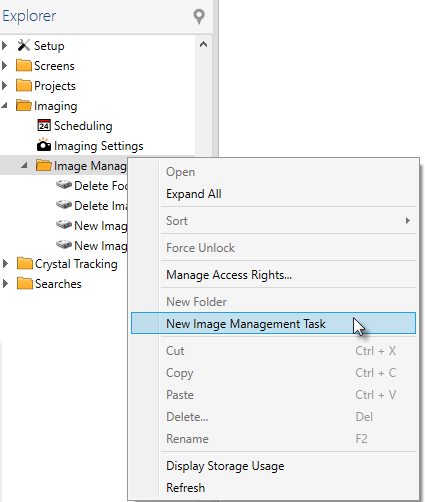
On the Explorer, click the Imaging folder and open the Image Management sub-folder. To create a New Image Management Task, right click on the Image Management and select New Image Management Task.
New Image Management Task
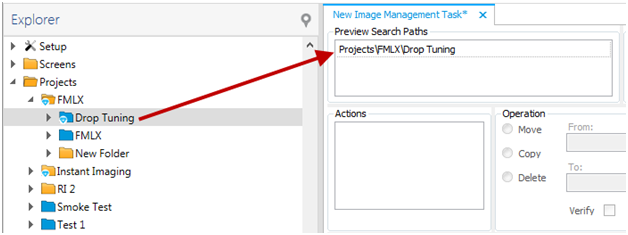
Drag your experiment folder to the Preview Search Paths area.
Drag Your Experiment Folder to the Preview Search Paths Area
Right-click on the Actions column and select New Action.
On Operation, click Delete.
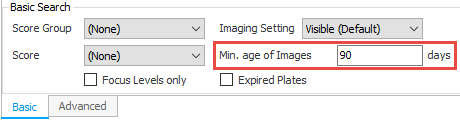
On Basic Search, next to Score Group, select None.
Next to Score, select None to find unscored images.
Next to Imaging Settings, select which Imaging Setting you want to include from the provided list.
Next to Min. age of Images, enter the age (in days) of the images you want to include. This will include all the images older than the value entered in this field. If the value is set to zero, all images will be included regardless of age. In this tutorial, the minimum age of images is 90 days.
Note
If the Min. age of Images is kept at 0 days, all images matching the other parameters will be deleted.
Basic Search
Note
Select Focus Levels only if you only want to delete focus level images.
Note
Select Expired Plates if you want to delete images that exceed their expiry dates.
Deleting Images with Scores
In this section, you will learn how to delete images with scores. The following steps are designed to remove images which have outdated or uninteresting scores.
Important
Do not apply these steps if you are using the Auto Scores feature.
To delete images with scores:
Refer to steps 1-4 from deleting images with no scores. Then, you can continue with these steps:
On Basic Search, next to Score Group, select the desired Score Group from the list provided. In this tutorial, select Default from the Score Group list.
Next to Score, select the desired score from the list provided. In this tutorial, select Dust from the Score list.
Next to Imaging Settings, select which imaging setting you want to include from the provided list.
Next to Min. age of Images, input the minimum age of images you want to include in your search. In this tutorial, the minimum age of images is 90 days.
Deleting Images with Specific Criteria
The Advanced tab is helpful when you want to delete images with specific criteria. You can select Add Constraint, Add AND, Add OR, Add NOT, and Change to OR according to your needs.
For example, in this tutorial you will use the Advanced tab for deleting images which are older than 90 days and owned by the administrator. The images in this tutorial are also scored as either “Dust” or “Clear,” and contain the protein Lysozyme.
Note
The steps provided here are only examples. You can always modify and change the details according to your needs.
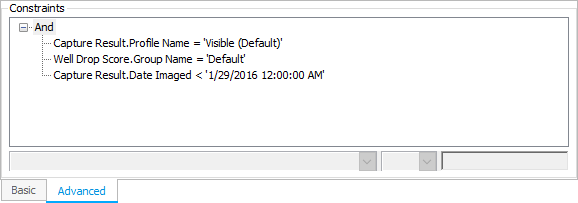
Please refer to steps 1-4 from deleting images with scores, but in this case you need to leave the Score blank in order to specify scores that you are going to delete. When you have set all variables such as Score Group, Score, Imaging Setting, and Min. age of Images in the Basic tab, and when you select the Advanced tab it will also appear as a set of constraints.
Advanced Tab
Then, you can continue with these steps:
Right-click on the And and select Add Constraint.
Select Protein Formulation Ingredient.Name from the provided constraints list and select = from the dropdown windows.
Type Lysozyme in the box and press Enter.

Add Constraint
Then, right-click on And and select Add Constraint.
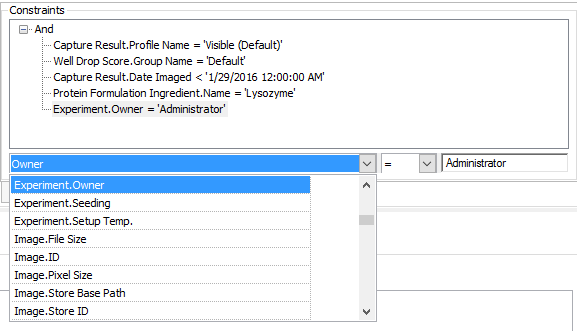
Select Experiment.Owner from the provided constraints list, then select = from the dropdown windows.
Type Administrator in the box and press Enter.
Add Constraint
Then, right-click on And and select Add OR to add new directory.
Right-click on the newly added Or and select Add Constraint.
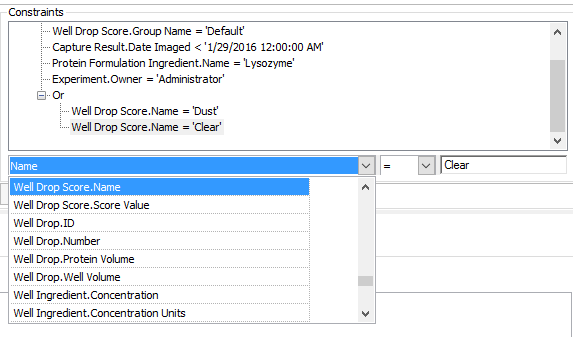
Select Well Drop Score.Name from the provided constraints list, then select = from the dropdown windows.
Type Dust in the box and press Enter.

Add Or
Then, right-click on And and select Add OR to add new directory.
Right-click on the newly added Or and select Add Constraint.
Select Well Drop Score.Name from the provided constraints list, then select = from the dropdown windows.
Type Clear in the box and press Enter.
Add Or
Important
The < or > sign can only be used for numeric comparisons.
Click Start to start the search.
- A dialog box appears asking you to confirm that you want to execute the image management task without first previewing the results. If you would like to preview the Images to be deleted, select Yes to execute the search and delete process, or No to display a preview of the results before the deletion occurs.
Related Topics