Adding Ingredients and Working with Layers
There are several ways to create and manipulate layers, which is what you use to manage the ingredients in an experiment design.
Topics:
Adding Layers to the Canvas
You can create a layer by selecting the appropriate design tool and then clicking and dragging to draw the layer on the canvas.
In the Experiment tab set, click the Design tab.

Design Tab
In the Add Ingredients group, click the button that represents the type of layer you want to add to your experiment.
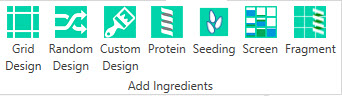
Add Layer
Drag the mouse over a group of wells to select them.
When the layer is the desired size, release your mouse button. The new layer will be indicated by a red border.
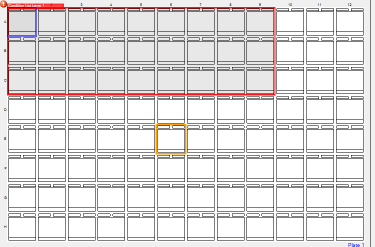
The New Layer will be Indicated by a Red Border
Type a descriptive name for the layer in the Name box. If necessary, adjust the Target and Volume.
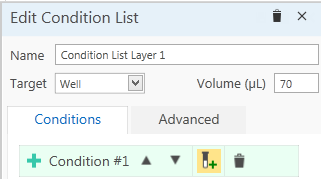
Edit Condition List
Add ingredients.
Creating New Layers by Copying and Pasting Wells
You can copy any number of wells from the Canvas and paste them into a different location to create new layers within the same experiment or a different experiment. You can choose to make the resulting layer a grid layer, random layer, or custom layer. Your choice determines how the copied wells will be used in the new layer.
The following table describes the results of creating each type of layer.
Layer Type |
Result |
|---|---|
Grid Layer |
A separate grid layer will be created for each well that was copied, and each layer will contain the ingredients of the copied well to which it corresponds. The new overlapping layers will cover the entire plate. All ingredient concentrations and volumes will be set to zero. |
Random Layer |
The new layer will cover the entire plate. ROCK MAKER will create ingredient groups and assign ingredients to them based on the ingredients of the copied wells. A probability of 1 will be assigned to each ingredient group, and the probabilities for the ingredients within each group will be equal. |
Custom Layer |
The new layer will contain one condition for each well that was copied. The properties of the new conditions will match those of the conditions in the copied wells. |
Protein Layer |
The new layer will contain the protein formulation that will be used in one or more of the drops for the selected wells. |
Seeding Layer |
The new layer will contain crystal seeds that will be used in one or more of the drops for the selected wells. |
Screen Layer |
A screen layer is a layer for which the conditions have been defined by a screen lot. Each screen layer can contain only one screen lot. |
Fragment Layer |
The new layer will contain a fragment that will be used along with the protein sample in the drop for co-crystallization. |
To create a new layer by copying and pasting wells:
Select the wells that you wish to copy.
Right-click the wells and select Copy.
Locate the area where you want to create a new layer using the wells. You can paste the wells onto the same canvas or onto the canvas of a different experiment.
Right-click and select Paste. The dialog displays a question about where you want to put your layer.
Select the type of layer you want to create from the list.
Check “Substitute source stocks with prepared stocks” in order to replace ingredient stocks with the one that are marked as prepared from ingredient stock list, or uncheck to use the original ingredient stock.
Click OK. ROCK MAKER creates the new layer and pastes the wells into it.
Design the new layer as you see fit.
Alternatives:
Drag-and-drop onto a project:
Select the desired wells.
Drag them to a different project in the Explorer.
Select a layer type.
Drag-and-drop onto a canvas:
Select some wells.
Hold down the Shift key, then drag the wells to the Canvas of a different experiment.
Select target type.
Moving Layers
You can drag a layer from its location to a new location on the plate.
Click the layer’s name tab, and drag the layer to the new location.
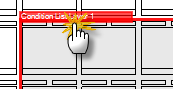
Click the Layer’s Name Tab
Renaming Layers
By default, ROCK MAKER names a layer according to its type. You can change this default name to one of your choosing.
Note
You cannot rename a layer if it has already been dispensed.
To rename a layer:
- Click the layer in the Edit group of the Design tab to select it.
Type a new name into the Name box.
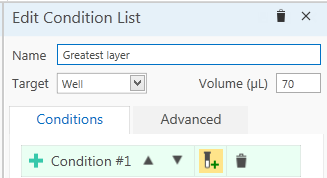
Edit Condition List
Duplicating a Layer with Copy/Paste
You can duplicate a layer by copying it and then pasting it into a new location on the same canvas or on the canvas of a different experiment.
Right-click the layer’s name tab and select Copy.
Locate the area into which you want to paste the layer. You can paste the layer onto the same canvas or onto the canvas of a different experiment.
Right-click and select Paste. A copy of the layer is created in the new location.
Copying and Pasting Conditions to External Applications
You can copy any number of wells or any single layer from an experiment’s Canvas tab and paste them into external applications. Currently this functionality is available for Microsoft Excel, Word, and Notepad.
To copy and paste conditions to an external application:
Select the wells or layer that you wish to copy to an external application.
Right-click the wells and select Copy.
Open any of the external applications mentioned above.
- Right-click in the external application and select Paste.Conditions will be pasted in the following format (MS Excel):
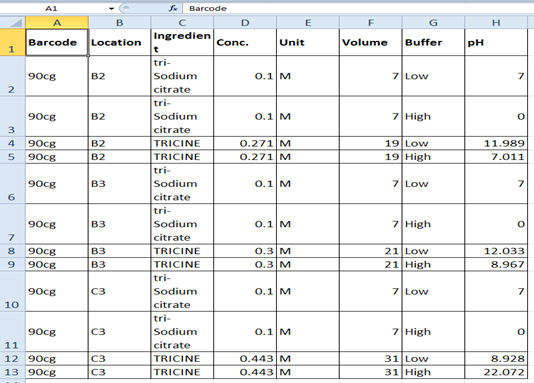
Conditions in MS Excel
Related Topics