The Explorer
The Explorer is the file structure for your projects, experiments, and protein formulations. It is also where you can access administrative and imaging settings and create and view Search and Filter searches.
ROCK MAKER projects and experiments are organized in a tree fashion, much like your files in Windows or OSX. This structure allows you to organize your files so that you have convenient access to your data. It is best to choose some consistent standard within your teams. For example, the hierarchy structure of your projects could be like this:
<PI> \ <Staff> \ <Protein> (usually a project) \ <name>
Note
The name is commonly something that describes what you are doing. For example, “HEWL JCSG+”.
To make it easier for you to find the opened experiment from your
projects or experiment list, you can now click the Find Opened
Experiment button  . Clicking this button will automatically
display the currently opened experiment in the Explorer tab.
. Clicking this button will automatically
display the currently opened experiment in the Explorer tab.
Explorer
Using the Explorer
Explorer Tooltips
Right-clicking a node and selecting Show Info will briefly display
some information about the item, as demonstrated in the screen shot
below. You can also click the Show Info button  in the
Home tab to display the tooltips.
in the
Home tab to display the tooltips.
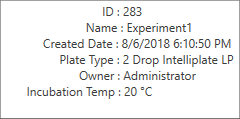
Example Tooltip
Tooltips are available for Screens, Protein Formulations, Experiments, Experiment Plates, and Projects.
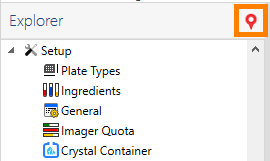
The Explorer includes a “locate me” button to help you locate the active experiment, which is useful if you have clicked around within the Explorer and wish to return to where the active experiment is.
Locate Me Button
Depending on the status of the items you select, you can hold down Shift or Ctrl on your keyboard and click the mouse on several different folders, projects, plates, or experiments in order to run a command on multiple items at the same time. Options include delete, print barcode, move to dispense queue, mark as dispensed, mark as not seen, and change the imaging schedule.
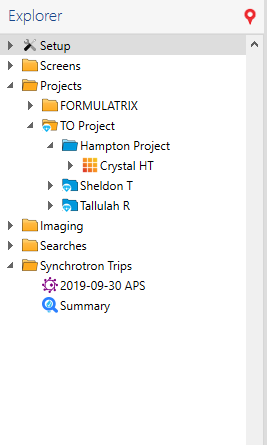
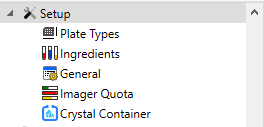
Setup Node
The Setup node is what you use to configure ROCK MAKER for operation. This is where you define and manage plates, ingredients, well score, imager quotas, experiment temperature settings, and other settings. For more information, see Administration.
Setup Node
Screens Node
The Screens node contains several folders, organized by vendor, where you will find commonly used commercial screens. FORMULATRIX always strives to keep these screens up-to-date and occasionally you might need to update the screen files in ROCK MAKER. You can both update and import new screen conditions from the ROCK MAKER XML screen file repository. You can also create your own screens.
Note
ROCK MAKER supports only its own file format called RMXML. If you wish to import a screen file from another company, it must be in RMXML format.
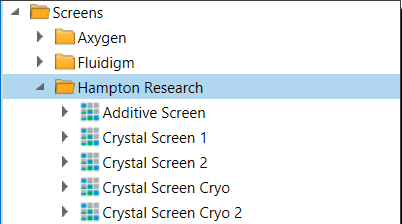
Screens Node
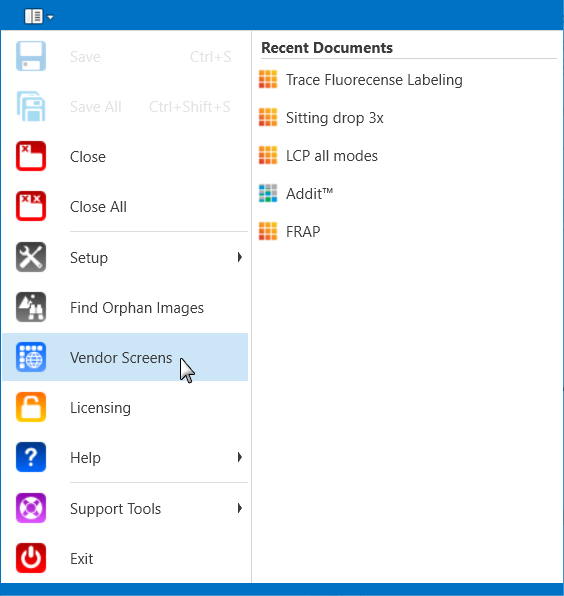
If a commercial screen isn’t in your database, please check the online vendor screens database list by going to the main ROCK MAKER menu at the top-left of the software window and selecting Vendor Screens. This is where you can also check if there are any updates on the existing screen files in your ROCK MAKER. If that’s the case, you can download the updated version and import it to ROCK MAKER.
Vendor Screens Link
Projects Node
You can organize your work into folders and projects. A project, which is a blue folder, has special permissions that a regular folder does not. A project is a parent folder for an experiment, protein formulation, screen, or search and filter. A regular folder is just an organizational tool.
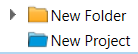
Folder vs. Project
Folders, screens, experiments and plates all have various icons that will change based on the status of the item. For example, if an experiment contains a drop that has been scored as a hit, and you have configured which scores are a hit in the scores section of General setup, then a crystal icon will appear on top of the folder, experiment, plate, or project icon.
If an experiment or plate has new images, then the text will appear in bold to indicate that you have new images to review.
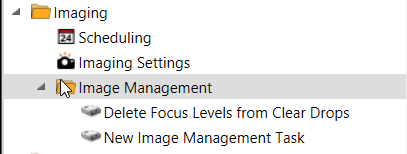
Imaging Node
The Imaging section is where you manage the imaging schedules, imaging settings, and image stores of your experiment plates. You can also create and save regular image management tasks to help you get the most out of your image storage space. For more information, see Image Management.
Imaging Node
Searches Node
The Searches node displays all saved searches that you have created, as well as some sample searches. For more information, see Search and Filter.
Synchrotron Trips Node
The Synchrotron Trips section is where you manage your crystals. Here you can create a Synchrotron Trip or view existing Synchrotron Trip data.
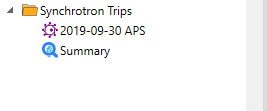
Synchrotron Trips Node