Tracking Ingredients with the Rack Editor
In the Rack Editor, you can define the ingredients you currently have on the dispensing deck of your dispensing robot. If you don’t have an ingredient scanner on your dispensing robot, the Rack Editor helps you keep track of the ingredient racks.
Using the Rack Editor
Open the Dispensing tab by clicking the Dispensing button
 on the Home tab.
Click the Rack Editor button in the Dispensing group on the Home tab.
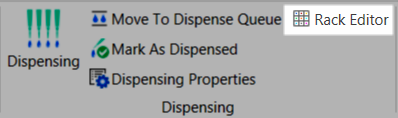
Rack Editor Button in the Dispensing Group
If you have not yet defined a rack type, right-click in the Racks table and select Rack types. Otherwise, skip to step 5.

Right-click and Select Rack Types
Right-click in the Rack Types table and select Add. Click in the appropriate boxes and type a name for the rack; the number of columns or rows; select a type (vials or trough); and type the volume and dead volume.
Right-click in the Racks table and select Add.
Type a name for the rack in the Rack Name box.
Select the rack type from the Rack Type list. Click in the rack type box and then click the down-arrow to display the list.
Right-click on the rack you created and select Place on Deck. The rack will move to the Deck table.
Click in the Site Name box and type the name of the site.
Right-click the rack and select Edit ingredients.
To add ingredients to the rack, drag an ingredient from the Ingredients table to its position in the Rack table.
To view only those ingredients needed for dispensing the plates currently in the Run Queue, select Run queue ingredients at the bottom of the window.
- Click OK when you have added all ingredients.
Click OK on the Rack Editor window.
Related Topics