Executing Image Management Tasks
You can execute an image management task in two ways:
From the Image Management node, which is found under the Imaging folder on the Explorer.
From Manage Image, on the Plate tab in the Images contextual tab set.
To execute an image management task from the Image Management folder on the Explorer, define the task and then click Start.
To execute an image management task from Manage Image in the Images contextual tab set, select the appropriate task from the list, click the Run button next to the corresponding menu, and then click OK.
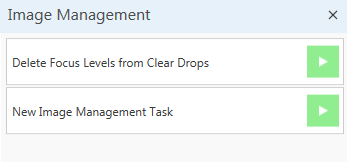
Image Management Tasks
Results Preview
When you execute an image management task, the Preview Results area of the image management task window will display a record of each task.
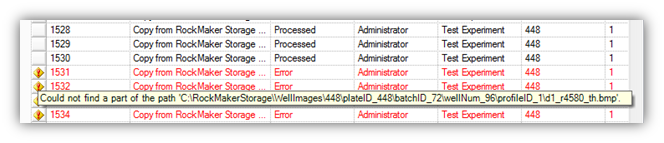
Each image record in preview results has a field for action status. The action status for each image can have any of following three values:
Pending. The image has not yet been processed.
Processed. The image has been processed successfully.
Error. An error occurred while trying to process the image.
If an image record has action status set to Error, the corresponding error message can be viewed in tooltip of row header, as shown below. To view the tooltip, simply mouse over the yellow alert button.
Results Preview
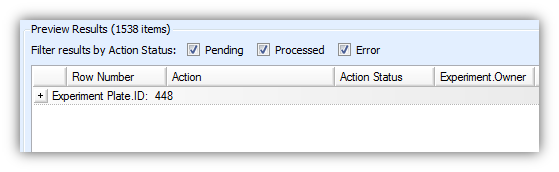
You can filter preview results in image management by action status.
To filter preview results:
Check the check-box of corresponding action status value if you want to see records belonging to that status or uncheck if you do not want to see records belonging to that status.
Filter Preview Results
Results Export
You can export image results that appear in the Preview Result panel. Results can be exported in XML, CSV, and tab-delimited text formats.
You can export results after the results grid is populated. To do so, take the following steps:
Right-click the results grid and select Export. You can select what kind of file you would like to export. A save dialog box will be displayed.
Select the type of file to export, enter the file name, and click Save.
Related Topics