Search and Filter Interface
-

Search and Filter Interface
1) Search & Criteria
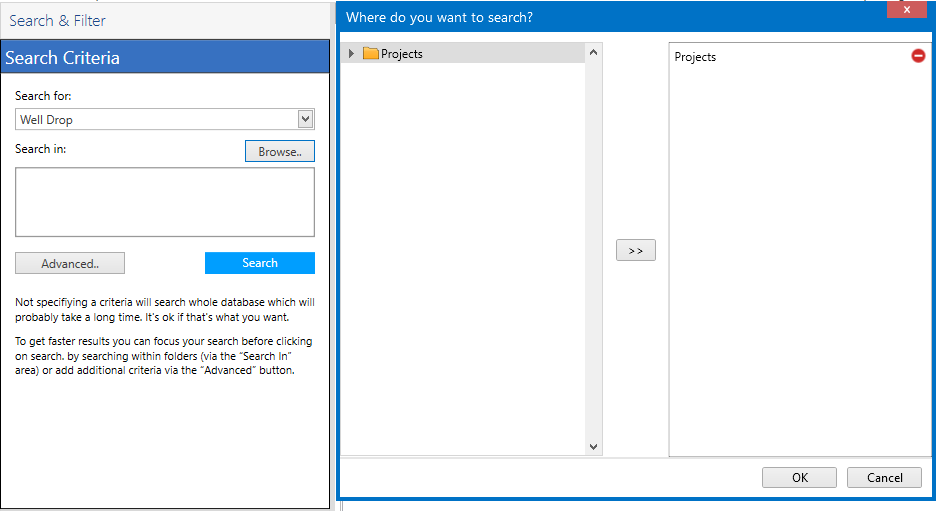
The Search Criteria panel is where you define the Search for and the
Search in values. The Search for value can be a project, experiment,
protein formulation, experiment plate, well, well drop, well ingredient,
region annotation, screen, or screen hits. Select what you are looking
for in Search for, then click Browse. Then, browse a project, an
experiment or even the whole folder from the search location, click
 and click OK. Your selected search location will appear in
the Search in table. Next, click Search.
and click OK. Your selected search location will appear in
the Search in table. Next, click Search.
Search Criteria Panel
Advanced Button
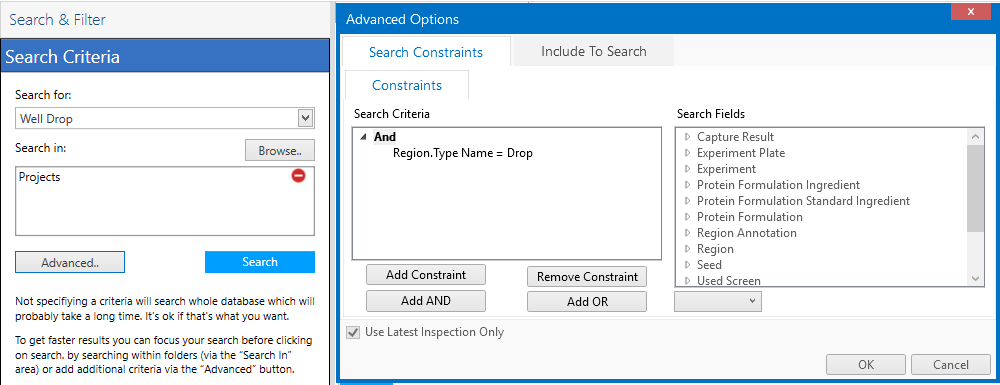
The Advanced options contain two tabs that provide tools for more specific search queries:
Search Constraint tab — The Search Constraint tab consists of the Constraints tab with two fields: Search Criteria for adding and removing constraints, and Search Fields for selecting the areas to define your search categories. ROCK MAKER uses these constraints to filter the database when you conduct a search, and you can apply multiple constraints to your search. Select the desired constraint(s) from the available list in the Search Fields and then click the Add Constraint button. You can use the Remove Constraint button, the Add AND button, and the Add OR button according to your needs, or select a specific date that corresponds to the data you are searching for. If you select the Use Latest Inspection Only option, only the latest image inspection will appear in your search result.
Search Constraint
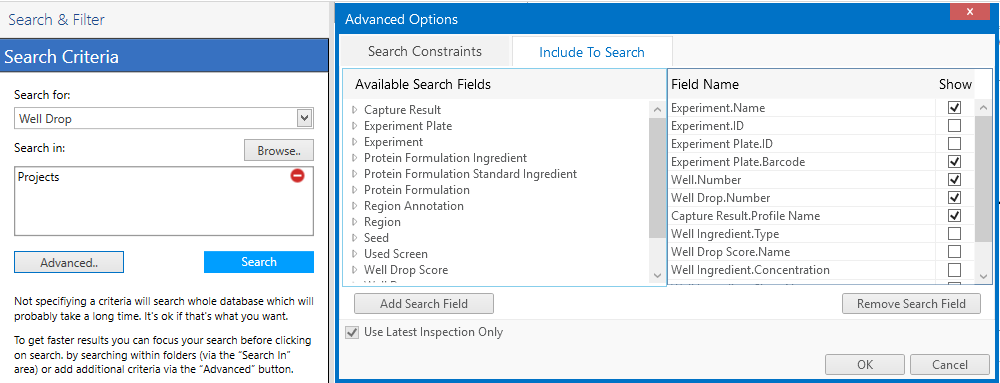
Include to Search tab — The Include to Search tab defines more specific fields to be included in a search. Select the area based on your needs from the Available Search Fields on the right side of your screen, then click the Add Search Field button. Or click the Remove Search Field button to remove the selected fields. Then, you can include or exclude a specific field for your search from the Field Name and click OK. If you select the Use Latest Inspection Only option, only the latest image inspection will appear in your search result.
Include To Search
2) Chart/Canvas/Drop/Compare Tabs
This portion of the screen contains multiple views for visualizing data, which are located on the following tabs:
Chart Tab
The Graph tab displays a graphical representation of data found in the search results. You can interact with this tab to graphically display data according to your needs. For more information, see Graphs.
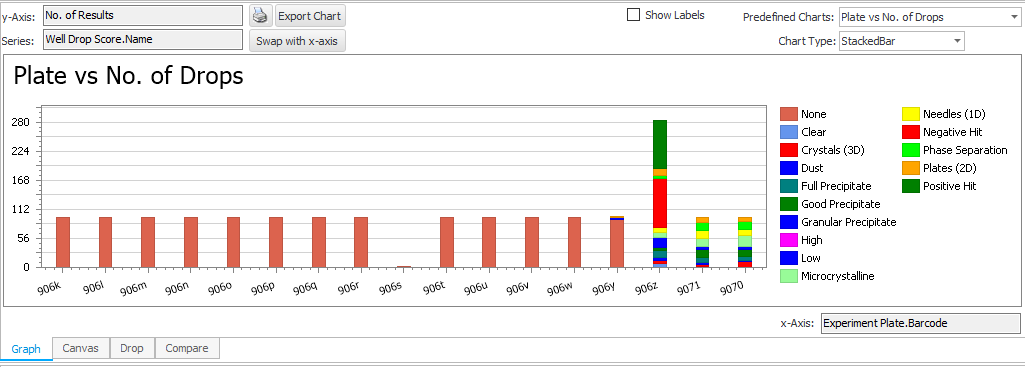
Graph Tab
Canvas Tab
The Canvas tab allows you to:
Show wells that are found in search results
View well design
View well Ingredients
View well Images and tuned images
View scores
Select wells
Select an ingredient with Alt+click for alpha blending
Zoom in and out
The Canvas tab is updated as you filter your search results.
Drop Tab
The Drop tab shows you a high-resolution image of the currently selected drop. You can access this tab by double-clicking an image on the Canvas tab. When on this tab, you can select a row from the result grid to show its respective image. For more information on the Drop tab, click here.
Compare Tab
The Compare tab is used to compare different images side by side. These images can be selected from the canvas, up to four images at a time. When multiple images are selected, they are displayed in the Compare tab in a 2x2 layout. The Compare tab can be used to view images of inspections, regions, imaging settings or drops of different well drops. For more information on the Compare tab, click here.
3) Search Results table
Search Results is a table of results based on the Search Criteria and Search Filters.
Search Results
The Search Results dock panel displays search results, grouped into pages of 1,000 entries or fewer. Columns in this grid can be added dynamically by dragging fields from the Search Fields panel to the Search Results. Fields can be removed by dragging them out of the panel. From this panel, you can:
Export search results to different formats
- Copy search results to the clipboard

Search Results Table
4) Instant Filters
Once search results are returned, the Instant Filter tab will automatically be enabled for you to filter the results. Two buttons will then appear: the Edit Filters button to narrow down your search results and the Apply Filters button to apply your selected filters. Besides these buttons, there are two options available: the Distinct Rows option to avoid duplicate records and the Enable All Filters option to enable or disable all the provided filters according to your own needs. The Instant Filters tab contains:
Edit Filters — Select the filters you want to edit from the list and click Apply. Your selected filters will be shown in the Instant Filters panel and you can edit them accordingly.
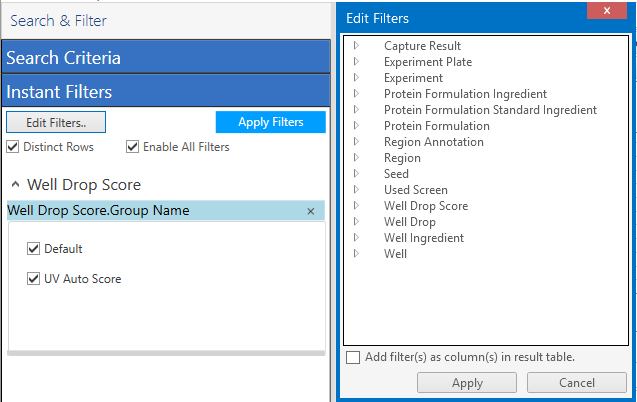
Edit Filters
Edit Columns — Select the column(s) you want to edit from the Available Search Fields and click Add. Select the Field Name you want to include in your filter and click OK. Your selected column(s) will be shown in the Instant Filters area and you can modify accordingly.
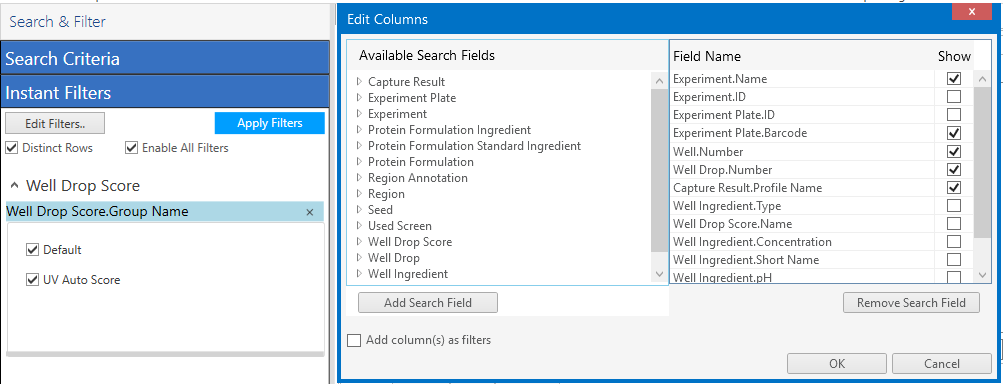
Edit Columns
Related Topics