Sending Images to Autoscoring
If you have experiments that have been imaged using a visible light path prior to MARCO installation, you can send them to MARCO/Sherlock to get scored through the Send to MARCO button. In this section, you will learn how to send your visible images to MARCO/Sherlock.
Prerequisites
You have installed and enabled MARCO/Sherlock.
You have previous experiments imaged using Visible light path.
You are running ROCK MAKER version 3.18
You are running ROCK IMAGER version 3.5.4 or newer.
You are running ROCK IMAGER Processor version 3.5.4 or newer.
To send an inspection for autoscoring:
Note
If the MARCO/Sherlock is enabled and ROCK IMAGER Processor (RIP) is running, then MARCO/Sherlock will automatically score any new images. The Send to MARCO button should be used for images collected before you enabled MARCO/Sherlock in the ROCK MAKER software.
Images can be sent to MARCO/Sherlock for auto-scoring using any of the three options stated below:
OPTION 1: Using the Send to MARCO button
Open your imaged experiment in the Canvas view.
Click the Send to MARCO button in the top bar.

Send to MARCO Button
Click OK when the notification appears. This message shows you that the current inspection has been queued to be scored by MARCO.

Notifying Users that Current Inspection Has Been Queued to be Scored by MARCO Auto-Scoring
OR
OPTION 2: Using the right-click menu
From the Explorer, expand the Projects node and right-click on the experiment or plate that you want to score. Then, select Send to MARCO.

The Send to MARCO Option in the Explorer Right-click Menu
When the dialogue message appears, click Yes to continue scoring the images, or No to cancel the process. Then, proceed to step 2.

Dialogue Message to Confirm Images Being Sent for Auto-Scoring
OR
OPTION 3: Using MARCO Panel
Click Scores in the Images tab. The MARCO Panel will appear on the right side. Then, click the Send to MARCO button.

Send to MARCO Button in MARCO Panel
Please wait for a few minutes while MARCO/Sherlock is scoring your images. To see the scoring results, click the Refresh Canvas button
 in the Imaging tab of the Images contextual tab set, or close your experiment and open it again.
Note
The MARCO Panel on the right side of the screen shows you the raw data of the MARCO/Sherlock scores, the Dispute button, the Send to MARCO button, and the Send for Training button in case you disagree with some of the MARCO/Sherlock results. The panel will always appear when you open your experiment whose images have been scored by MARCO/Sherlock models.
To view MARCO/Sherlock scores: MARCO/Sherlock scores can be viewed both in the Canvas and Drop views by clicking the MARCO Score button in the Auto Score tab of the Scores menu. The panel will appear on the right side with the detailed scores.
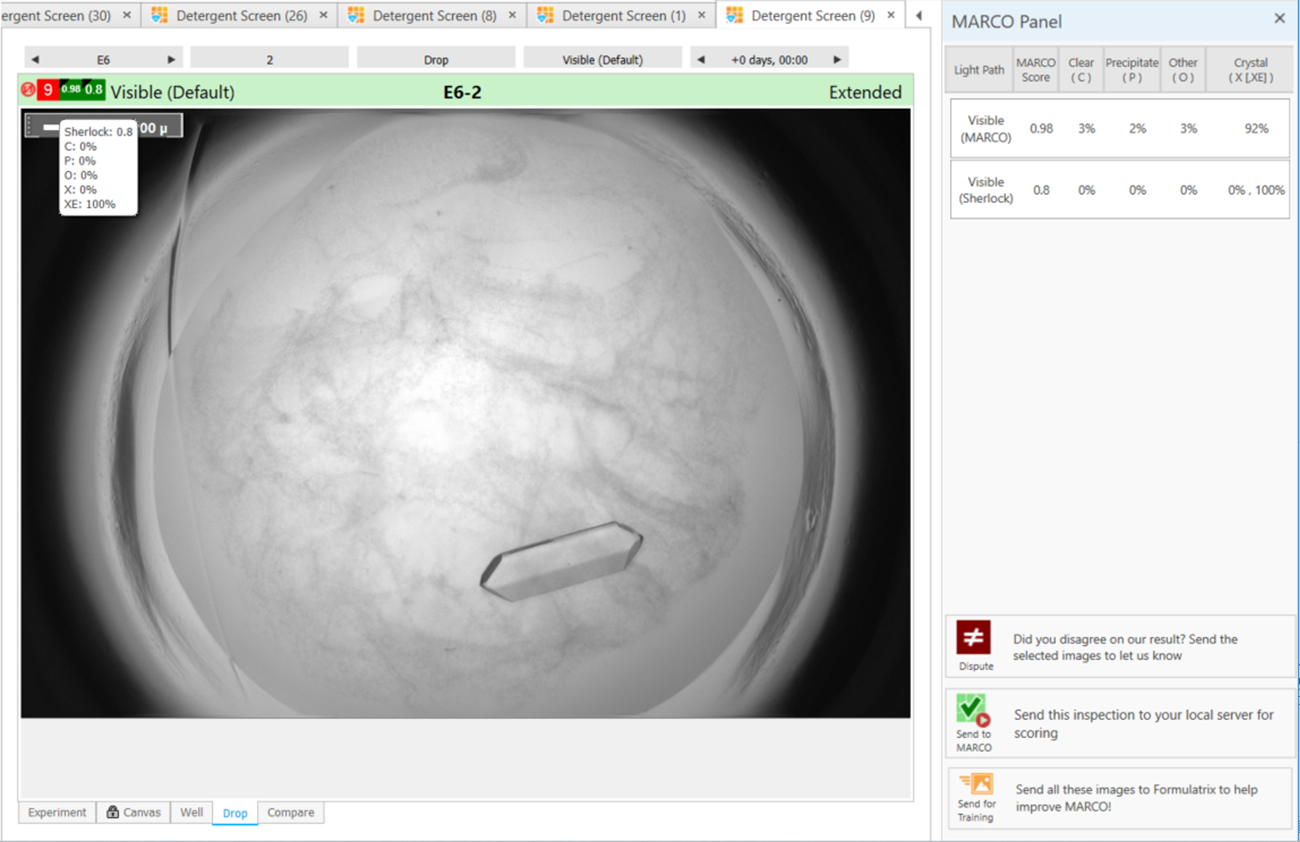
MARCO Panel