Setting Up Auto Scoring Models
ROCK MAKER v3.18 includes Sherlock, an image-scoring infrastructure that allows ROCK MAKER to download updated scoring models independently of the ROCK MAKER version. Sherlock allows using multiple models at a time allowing users to compare old vs new and eventually select a favorite. Of course, scoring by additional models will add to the scoring time. The default model is Sherlock 1 and MARCO, and an improved model for Sherlock is in development. We plan to continuously work on Sherlock for improvements.
Sherlock requires a virtual machine that is not compatible with MARCO virtual machine. Hence, in case of an upgrade to ROCK MAKER v3.18, it is critical that the corresponding virtual machine is deployed.
Prerequisites:
You are running ROCK MAKER desktop version 3.18.2.1 or newer.
You are running ROCK IMAGER and ROCK IMAGER Processor desktop version 3.5.4 or newer.
Your computer must meet the system requirements.
You have installed VirtualBox on your computer. VirtualBox is a free, open-source operating system emulator that can be downloaded here.
To enable MARCO or Sherlock in ROCK MAKER, you must be a ROCK MAKER Administrator.
Deploying the Virtual Machine
Download auto scoring Linux Ubuntu Virtual Machine ZIP file from this link:
Note
The size of this file is 5.7 GB, so this will take some time to download.
Right-click the ZIP file and select Extract All, as shown below.
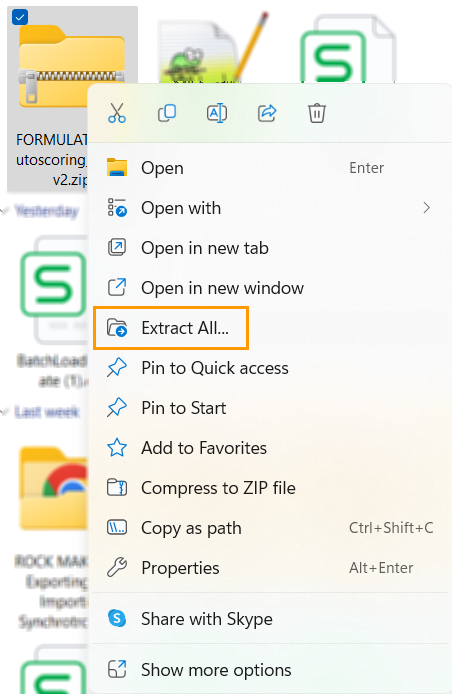
Selecting Extract All
Now that you have successfully extracted the FORMULATRIX Autoscoring Host v3 file, open the VirtualBox application on your computer.
Go to the File menu, and select Import Appliance to import the FORMULATRIX Autoscoring Host v3 to VirtualBox.
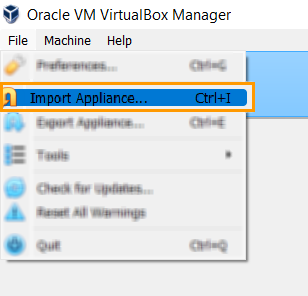
Selecting Import Appliance to Import the FORMULATRIX Autoscoring Host v3 to VirtualBox
Locate the FORMULATRIX Autoscoring Host v3 directory, then click Next.

Locating FORMULATRIX Autoscoring Host v3 Directory
Then, a list of all the hardware specifications from the FORMULATRIX Autoscoring Host v3 will appear. Click Finish.
Note
Do not alter any settings in this window unless you are an advanced user and are sure of what to do.
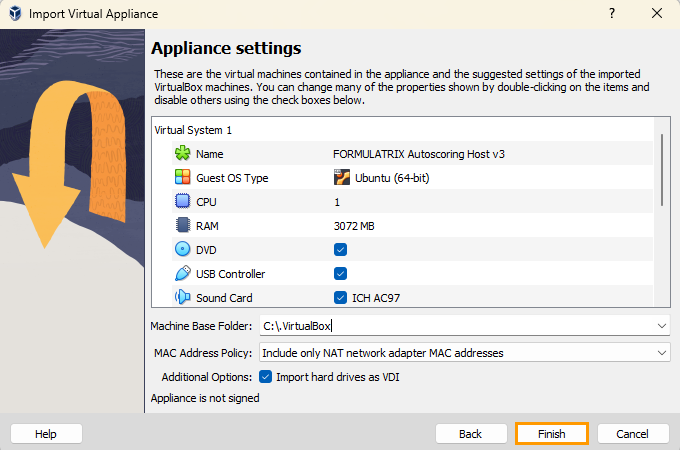
Importing FORMULATRIX Autoscoring Host v3.ova
Please wait for a few moments while the VirtualBox imports the FORMULATRIX Autoscoring Host v3.

FORMULATRIX Autoscoring Host v3.ova is Being Imported
When the import is complete, you will be redirected to the Home page of the VirtualBox application. Ensure that the FORMULATRIX Autoscoring Host v3.ova has been successfully installed in your virtual machine by checking the top-left corner of the application window, as shown below.

FORMULATRIX Autoscoring Host v3.ova Has Been Successfully Installed in Your Virtual Machine
Right-click FORMULATRIX Autoscoring Host v3 and select Create Shortcut on Desktop, as shown below.
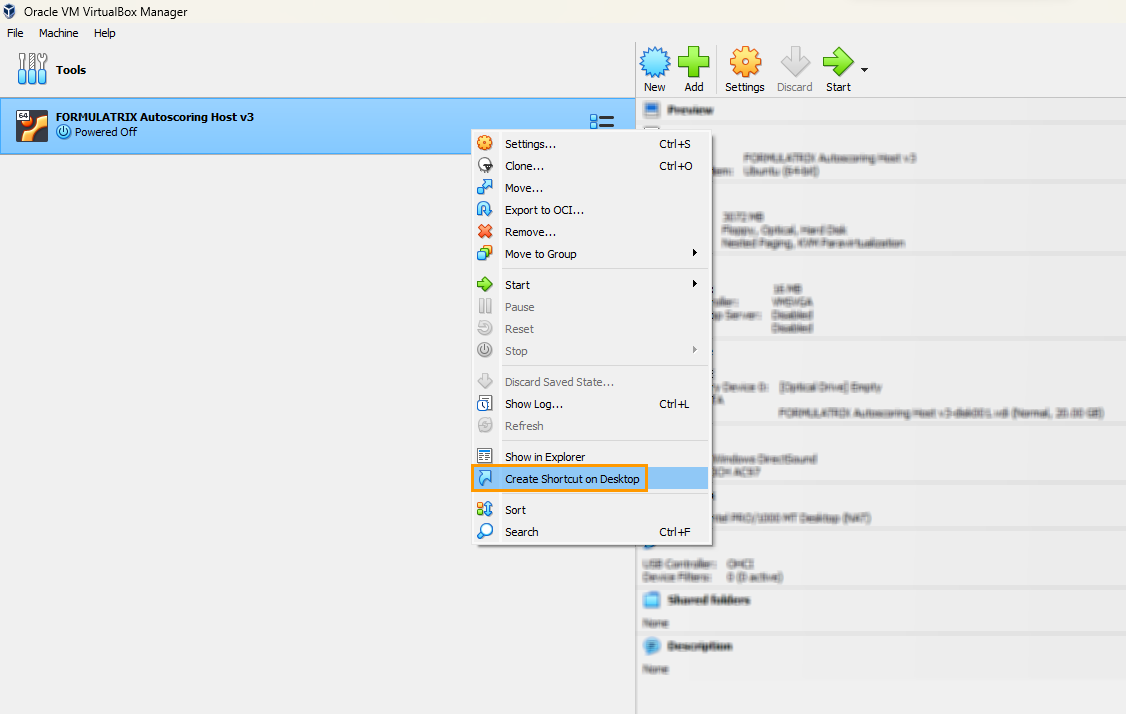
Creating a Shortcut on Desktop for FORMULATRIX Autoscoring Host v3
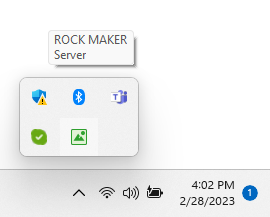
Then, click the downward arrow next to Start and select Headless Start. This will enable the selected auto scoring model(s) to run automatically in the background.
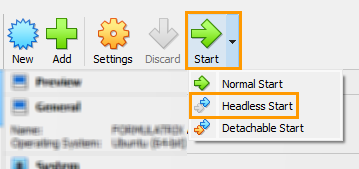
Selecting Headless Start to Run Selected Auto Scoring Model(s) in the Background
If the Windows Security Alert dialog box appears, select Allow access.

Selecting Allow Access
ROCK MAKER Configuration Changes
Open your ROCK MAKER application.
Click the Application Menu button, point to Setup, and select Global Preferences.
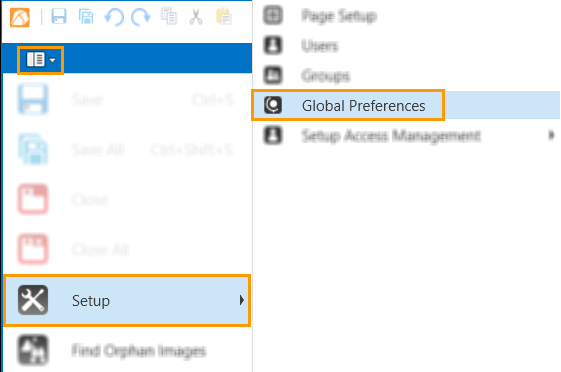
Selecting Global Preferences
Go to the General tab and select the Scoring properties.

Scoring Properties in General Tab
In the Scoring properties, locate and tick the following fields:
Enable MARCO Auto Score
Allow Auto Scoring using ‘Sherlock’ model
Allow Auto Scoring using ‘Sherlock’ model ‘Stable version’
Allow Auto Scoring using ‘Visible’ model
Allow Auto Scoring using ‘Visible’ model ‘Stable’ version
Then, you need to obtain the computer name on which the virtual box is deployed. To find out the computer name, open File Explorer, right-click This PC, and select Properties. The About window will open.

Obtaining the Computer Name on Which Auto Scoring Model is Installed
Then, type the computer name on which the virtual box is installed in the MARCO Scorer Server URL field, as stated below.
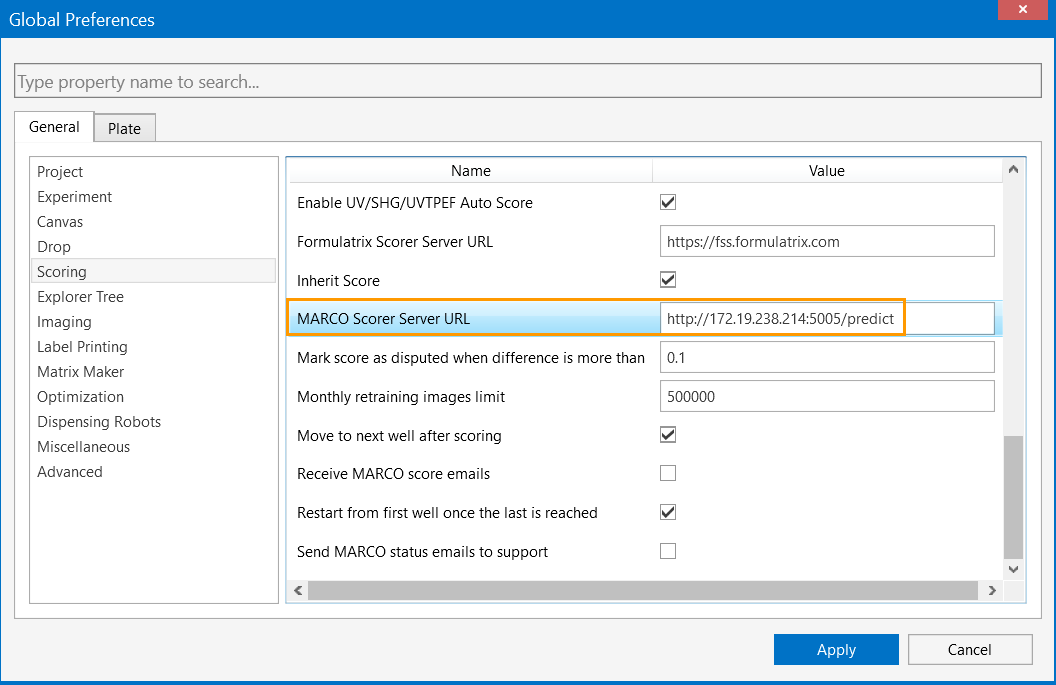
MARCO Scorer Server URL Field
Note
Replace 172.19.238.214 with your computer name between http:// and :5005. The computer name in the case given below is DESKTOP-O4K95BQ.
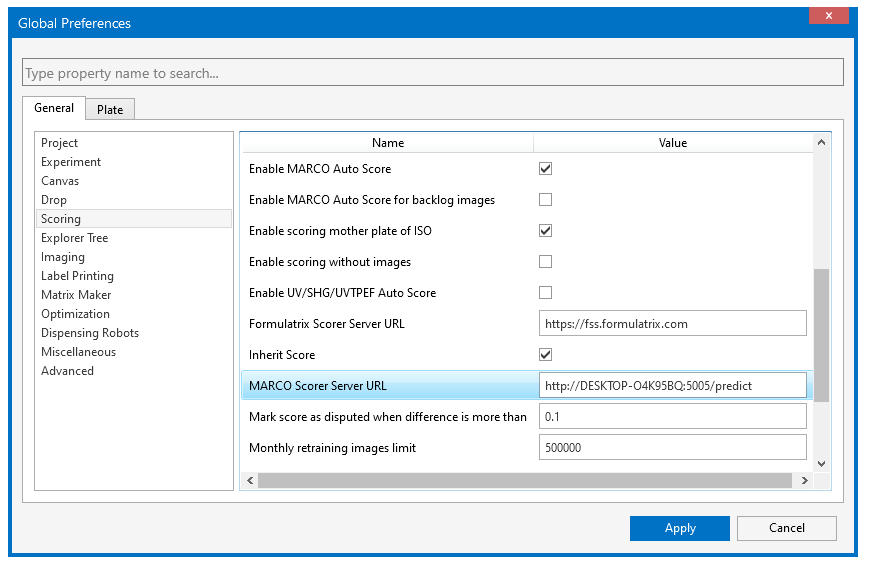
Updated MARCO Scorer Server URL
Click Apply.
Restart ROCK MAKER, and the Send to MARCO button will appear in the Auto Score group of the Scores tab in the Images contextual tab set.

Send to MARCO Button
Note
The Send to MARCO button should only be used for images collected before you enable an auto scoring model(s) in ROCK MAKER. Your auto scoring model(s) will automatically score any new images without having to click the Send to MARCO button.
Make sure that the AutoImageManagement tool is running along with ROCK MAKER.
Make sure that all “RockMaker.Database.—” settings in the AutoImageManagement.exe.config file in the “SharedFilesRockMakerAutoImageManagement” folder are identical to these settings in the RockImagerProcessor.exe.config file.
The location of the SharedFiles folder is determined by the Common.SharedFiles.Location setting in the RockImagerProcessor.exe.config file.

AutoImageManagement.exe.config File
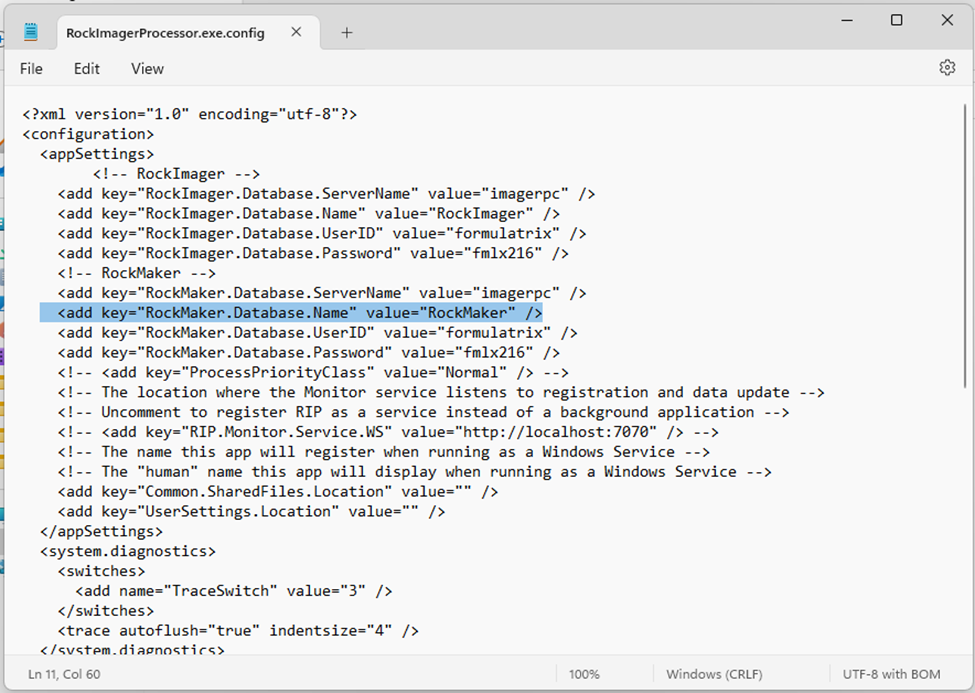
RockImagerProcessor.exe.config File
Enter the computer name for ROCK MAKER Server in the Run RM Server on PCs field in the Advanced properties of the Global Preferences menu.

Run RM Server on PCs Field
Adding VirtualBox to the Windows Startup Applications
To ensure that the selected auto scoring model(s) will always run automatically upon Windows startup, you need to add the Linux VirtualBox batch file to the startup folder in Windows. Follow the tutorial below that corresponds to the operating system you’re running.
To add the Linux VirtualBox to the Startup folder in Windows 10 and 11:
Download the following BAT file:
Open the command prompt by right-clicking the Start menu and selecting Run.
Type shell:startup in the available field, and click OK.
Press Enter on your keyboard.
Locate the downloaded BAT file on your computer and copy it to the Startup folder, as shown below.

Adding the BAT File to the Startup Folder in Windows 10 and Windows 11
Troubleshooting
What steps to take if you get the following error: Failed to get device handle and/or partition ID for 0000000001ac8ac0 (hPartitionDevice=0000000000000a1d, Last=0xc0000002/1) (VERR_NEM_VM_CREATE_FAILED)?
Answer: In your Windows File Explorer, go to Control PanelAll Control Panel ItemsPrograms and Features. Click Turn Windows features on or off located in the left panel. Please make sure that the features in the red boxes are unchecked.
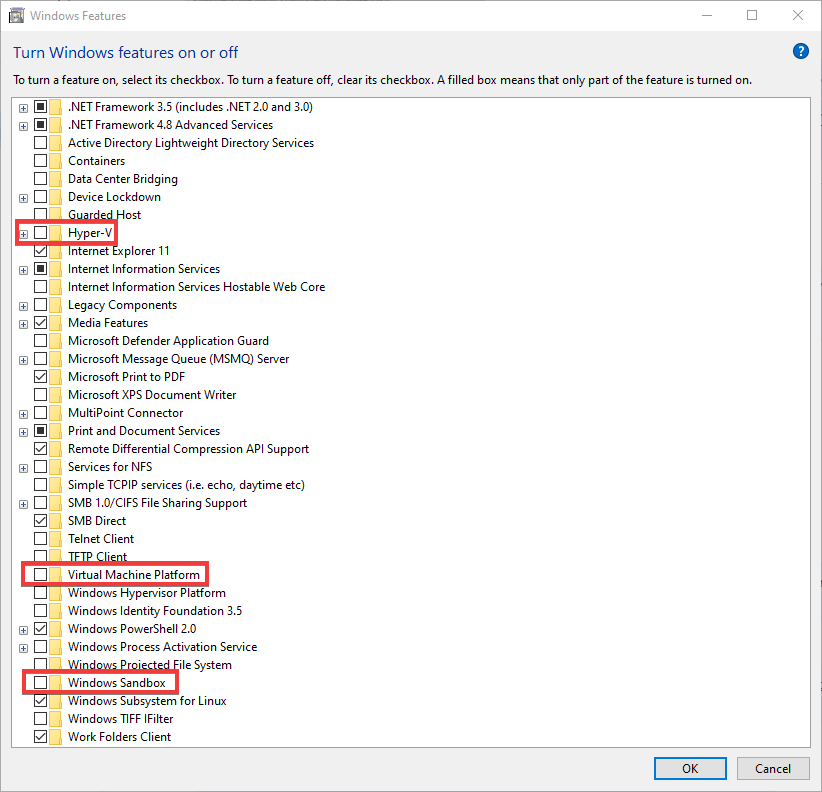
Unchecked Boxes of Hyper-V, Virtual Machine Platform
What steps to take if you get the following error when running the VirtualBox: E_INVALIDARG (0x80070057)?
Answer: Install the FORMULATRIX Autoscoring Host v3 file in a not-specific directory. For example, if you are a Windows user, install the FORMULATRIX Autoscoring Host v3 file directly in C:\ directory.
What steps to take if you get an error related to Visual c++ redistributable?
Answer: Download the latest version of visual c++ from here: setup file. To install, just follow the default installation shown when the setup file is run.
Running The AutoImageManagement Tool
To use the Send to MARCO button, make sure that you create a shortcut for the AutoImageManagement tool and run it alongside ROCK MAKER when using the Send to MARCO button.
Go to the path given below and copy the AutoImageManagement on the desktop for easy access.
C:\Program Files (x86)FormulatrixSharedRockMakerAutoImageManagement
AutoImageManagement Running in the Background
Removing Existing Virtual Machine
If you have an existing virtual machine, you will need to remove it.
To remove the existing virtual machine:
Open your VirtualBox application on your computer.
Locate Formulatrix Scoring Server on the left side of the VirtualBox window.
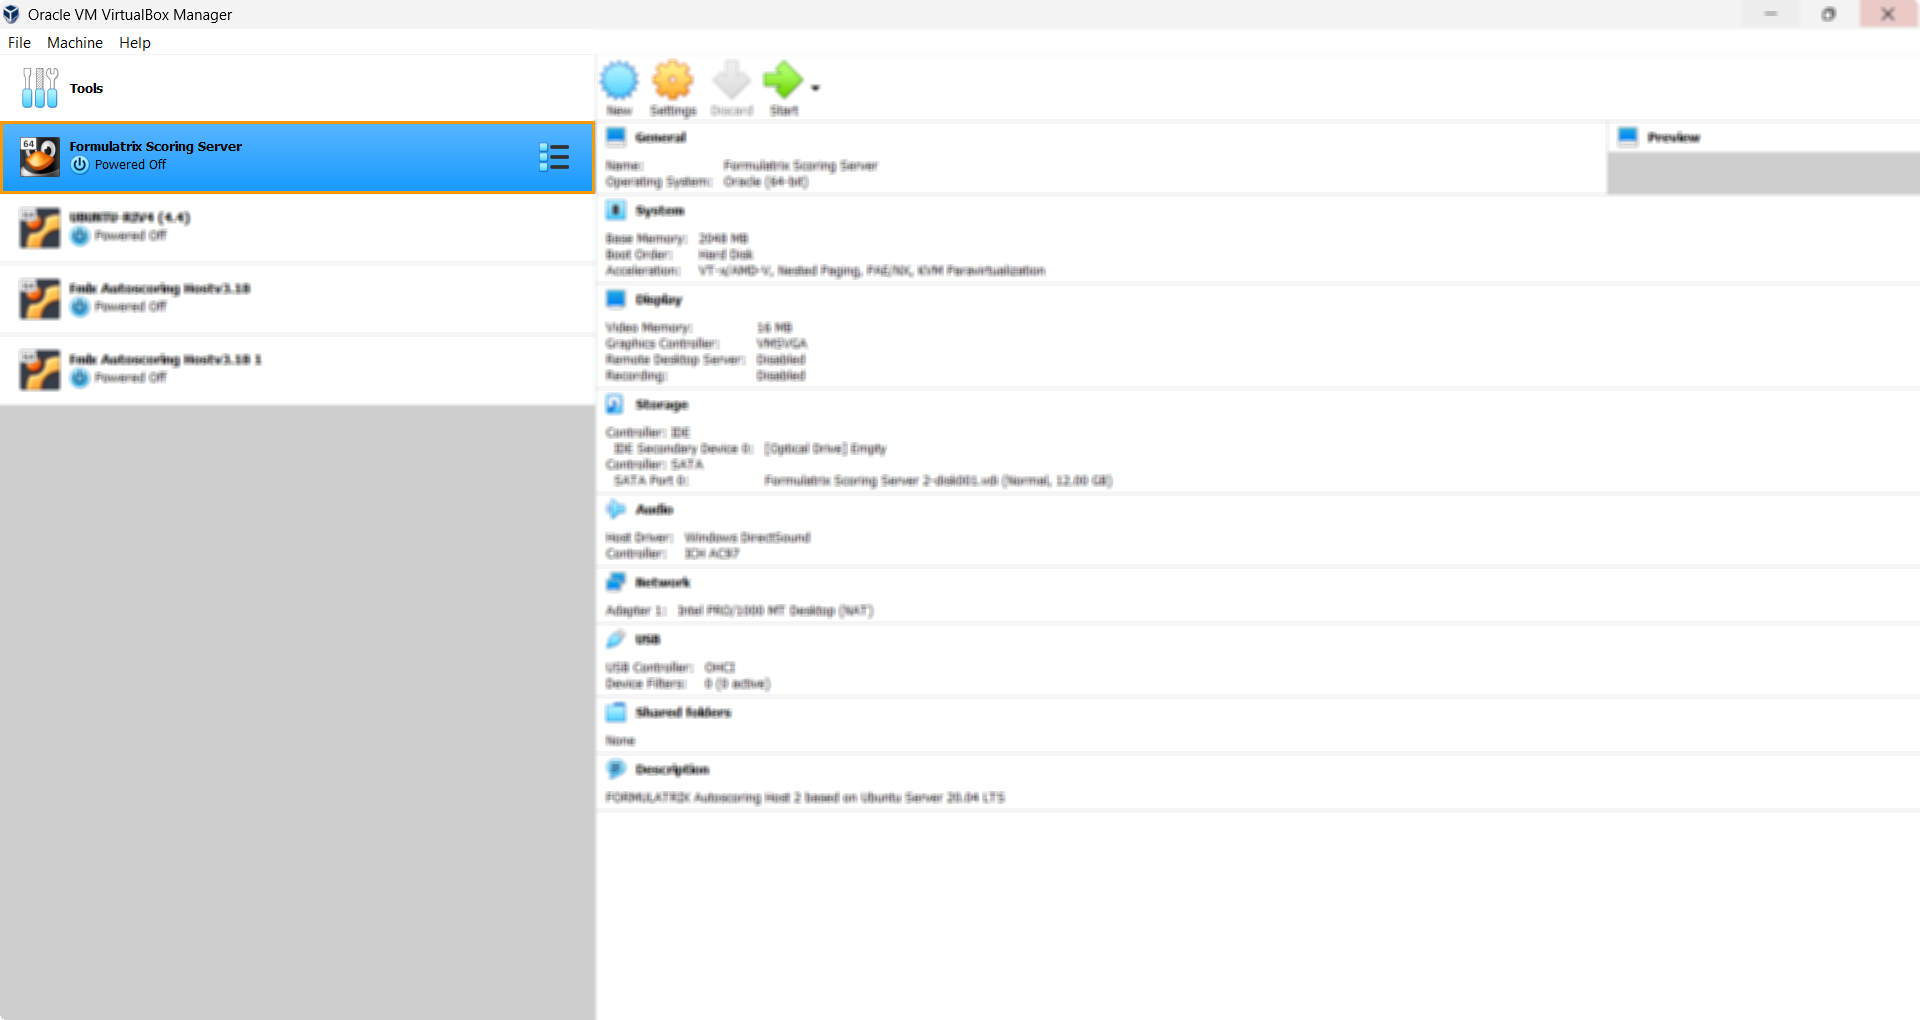
Existing Virtual Machine: Formulatrix Scoring Server
Right-click on Formulatrix Scoring Server and click Remove.

Removing Formulatrix Scoring Server
A dialog box asking you which action you want to select will appear. Select Delete all files.

Delete all files Button
Related Topics: