Screens and Experiments
ROCK MAKER allows you to create new screens and experiments once you have created a project.
A screen generally does not include proteins and is used to help fill wells on smaller plates. Screens are usually available from third party vendors; ROCK MAKER comes pre-populated with most commercial screens. You can also make your own screens for internal use and apply them to experiments with a screen layer. Screen Lots are used to track the volume that you have in one or more deep well blocks that you have prepared or purchased.
If you were to create, save, and dispense an experiment without selecting a screen lot in the screen layer, the liquid handler would try to set up the experiment from stock ingredients. While possible, this is not recommended. Selecting a screen lot ensures that the liquid handling robot only needs to copy over the well solutions from the screen lot, rather than mix every condition individually from stock ingredients.
An experiment includes proteins and is photographed by an imager to show you whether or not the experiment formed crystals. An experiment can include a screen, but a screen can not include an experiment.
Although screens and experiments are different by definition, the way you define and use them in ROCK MAKER is very similar. As you’ll see below, both experiments and screens are manipulated in the canvas, and each is defined via your input through two main panels.
Since experiments can contain images, the experiment page has a third panel for the Experiment Navigator.
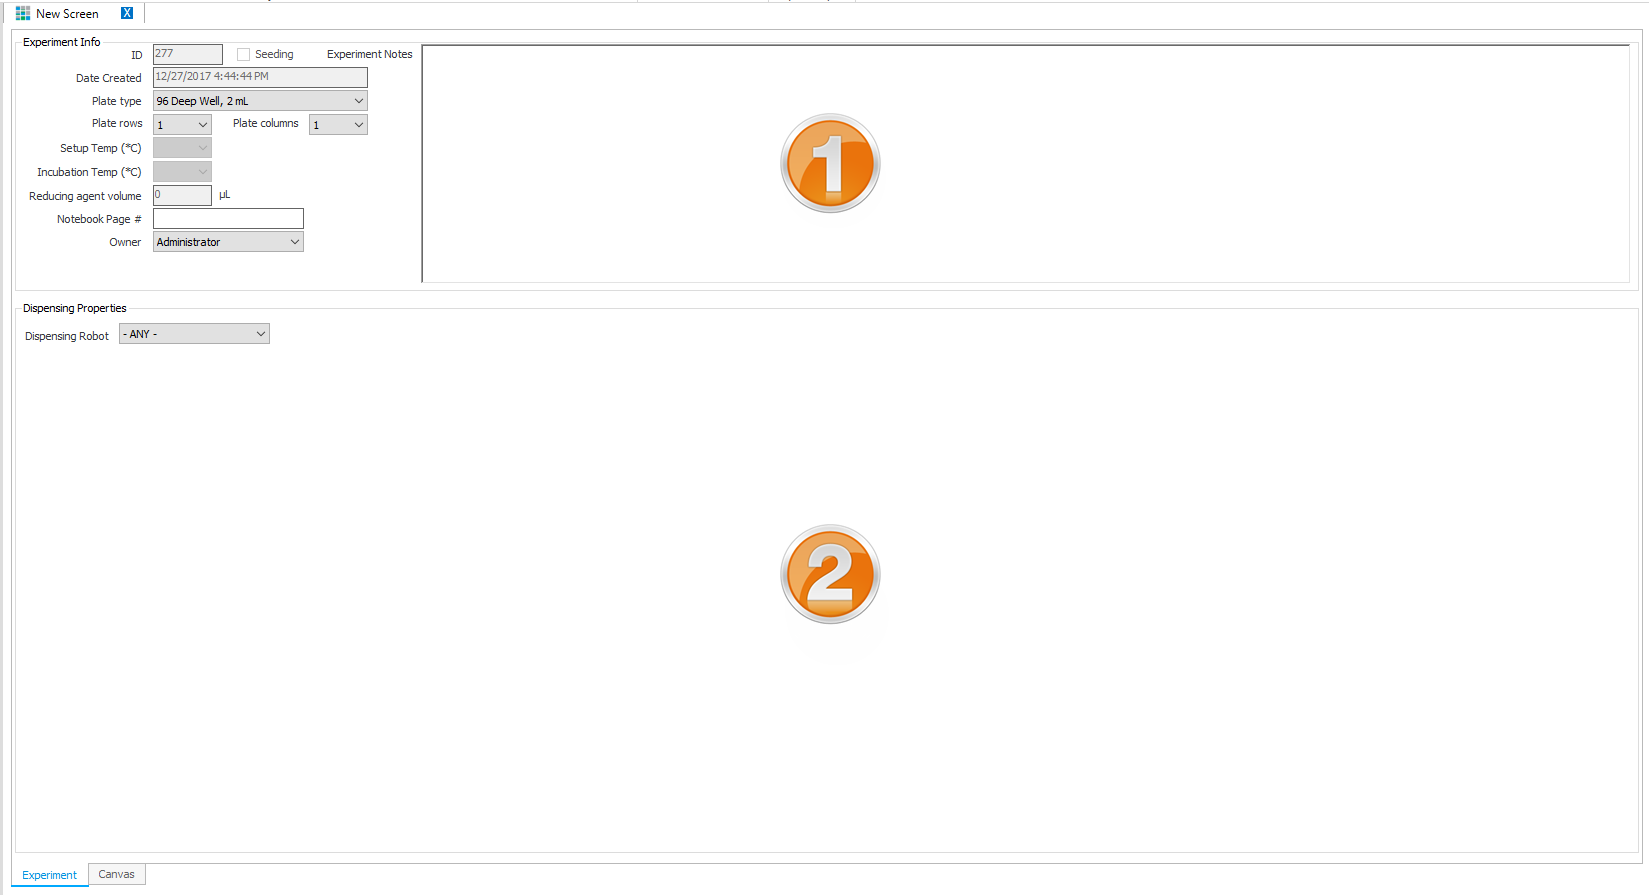
New Screen Setup Page
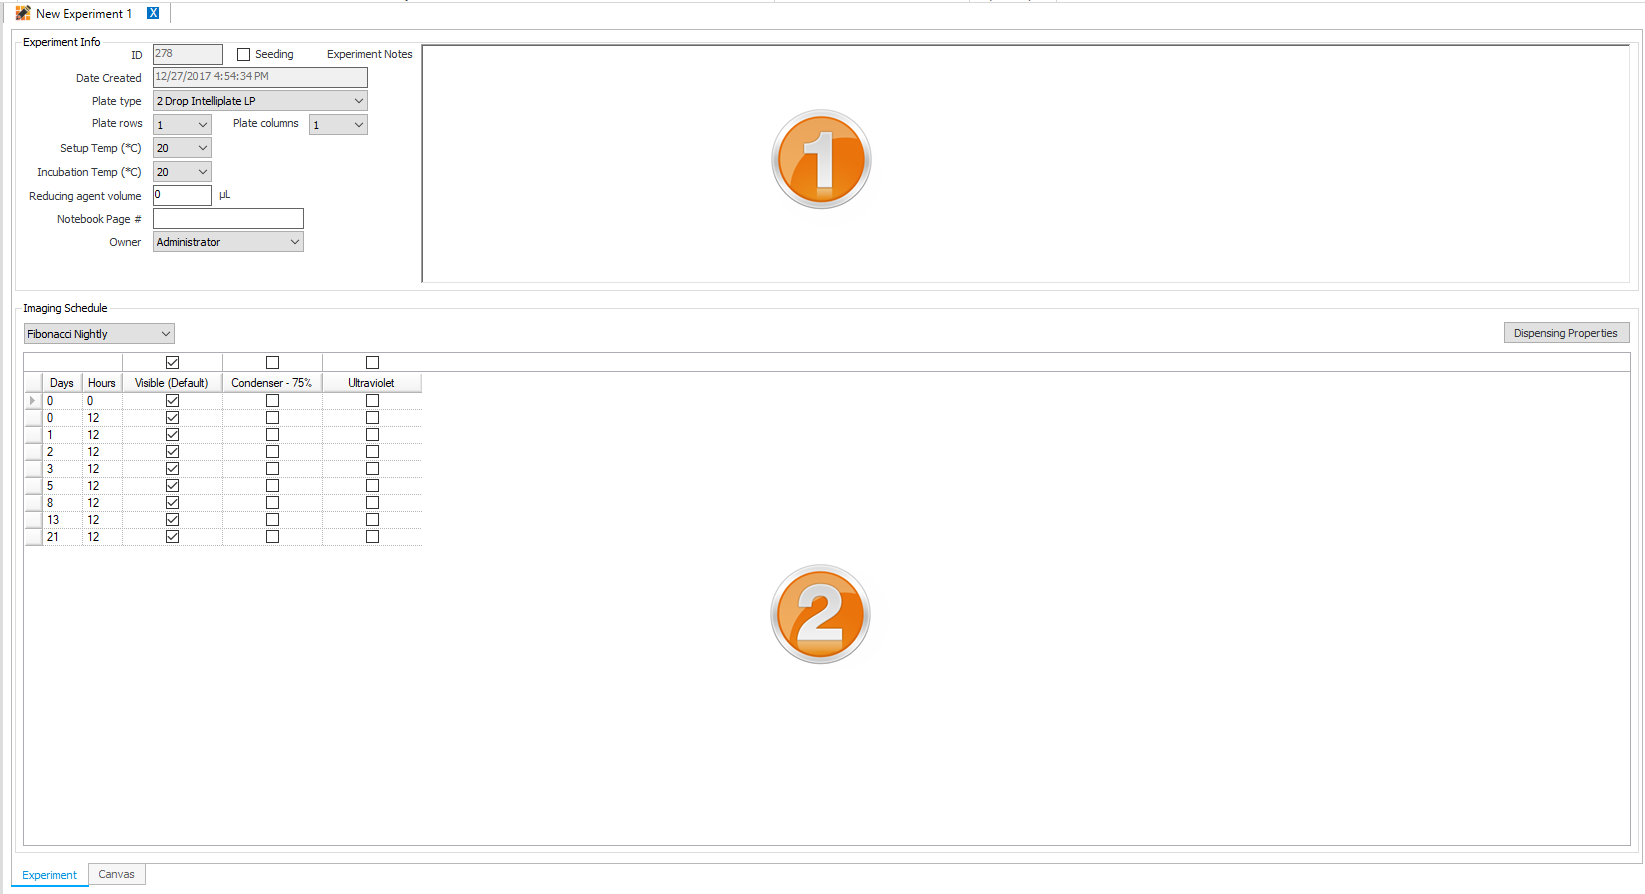
New Experiment Setup Page
Number |
Description |
|---|---|
1 |
This area is where you fill out info about the experiment or screen, such as plate type and number of rows and columns of plates (if creating a multi-plate experiment), setup and incubation temperatures, reducing agent volume (if any), and owner. The experiments page also has a field for an imaging schedule and a check box for whether or not it’s a seeding experiment. The image schedules are defined at the project level; you can customize it for individual experiments here by pressing F3, which hides the information tabs and displays the details of the schedule. |
2 |
If you’re creating a screen, this area is where you select the dispensing robot. If you’re creating an experiment, this area is where you define your Imaging Schedule. If you will be dispensing with a robot, click the Dispensing Properties button to select the dispensing robot. |
Additive Experiments
An additive experiment is one to which one or more additional layers containing small amounts of additive ingredients have been added.
To design an additive experiment, you would create a separate layer that overlaps the other layers of the experiment. Additives can be dispensed into both wells and drops by selecting the appropriate target from the Layer Target list on the Layer Tab.
Screen Experiment Wizard
The screen experiment wizard allows you to quickly set up several screen experiments at once. When you go through the wizard, you will be asked various questions about experiment setup. At the end, ROCK MAKER will generate as many experiments as you specified in the wizard, depending on the number of screens you included in the wizard.
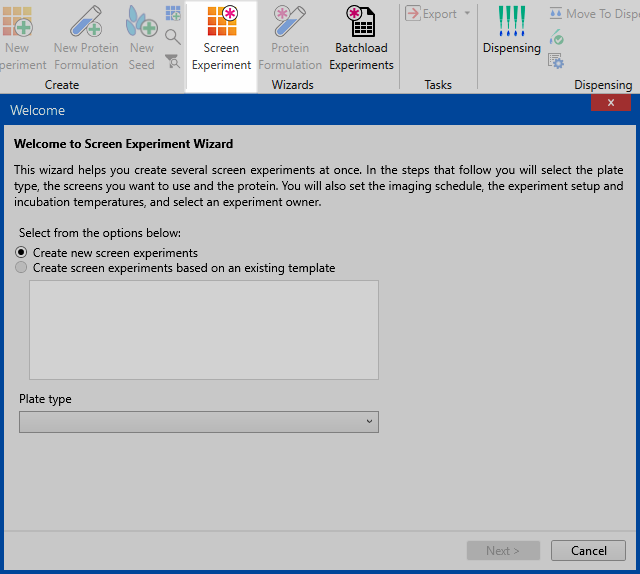
Screen Experiment Wizard
The wizard will ask you for the following information:
Plate type — You must use the same plate type for all experiments created in a single wizard session.
Screens — The well volume will populate with the default volume of the plate, and you can select the available screen lot accordingly.
Protein(s) — You can select different proteins, but you may only use as many proteins as the number of drops at a well. For example, if you are using a two-drop plate, you may only select two proteins.
Setup Temperature, Incubation Temperature, and Owner.
Imaging Schedule — You may only select a schedule here that will be applied to all experiments. To customize a schedule, you must go into the experiment after it has been created.
Review Experiment(s) — You can determine the location of your screen experiment and name it accordingly.
If you have a set of screens you prefer to use when you screen a protein, you may want to go through the wizard and save the settings as a template for future use. You will be presented with this option towards the final steps of the wizard.
Using the Screen Experiment Wizard
Click the Screen Experiment button
 in the Wizards
group on the Home tab and follow the on-screen prompts.
in the Wizards
group on the Home tab and follow the on-screen prompts.
Deleting and Renaming Templates
Once you have templates stored in your Screen Experiment Wizard database, you can delete or rename them by right-clicking anywhere in the templates box.