Importing Screen Conditions
Instead of manually entering screen conditions, you can import pre-existing screen conditions to ROCK MAKER. For your convenience, ROCK MAKER allows you to import these screens in two different ways, all of which are available in the Import/Export group on the Design tab. When you import a condition, ROCK MAKER will create a new condition list layer that contains the imported screen conditions.
Options to Import Screen Conditions
Screen Import Overview
In order to take full advantage of the importing screen features in ROCK MAKER, you must know all of the available methods to import your screens.
Option |
Description |
|---|---|
Import XML Screen |
Imports commercial screens and screens that have been shared with you in an XML format. If you wish to import an XML screen file from another company, it must be in RMXML format. |
Import Text File |
Since plain-text format requires no special editor, we recommend saving screens as a plain-text file using Import Text File. It can also make sharing screen files easy if your colleagues are using different ROCK MAKER software or LIMS. |
Importing Screen Conditions
This section explains how to import screen conditions in ROCK MAKER XML and TXT file formats. Click on the corresponding menu to view the tutorial.
Importing RMXML Screen Files
This XML template—provided for use in ROCK MAKER—is an open format available to anyone who wishes to use it for development purposes.
Note
You can browse the ROCK MAKER XML screen file repository and import any files there to ROCK MAKER.
To import RMXML screen files
From the Explorer, right-click the Screens node and select New Screen.
Rename the screen by typing over the default name in the Explorer.
Fill in the fields on the Experiment tab.
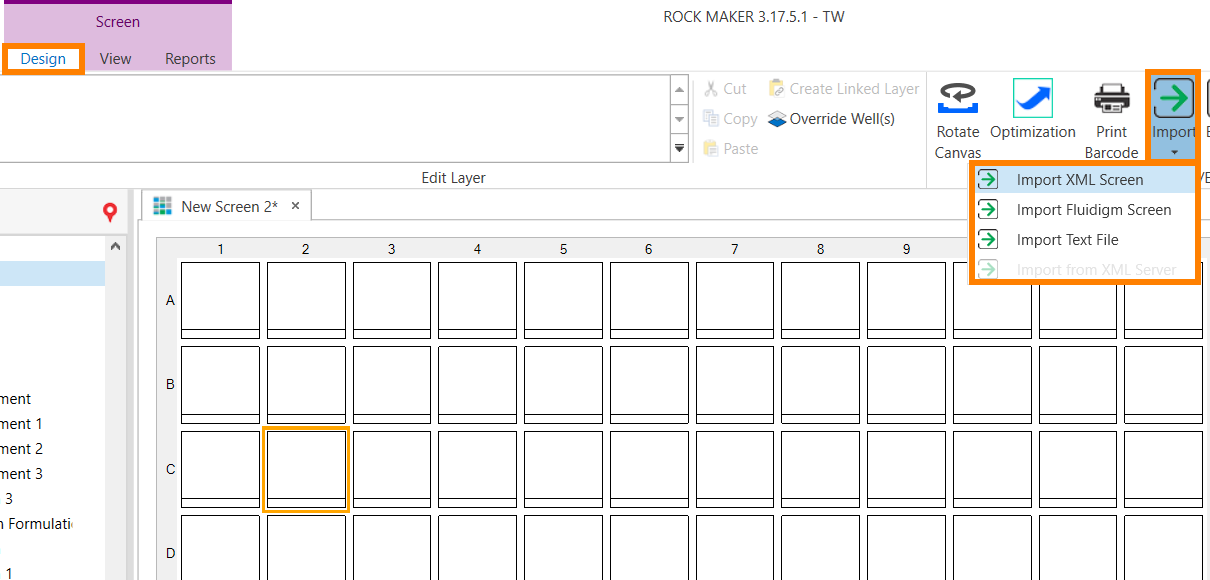
Go to Canvas and click Import on the Design tab. Then, select Import XML Screen.
OR
Right-click anywhere in the Canvas area and select Import XML Screen.
Select the desired screen file that you want to import and click Open. A new condition list layer will be created, and the imported screen’s conditions will be inserted into the new layer.
1.gif)
Importing An XML Screen File
While importing ingredients, ROCK MAKER will compare the imported ingredient names, short names, aliases, CAS numbers, other information with those already found in the ROCK MAKER database.
If the screen contains extra stocks that are not in use in any of its conditions, ROCK MAKER will ask whether you want to import these extra stocks. Click either Yes or No to continue.

Confirmation Box for Importing Extra Stocks
If any partial matches between the incoming and existing ingredients are identified, or if an incoming ingredient is not found in the database, ROCK MAKER will open the Screen Import dialog box.
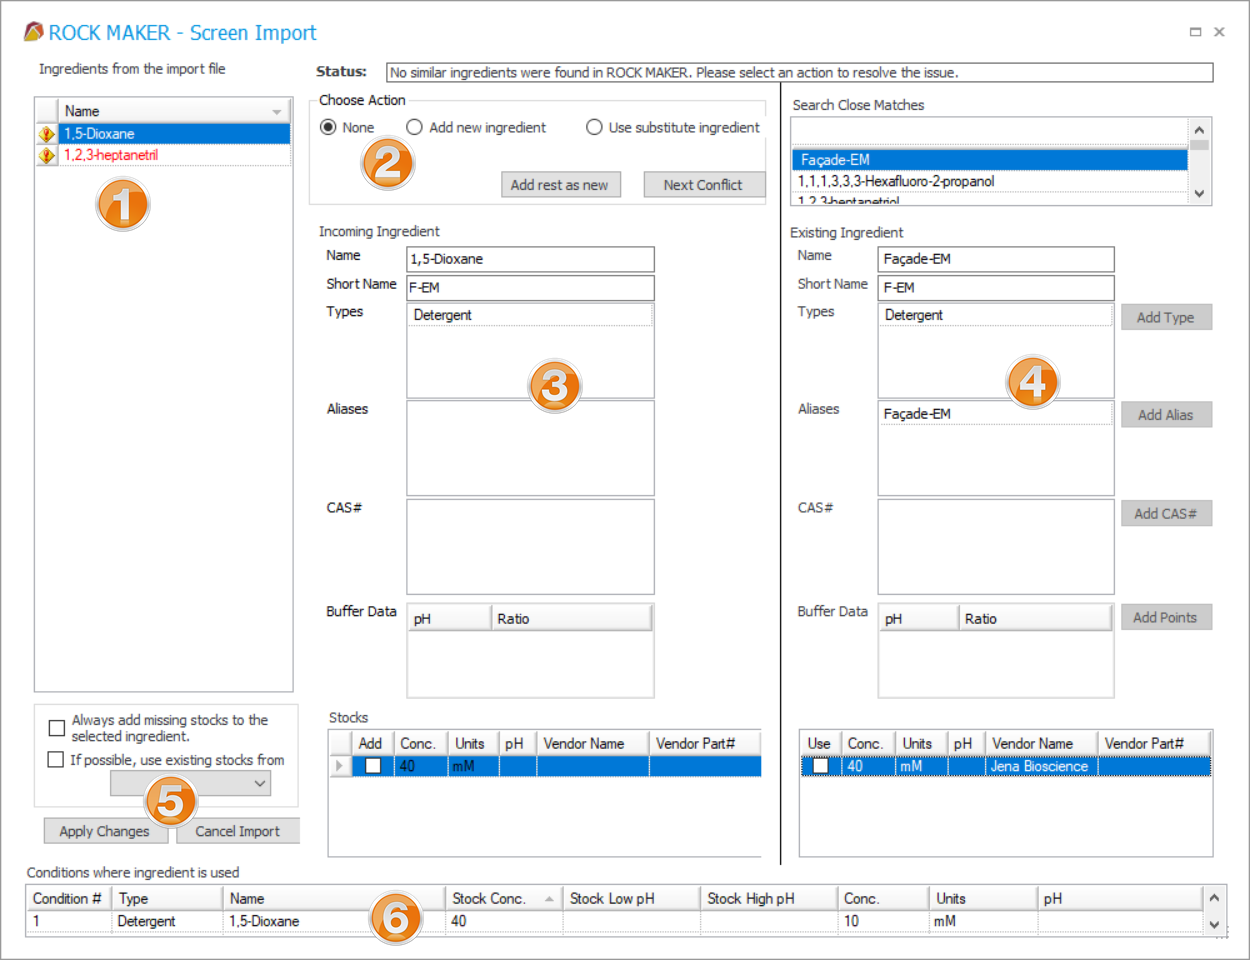
Screen Import Dialog Box
Number
Description

This table displays a list of ingredients in conflict. The conflicted ingredients are marked in red. Hover your cursor over the error symbol
 or look at the Status field in order to see the error details. Once a conflict is resolved, the ingredient name turns dark and the Status field will say ‘Conflict resolved.’.
In the Choose Action area, you can resolve the conflict in three ways:
Add New Ingredient: ROCK MAKER creates a new ingredient using the properties specified and highlights the ingredient properties to be used in green to indicate that the conflict has been resolved. Selecting this option will automatically add the incoming ingredient to the ROCK MAKER database, which you can check in the Ingredient Setup tab.
Tip
If you have multiple conflicted ingredients and want to use all of the incoming ingredients, select Add rest as new. This will save you more time by resolving all conflicts at once.
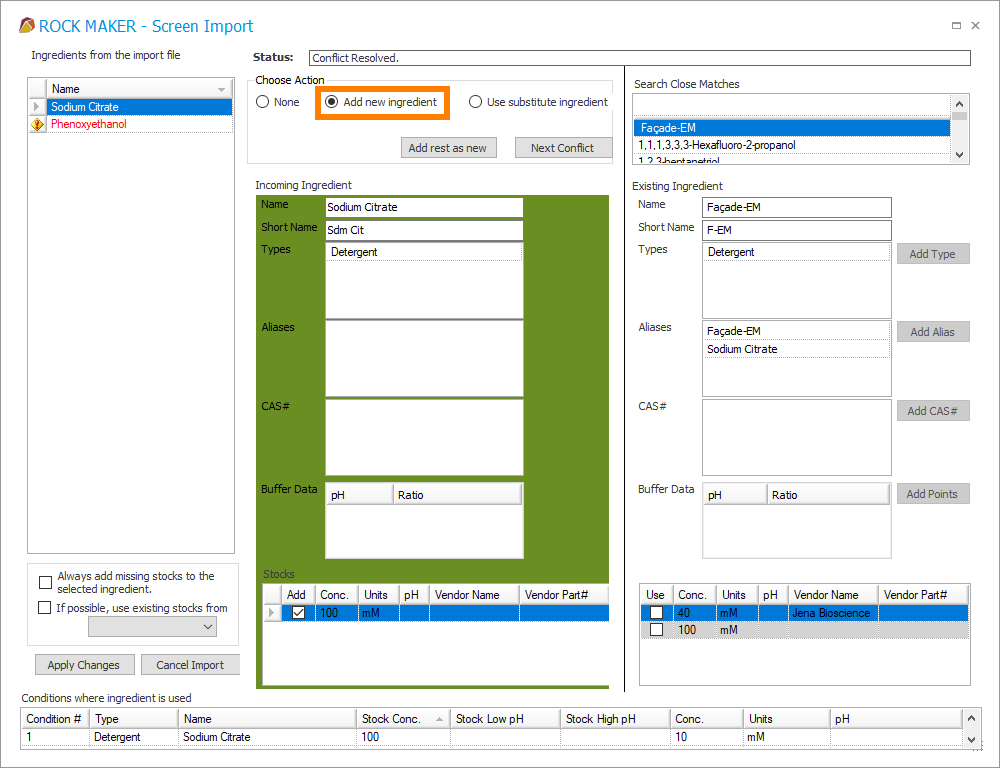
Adding a New Ingredient (Highlighted in Green)
Use substitute ingredient: ROCK MAKER uses an existing ingredient from the database. In the Search Close Matches table, you can search an ingredient that closely matches the incoming ingredient. ROCK MAKER will highlight the substitute ingredient properties to be used in green to indicate that the conflict has been resolved.

Using a Substitute Ingredient (Highlighted in Green)
None: If you want to cancel screen import, select None and then click Cancel Import. By selecting this option, ingredients in conflict will not be resolved.
Clicking Next Conflict button will bring you to the next unresolved conflict in the list.
 ,
, 
Figure #3 and #4 show the details of the incoming and existing ingredients, respectively. Read Ingredient Setup for more information about ingredient details.
In the Stocks table of the incoming ingredient, the Add checkbox can be selected if you choose to use an existing ingredient from ROCK MAKER but want to add stocks from the missing ingredient. This can be used for example if the stock concentration is not on your database already.
If you click any of the buttons in the existing ingredient area, such as Add Type, Add Alias, or Add CAS#, ROCK MAKER will add the ingredient type, alias or CAS number from the incoming ingredient to the existing one. To undo it, simply right-click and select Remove.

This area provides two options to deal with the ingredient stock.
Always add missing stocks to the selected ingredient. ROCK MAKER automatically adds stocks from the incoming ingredient to an existing ingredient when it does not have the required stocks.
If possible, use existing stocks from. ROCK MAKER automatically chooses an existing stock from the vendor of your choice. You must select a vendor from the list in order to use this option.
Click Apply Changes after all ingredient discrepancies have been reconciled. A new condition list layer will be created, and the imported screen’s conditions will be inserted into the new layer. You must resolve all ingredient conflicts before clicking Apply Changes in order to move forward with the import, otherwise the warning message below will appear.

A Warning Message that Appears When Clicking Apply Changes Button Without Resolving Conflicts
If you wish to cancel the screen import, click the Cancel button. Then, select Yes when prompted.
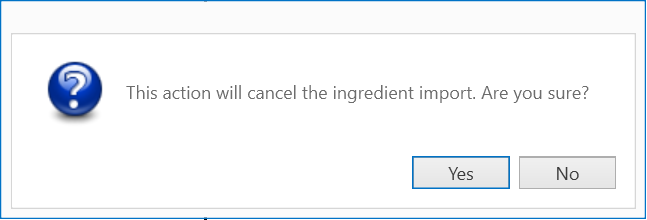
Exiting the Screen Import Dialog Box

Shows the list of the conditions where the ingredient is used.
Importing Screen Text Files
This feature is built to complement ROCK MAKER’s ability to export a screen file in a text format. Should you ever need to reuse the screens you exported, you can simply use Import Text File.
To import screen text files
From the Explorer, right-click the Screens node and select New Screen.
OR
Select a screen folder in the Explorer, then click the New Screen button
 on the Home ribbon.
Rename the screen by typing over the default name in the Explorer.
Fill in the fields on the Experiment tab.
Go to Canvas and click Import on the Design tab. Then, select Import Text File.
Select the desired screen file that you want to import and click Open.
Importing A Text Screen File
Important: To ensure a screen is imported successfully, all the incoming ingredients must exactly match the existing ingredients already found in the ROCK MAKER database.
If the error message below appears during screen import, make sure that all the screen ingredients exist and match the ones in your ROCK MAKER database. You can resolve this error by adding the incoming ingredient to the database.

Ingredient Not Found
Related Topics