General Setup
General Setup is a place where you can define Well Scores, Experiment Temperature, Image Stores, and opt in or opt out of Usage Reporting.
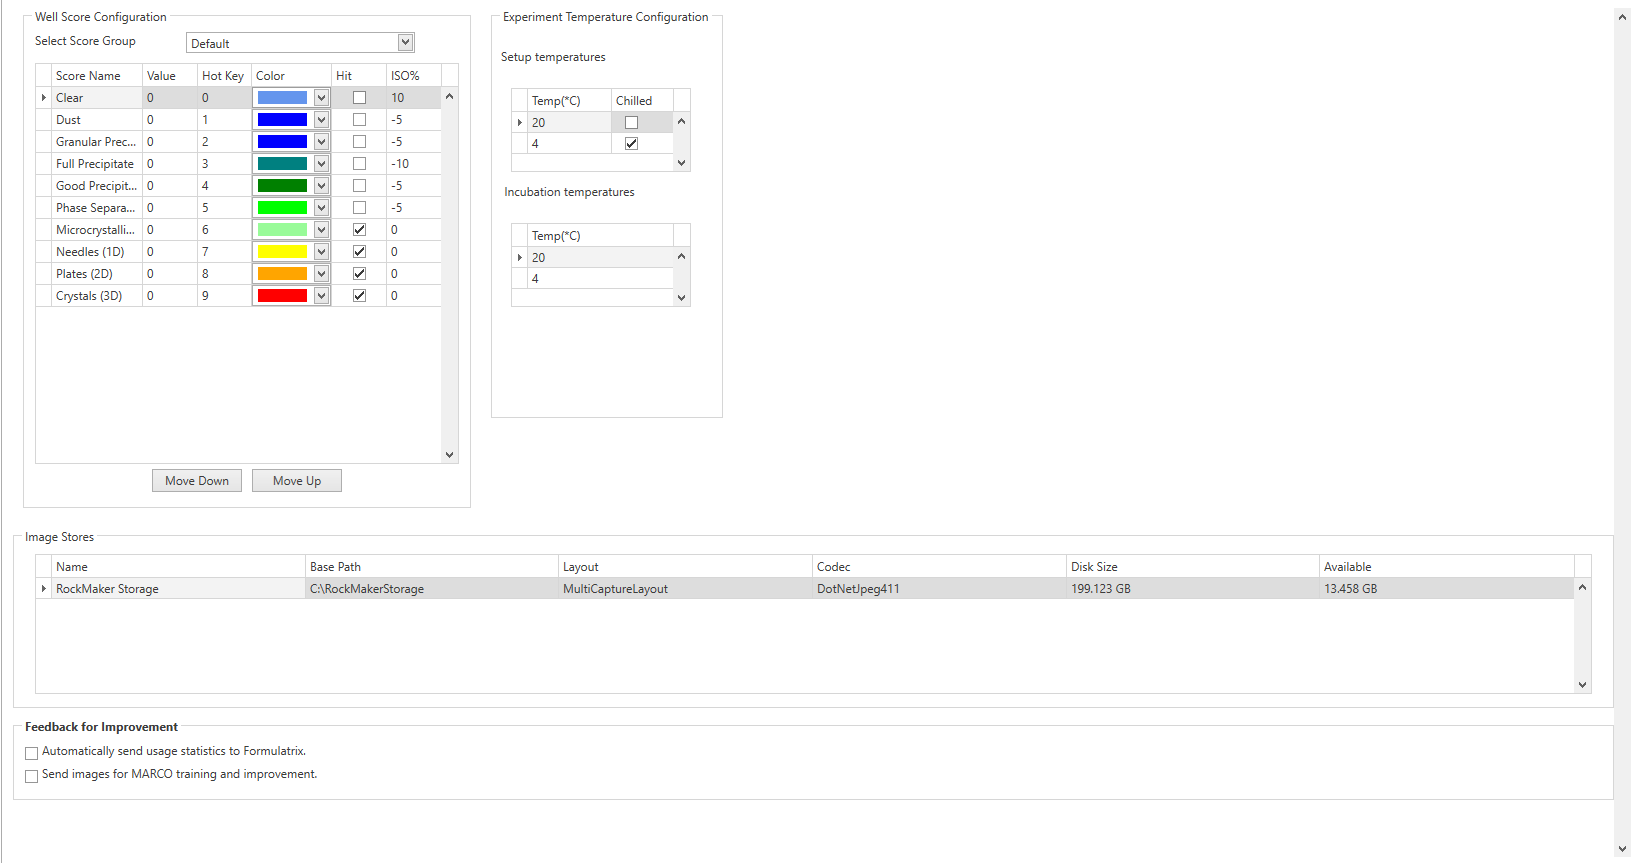
General Setup
This page covers the following sections:
Well Score Configuration
Experiment Temperature Configuration
Image Stores
Feedback for Improvement
Well Score Configuration
You can configure the score name, hot key, color of your well scores, and whether or not a score indicates a hit in the Well Score Configuration section. If you select the check box to mark a score as a hit, a small diamond indicator will appear over the folders, projects, experiments and plates that contain a drop marked with the related score(s).
The default well score values are shown in the image below. You may customize these to better suit your experiments.
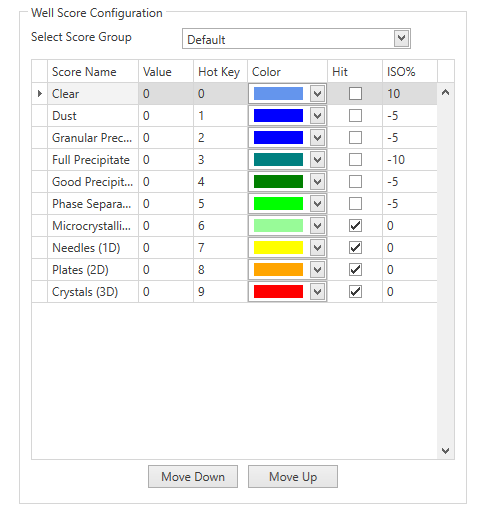
Well Score Configuration
Score Groups
Score groups can be of two types: Manual and Auto. By default, well scores are organized into a single group named “Default.” However, ROCK MAKER lets you create additional groups to allow for the application of multiple scores to a single well. This is useful when scoring a drop that exhibits attributes of both a crystal and a precipitate, and also when more than one person will be scoring the same drops. Only one score from any particular group can be applied to a well.
Auto Score Groups
Auto Score groups are used when scoring is done by any remote application. For example, FRAP images are scored automatically by the FRAP imager. In case of auto score groups, the auto score value will be visible instead of hot keys that are visible in case of manual scores. You can not change the auto score values set on drops in ROCK MAKER. However, if you are using autoscoring, you can help improve or dispute a MARCO/Sherlock score by using the Send for Training and Dispute buttons. For more information on MARCO/Sherlock training, see Sending Images for Autoscoring Training.
Hot Keys
A score’s “hot key” is a shortcut you may use to quickly score a well. In the Well Score Configuration dialog box, you can specify a hot key for each score. For example, if you enter ‘1’ in the Hot Key column for the Large Crystal score, you can assign that score to a well by simply pressing 1 on your number keypad. For more on well scoring, see Scoring Overview.
Color Coding / Score Color
You can choose a color for a particular score to easily identify the scores of the different wells in the plate viewer. Click on the color field and choose a color from the 25 predefined colors in the Color menu.
Note
ROCK MAKER will allow you to choose the same color for two different scores. For auto score values, color is automatically detected along the gradient based on where this incoming auto score value lies between the immediate previous and immediate next auto score value. For example if 1 = Yellow and 3= Green, and the incoming auto score value is 2.35, then the color will be somewhere between yellow and green according to where 2.35 lies on a gradient between 1 (yellow) and 3 (green).
Hit
You can define a multiple scores within any scoring group as Hits in ROCK MAKER. Images that are marked as Hits can be sorted for easy viewing, and can even be published in a report. Simply select the checkboxes that correspond with your desired scores in the Hit column. See Hits Report for more information.
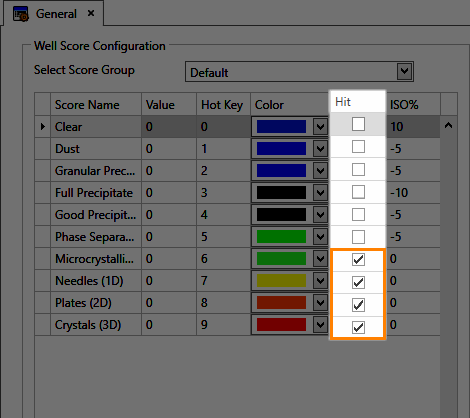
Selecting Hits Based on the Desired Scores
Experiment Temperature Configuration
In the Experiment Temperature Configuration area, you can record the temperatures of your plate setup and incubation locations. The temperatures you see here are available for selection in the Incubation Temp and Setup Temp boxes on the Experiment tab. See Creating an Experiment for more information.
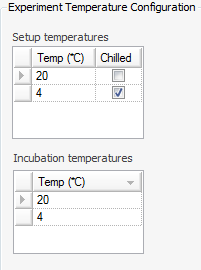
Experiment Temperature Configuration
ROCK MAKER comes with default temperatures already defined. You may edit these and add the temperatures of additional setup and incubation locations if necessary.
Adding a Setup or Incubation Temperature
Right-click the table and select Add.
In the blank row, click the Temp column and enter a temperature.
If you are adding a setup temperature, you can specify whether the temperature you have entered is for a chilled setup location or not. Deselect the check box if the setup location is not chilled.
Save your changes by selecting Save from the Application Menu button
OR
By pressing Ctrl+S.
Image Stores
An image store is a directory in which ROCK MAKER saves the image files created while imaging experiment plates. Typically, you will need only two image stores: one for storing images and one for archiving old images.
Important: Image stores will be defined by FORMULATRIX when ROCK MAKER is installed. Only an administrator should modify these settings after installation.
Adding an Image Store
Right-click the Image Stores table and select Add Image Store.
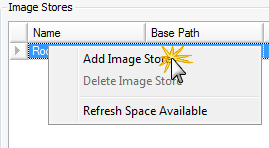
Add an Image Store
Use the following table to fill in the columns in the new row:
Name
In the new row, type a name for the image store.
Base Path
In the Base Path column, type the path of the directory in which images are to be stored.
Layout
The Layout column defaults to MultiCaptureLayout and cannot be changed.
Codec
Select DotNet Jpeg411 or WIC HD Photo from the drop-down menu.
Disk Size
This value tells you the total size of the disk.
Available
This value indicates how much space is available on the disk. .. note:: This value is only current as of the last time the General Setup screen was opened or the value was refreshed. To refresh this value, right-click the Image Store table and select Refresh Space Available.
Save your changes by selecting Save from the Application Menu OR by pressing Ctrl+S.
Note
To delete an image store, right-click it and select Delete Image Store. You cannot delete an image store that contains images.
Feedback for Improvement
The Feedback for Improvement table includes two options:
When the Automatically send usage statistics for FORMULATRIX. check box is selected, a weekly report is sent to FORMULATRIX that describes how you use ROCK MAKER. For more information, see Usage Statistics.
When the Send images for MARCO training and improvement. check box is selected, the Send for Training button in the Auto Score group on the Scores tab of the Images contextual tab set will be enabled. This way, you can send images to FORMULATRIX for MARCO/Sherlock training. See Sending Images for Autoscoring Training.

Feedback for Improvement
Related Topics