Image Tools
Image Tools allow you to manipulate your images by adding measurements to them, making sticky notes and attaching them to the image, and scribbling directly on the image. You can also create regions of interest in order to zoom in on interesting objects during subsequent inspections.
The Tools tab will automatically appear when you are on the Drop or Compare tabs.
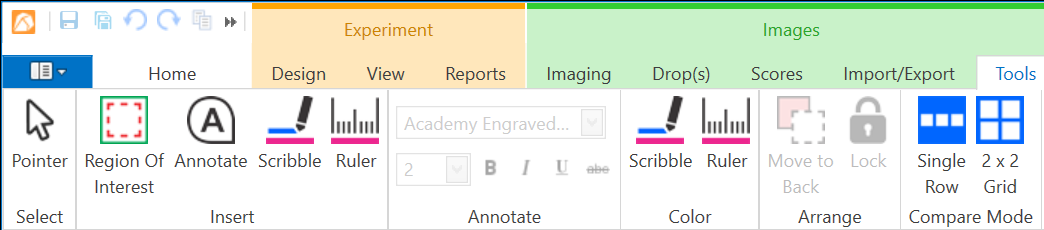
Image Tools
Image Tool Descriptions
Click the Pointer button
 to change the mouse cursor to
the pointer while using image tools. The pointer can be used to
select existing Regions of Interest, annotations, scribbles, rulers,
or Points of Interest to move them.
to change the mouse cursor to
the pointer while using image tools. The pointer can be used to
select existing Regions of Interest, annotations, scribbles, rulers,
or Points of Interest to move them.The Region of Interest tool is what you use when you want to take zoomed-in images of a certain area in your drop. To use it, click the Region of Interest button
 and drag the rectangle until
you have covered the desired area. You will see multiple boxes
depending on the cameras available in your imager, as each camera has
different imaging limitations based on hardware design. Read more
about Drawing Regions of
Interest.
and drag the rectangle until
you have covered the desired area. You will see multiple boxes
depending on the cameras available in your imager, as each camera has
different imaging limitations based on hardware design. Read more
about Drawing Regions of
Interest.The Annotate tool
 is what you use when you want to add
a note to a drop. If needed, you can move the note around and place
it anywhere in the drop image. You can also modify the text
formatting by changing the font type, size, style, or effect. To do
so, use the editing tools in the Annotate group, or right-click
on the annotation and select the desired option. Read more about
using the annotation tool in Using Image
Tools.
is what you use when you want to add
a note to a drop. If needed, you can move the note around and place
it anywhere in the drop image. You can also modify the text
formatting by changing the font type, size, style, or effect. To do
so, use the editing tools in the Annotate group, or right-click
on the annotation and select the desired option. Read more about
using the annotation tool in Using Image
Tools.The Scribble tool is what you use when you want to draw on the image. To use it, click the Scribble button
 , and then start
drawing on the image. You can change the color of the scribble tool
by clicking the Scribble button in the Color group and
selecting a new color. If you want to change the color of an existing
scribble, first select the Pointer button
, click on the
scribble, and then click the Scribble tool in the Color
group. Read more about using the scribble tool in Using Image Tools.
, and then start
drawing on the image. You can change the color of the scribble tool
by clicking the Scribble button in the Color group and
selecting a new color. If you want to change the color of an existing
scribble, first select the Pointer button
, click on the
scribble, and then click the Scribble tool in the Color
group. Read more about using the scribble tool in Using Image Tools.The Ruler tool is used to measure objects in your images. To use it, click the Ruler button
 , and then draw a line by clicking
at the starting point of the item you want to measure and dragging
the mouse until you reach the end of the item you want to measure.
You will see the measurement of the object appear in a label next to
the line you drew.
, and then draw a line by clicking
at the starting point of the item you want to measure and dragging
the mouse until you reach the end of the item you want to measure.
You will see the measurement of the object appear in a label next to
the line you drew.Read more about using the annotation tool, the scribble tool, and the ruler tool in Using Image Tools.
The Point of Interest tool is used to mark any point within a drop, in order to get its coordinates. The coordinates can then be exported to a CSV file which can be read by a third party software for either dispensing directly on those exact coordinates, or collect X-Ray diffraction data on that exact position within a crystal. To do so, click the Point of Interest button
 , then click the
desired area in the drop. Read more about using the POI tool in
Using Point of
Interest.
, then click the
desired area in the drop. Read more about using the POI tool in
Using Point of
Interest.
Other Image Tools
The Move to Back button
and the Lock button
in the Arrange group can be used to reorder your annotations, scribbles, and Points of Interest. Use the Move to Back button to move a scribble, ruler, or sticky note behind another item. Then, click the Lock button to ensure that a scribble, ruler, sticky note, or Point of Interest stay in place.
If you have selected two or more images to compare, you can change how the images display on the Compare tab by clicking either the Single Row button
or 2 x 2 Grid button
. Single Row displays your images side by side, while 2 x 2 Grid displays your images in a square. 2 x 2 Grid is the default view.
Image Tuning is used to adjust the image brightness and contrast of your images. Read more about Image Tuning.
Related Topics