General Best Practices
Entering Data in a Table
Use the Tab key to quickly move from one column to the next.
You can also click in a column to edit it.
If a down arrow appears in a column
 , it means that the
column contains a list of values from which you must select one.
Click the down arrow to display the list.
, it means that the
column contains a list of values from which you must select one.
Click the down arrow to display the list.You can enter data in tables by dragging an item from the Explorer and dropping it into the table, as explained in the following section.
Saving Your Changes
After adding new data to a document or modifying existing data, remember
to save your changes by clicking the Save button  beside the
ROCK MAKER icon or press Ctrl+S. This ensures that the ROCK MAKER
database is kept up to date.
beside the
ROCK MAKER icon or press Ctrl+S. This ensures that the ROCK MAKER
database is kept up to date.
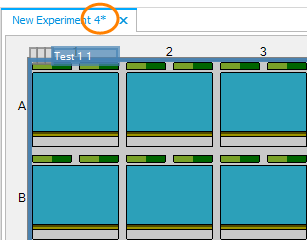
A Modified Document
Note
When you modify any of the data in a document, an asterisk will appear next to the name on the document’s tab at the top of the workspace, as shown in the example above. This serves as a reminder that changes have been made.
Synchronization Among Multiple Documents
Changes made in one document often affect the data that display in other documents. For example, if you change a well score’s hot key in General setup, that change will be reflected on the Score tab in the Images contextual tab. It is important to remember that such a change will not be reflected in another document until the next time the document is opened.
For example, if an experiment is already open when you save the new hot key in General setup, the new hot key will not appear on the Score tab. However, if you close the experiment and then reopen it, the change will be reflected. This is because a document is refreshed with the most current contents of the ROCK MAKER database each time it is opened. A good rule to follow is this:
Note
If you want to make changes in a part of ROCK MAKER which might affect other pages or settings, be sure to close all related pages before you make the changes. Once you save your changes, you can re-open the associated pages and they will be up to date.
Renaming Items on the Explorer
When you add a project, screen, or other item to the Explorer, ROCK MAKER immediately highlights the default name and places a cursor in it. This allows you to rename the item by typing over the default name.
If you would like to rename the item at a later time, you can do this by
clicking it once to select it, and then clicking it again (or pressing
F2) to edit the name. You can also click the Rename button  in the Home tab. Be sure to pause for a moment between clicks. If
you click too quickly, ROCK MAKER will think that you have
double-clicked, and will open the item in the workspace instead.
in the Home tab. Be sure to pause for a moment between clicks. If
you click too quickly, ROCK MAKER will think that you have
double-clicked, and will open the item in the workspace instead.
Related Topics